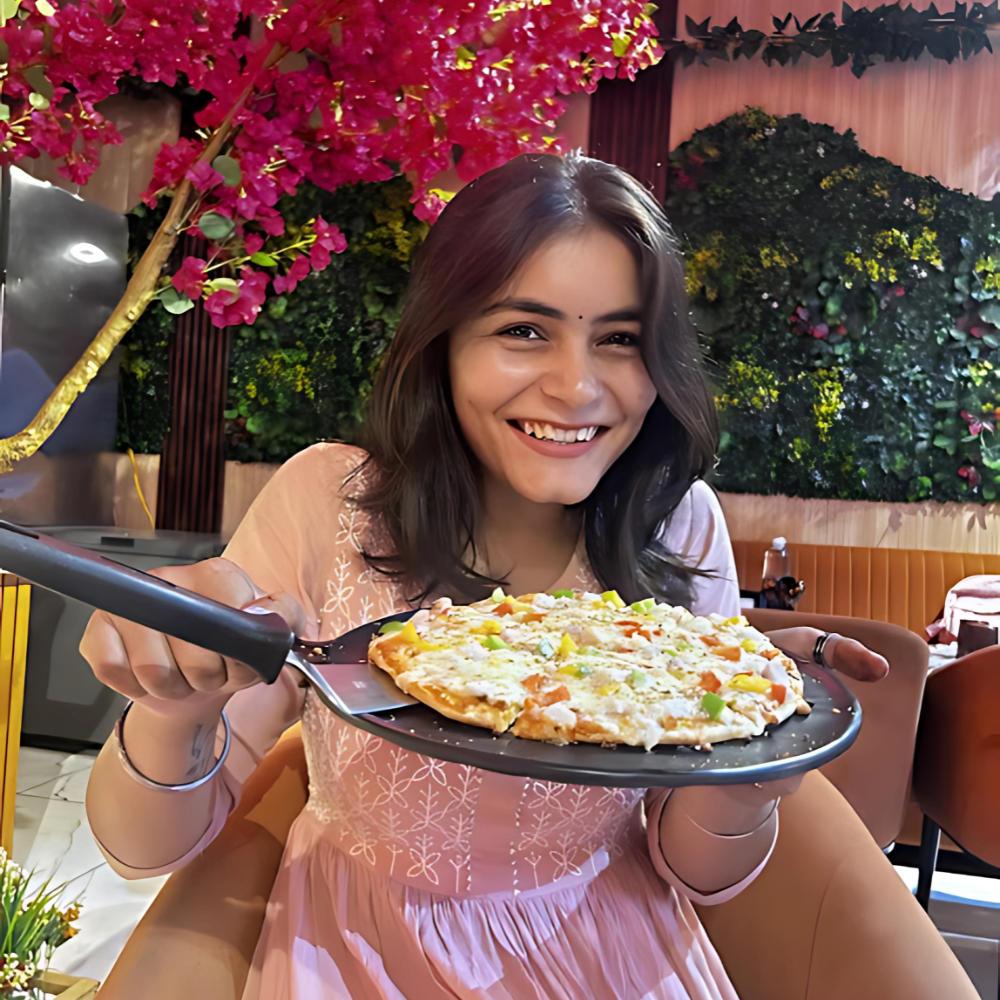
Skip to content

Life in the city


Boston Skyline Photograph by Elizabeth Thomas Photo

I’m really loving living in a city again. I love the busy-ness of a city, the variety of experiences. We explored Chinatown last week and tried some delicious new kinds of food … there was a strange bulbous brown thing on top of one of the dishes that turned out to be some sort of delicious marinated egg. Plus, I finally got to try bubble tea .. in mango, my favorite fruit!

Our little girl turned 5 within a few days of arriving in Boston, and her main present from us was that I told her that sometime soon I would get a day pass for the subway, and she and I would just ride all over the city exploring and riding the train together as much as she wants. She LOVES riding the train, so she was “a hundred, a thousand, infinity!” excited about this, to use her own words. We are planning to do that today. :)


Subway art photography by The BQE

There are always adjustments to be made, though, when moving from one area to another. There’s almost a culture change in some ways .. and then in other ways, it is more just logistics. For instance, realizing just how handy a messenger bag would be on the subway! Especially when we’re only our way to Bible study, and have Bibles and notebooks to carry and such. A briefcase … ehhh, not so much. So, we ordered a messenger bag.

Also, it is getting cooler here a LOT earlier than I expected. Which in one sense, I am looooving, because it already feels like fall, my favorite season. On the other hand, my warmer clothes are packed away and less accessible. While I was packing just a few weeks ago at the end of August in Kentucky, it felt like time for maxi dresses and white skirts and flip flops still had a long life to live – now, though, I’m craving jackets, light scarves and tights. I am so looking forward to the leaves changing – I’m sure I’ll be sharing pictures of that with you!


Large carry-all bag by HandmadeTherapy

Getting organized in a small space and with fewer belongings is also different. I can be organized when I NEED to be (for instance, in my craft biz), but organization does not come naturally to me. I’ve been reading Lori’s series over on In My Kitchen, In My Life, about “cerebral homemaking“, and it has definitely been a big help, and I hope to put more of her advice into practice, especially when we are a little more settled.

But in the end, I am just so tickled to be here. I keep squeezing Tim’s arm as we walk down the street near Boston Commons saying, “We are HERE!” We’ve been wanting to move here for so long, sometimes I forget that this isn’t just a visit – we have moved! And that our friends here, who have been SO kind and helpful during our move, are now our neighbors.

I feel so blessed.

Now I just need to find some shoes that aren’t flip-flops or high heels … that’s mostly what I have, and that’s not exactly great riding-the-subway-in-cold-weather material. ;)


Ballerina Shoes Photograph by magalerie

What about you? Do you like city life or country life?

7 Ways to Promote and Market Your Blog

Well, this is the last week of the blog redesign challenge! Next week I’ll be putting up a poll so you can vote on the next challenge … always fun to start a new project. :)

It was really interesting on Monday’s post how many of you mentioned marketing and promoting as being something you have questions about – because that happened to be related to what I was planning to write about for the last post of this series! Now, this is by no means a comprehensive look at the subject … these are just a few tips, primarily related to promoting your blog. Because, now that we’ve reached the end of this series and you may have a fabulous and newly redesigned blog, you want people to see it! I hope these tips and tools will be helpful in getting in touch with your target audience. The “7 ways” are 7 external websites that you can harness to help promote and/or market your blog, and I’ll be offering tips on how to use each one to benefit your own site.

Ok, so #1: Pinterest! On my blog, Pinterest is a HUGE source of traffic for me. And I feel the best way to use Pinterest to help your blog grow is less about getting your own followers on Pinterest than it is about making your posts as share-able for your readers as possible, because Pinterest is like visual word-of-mouth. Here are some tips on how to make your posts very Pinterest-friendly … and, as is only fitting, I included all the Pinterest tips in a very pin-able image. :)

On to tip #2! Blog-following sites. There are sites out there that are specifically made to help people discover and follow new blogs. One such site is HelloCotton. It specifically is for women bloggers, and if you are one, I highly recommend submitting your blog to their site so that people can follow you there. I’m a big fan. And there are other blog-following sites out there as well. Make sure your blog is there to find! And one thing I love about HelloCotton (as well as some of the others), is that followers are notified there of new posts, but are actually directed back to your blog to read the posts. Spiffy! :)

Now for #3: Monitor your site’s stats with Google Analytics. Now, this one is less about how to *directly* promote your site, because Google Analytics is just a tool to use to keep track of statistics for your blog, but it *does* relate to marketing, because it can help you find out information about how to promote and market your blog more effectively.

First of all, you need to install the tracking code on your blog, which Google explains here. Don’t get overwhelmed by the sheer abundance of stats and facts. You don’t necessarily need all that info – I certainly don’t mull over every little bit. Here are some of the tidbits, though, that I find especially helpful to know:

Tool #4 is FeedBurner. If, like Lori, you’re moving from Blogger to WordPress, you will want to make sure you create a new feed for your new site, and update your old feed so that your previous subscribers will still be kept in touch on your new blog. But, regardless of whether you have moved or not here are some tips I have on how to use FeedBurner more effectively – after all, gaining and keeping in touch with your subscribers is a huge part of this whole process! Here are some tips:

Tools #5 and #6 are very related: Twitter and Facebook. These social networking sites can help SO much in promoting and growing your own website. Probably at some point in the future I’ll do a more in-depth post just on these two sites and how they are different from each other, and how to use the effectively in their own distinct ways, but for today, I’m just going to share some tips the apply to both.

#7 is interesting, because it is the least specific (as far as what I can describe), but is probably the most important. This is the category that sends me the MOST traffic, and then Pinterest is a fairly close #2. But the reason I can’t be completely specific here is because it depends on what your target audience is. The basic premise, though, is that you need to find out where your target audience is hanging out online looking for what you have to offer. For instance, if you have a crafty blog, a good site in this category for you would be CraftGawker. If you have a foodie blog, then TasteSpotting or FoodGawker would be good places to look into getting featured. If you blog about handmade business, then try submitting your posts to Handmadeology. The list goes on and on – but it all depends on your target audience. Find out where they hang out, and promote and market there. Take out an ad on a site that your target audience loves. Offer to do a guest post on a site your target audience visits. This is how you really get in touch with your target audience – by finding them in the places they are looking for you.

Well, that’s it for the blog redesign series! It has been a LOT of fun for me … and also some sleepless nights writing and designing. But I’ve loved it, and I hope it’s been helpful for you. If you missed any of the previous posts from the 10-week series, here they are:

Part 1: Discover your branding with “The Drawing Board” Printable
Part 2: WordPress vs. Blogger
Part 3: Design Tips + Design Worksheet
Part 4: Themes, Coding and Stylesheets
Part 5: Making your own graphics
Part 6: 7 Blog Layout Tips to Engage your Reader
Part 7: Blog Page: The Must-haves and the Panache
Part 8: 25 WordPress Tips
Part 9: The Big Reveal
Part 10: 7 Ways to Promote and Market Your Blog (that’s today’s post!)

Leave your thoughts and comments below … for instance, if you have any ideas or suggestions for the next challenge! (And be sure to come back next Friday to vote!) Or even just to say hi … I love to hear from you!

Selling on Etsy Infographic

Well, my shop FlourishCafe is back open for business after our move! The vintage section of the shop will stay closed for awhile until we are more settled, but my typography and illustration prints are available again. Since some of you have been expressing an interest in selling on Etsy, so I thought you would enjoy this infographic. A group of designers made this and contacted me about sharing it on my blog, and I found it quite interesting and I thought you would too!

Etsy MBA
Created by: www.MBAOnline.com

If you have any questions about selling on Etsy, leave them in the comments below! :)

The Big Reveal!

This is it! If you’ve been following this 10 week blog redesign series, this is week 9, and it’s time for the big reveal! (As well as a question I am hoping to get your thoughts on … ) I’ve been redesigning Lori’s blog, In My Kitchen, In My Life throughout the series and giving tips on how you can get set up with a whole new design of your own as well. Lori already had great content, and this redesign was intended to get her set up on WordPress and give her posts the proper garnish and setting that they deserved. So now her blog has officially been moved to WordPress, and here is the before and after:

So what do you think of Lori’s completed site? It’s kind of small in the preview above, but you can check it out more fully here on her new site: www.InMyKitchenInMyLife.com

I considered writing my own tutorial for how to move from Blogger to WordPress – but it’s already been written far better than I could write it! It is on WPBeginner and I encourage you to check out her tutorial, just click here. She takes you through clearly, step by step.

Instead, now that we’ve finished the overall site redesign, I want to offer a few do-and-don’t design tips to bear in mind when writing your actual posts themselves:

o Left align your text. Unless it is poetry, keep your text left aligned. Reading center-justified text just feels weird and does not make it easy to read.

o No crazy fonts in your post. Keep the font of your actual post simple and clean. No handwriting type fonts. When it comes to paragraphs of text, your goal is to make them easily readable, not distract people with individual letters.

o Keep text one color, preferrably black. There are better ways to emphasize and add interest to your writing than to make random words different colors.

o At least one image per post. Obviously, this may not always happen — for instance, my post on Wednesday when I lost my computer charger in the midst of our move and my battery was about to die! (Which, by the way, has been resolved, and thus, today’s post.;) But if it is a post with highly valuable and shareable content, I consider including an image to be a must. For one thing, Pinterest can be a HUGE source of traffic to your blog – and having a picture in the post makes it that much easier to pin.

o ALL images the max width. Figure out what the maximum width of your post is, and only upload images of that width – it keeps your blog’s photos looking beautiful and consistent.

o Take photos in natural light, if possible. Avoid using flash, it makes for much less attractive photos.

o A quick adjust in brightness/contrast can make a big difference. I’d say it’s much better to have a so-so photo in your post than none at all – but if you’ve taken your photo in natural light, often just a little tweak of brightness/contrast can really make it pop even more.

o Break up long paragraphs. Now, this will depend some on your target audience. If they are long readers, you probably don’t have to worry about this. But in general on the internet, people’s reading attention span is fairly short. This doesn’t mean you only have to write short posts (I definitely don’t, haha!), but it helps if you break up long paragraphs into shorter chunks – and injecting photos every few paragraphs can help, too.

Well, next week is the LAST post in this series – now that your blog is set up and finished, I’ll be showing how to use 6 powerful tools that are OUTSIDE of your blog to help promote and publicize your site.

And as we are nearing the end of this series – I’d be very curious for your feedback on something. Several of you have written me expressing interest in having me do one-on-one consultations with you to look at your site, while others have expressed an interest in having me do design work for their blog, while others are interested in how to redesign and optimize an online business, while others talk about the value of writing e-books. I know many of you have commented that you’re surprised I’ve been blogging even while in the process of a cross-country move … but the fact is we are very dependent on my online income right now at this stage of our lives, both from my Etsy shop and from my blog. I’d love to get your feedback on whether the things mentioned above would be helpful if I offered them, or if there is something else you would be interested in. I’ve been astounded by the great responses I have received from you throughout this series, and I’d be very interested to hear your feedback on this. And I can’t believe we are almost at the end of these 10 weeks! Crazy. I hope it’s been beneficial for you.

Please leave your thoughts and comments below, I love hearing from you!

Part 1: Discover your branding with “The Drawing Board” Printable
Part 2: WordPress vs. Blogger
Part 3: Design Tips + Design Worksheet
Part 4: Themes, Coding and Stylesheets
Part 5: Making your own graphics
Part 6: 7 Blog Layout Tips to Engage your Reader
Part 7: Blog Page: The Must-haves and the Panache
Part 8: 25 WordPress Tips
Part 9: The Big Reveal (That’s this week’s post!)
Part 10: 7 Ways to Promote and Market Your Blog

Oops, that was dumb…

Well, tonight I needed to write the next blog post for the every-other-Wednesday series … buuuut I just realized I left my laptop charger at someone’s house. And our other charger is packed somewhere. And my battery is about to die. Oops. Plus we are still getting settled and it’s been almost a week since we’ve had a good night’s sleep. One night we got a full 45 minutes of sleep. Yeaaaah, that doesn’t quite cut it. ;) So I’m bowing out for today, but I leave you a couple fun quotes our 4 year old said today while we driving around Boston:

“This is infinity cool and infinity fun!” (while driving through the “Big Dig”)
“This is a cool Boston!”
“I’m so glad we’ve moved here.”

Yeah, me too. :)

Anyway, since I don’t have a great post to offer, please feel free to leave a link to a post of yours or someone else’s that you want to share, and we can find some fun blogs in the comments. I always enjoy hearing from you! :)

BOSTON!!

Today we arrive in Boston! WooT! Fun stuff – you know, like unloading the moving truck. I can’t wait to start exploring the city! In the meantime, here are some Boston-themed finds from Etsy – links below so you can check them out more fully. I think it is amazing to see where different artisans draw their inspiration from, whether it is a geographical location, or something more abstract, the possibilities are endless. And these all sing “Boston” to me. Don’t you wish you were here? ;)

1. Embroidered Necklace by MerriweatherCouncil 2. Boston Mapcut by StudioKMO
3. Vintage Dunkin’ Donuts Thermos by Tribute212 4. Boston Sky Line by ElizabethThomasPhoto
5. Vintage Boston Map by bananastrudel 6. Lobster Print Linen Napkins by madderroot
7. Jigsaw Puzzle Brooch by ME2Designs 8. Boston Skyline by FrescaPhoto

Have you ever been to Boston? Leave your thoughts and comments below, I love to hear from you!

25 WordPress Tips: Printables, Scheduling, Avatars…

Well, we’re preparing for the big move! And I don’t mean our move to Boston, although we are leaving for that TOMORROW! (WOOHOO!) But actually, in the context of blogging, I’m talking about how to move from Blogger to WordPress. This series is now in week 8 and we’ve been making great progress working on Lori’s blog redesign (and hopefully you’ve been making progress on your blog too!) as we’ve been going through this series. The goal was to use Lori’s blog, In My Kitchen, In My Life as a demonstration on how to create a new fully branded look, to move from Blogger to WordPress, and use WordPress tools to best benefit your blog.

So far, we’ve mostly been working on the branding and design aspect. Next week, I’m excited to say, is when we will move her blog from Blogger to WordPress! But one of the things about switching to a new blogging platform is learning how to use it. Lori is, of course, completely new to WordPress, and I’ve heard several of you mention in the comments that you tried WordPress but just were not sure how to use it. So for today’s post, I have 25 WordPress how-to’s, ranging from more simple things such as how to schedule a post to publish later, to things that might be a little more advanced, like how to make printables available on your site, or how to make a custom default avatar for your blog. So hopefully by the end of the post you’ll feel much more at home in WordPress – or even if you’re already on WordPress, that some of the more advanced tips will still be helpful to you! :)

All the tips assume that you are using WordPress.org on your own domain (some may apply to WordPress.com as well, but I’m just not familiar with it), and that you are logged in to your WordPress dashboard. If you’re not sure how to get there, just go to www.YOURSITEADRESSGOESHERE.com/wp-admin and sign in there to get to your dashboard. This is your dashboard – and the menu over on the left side is how you navigate around to different tasks:

So let’s jump right in! We’ll start off with the simpler tips. The first eight tips all have to do with something that is obviously very important – creating new blog posts:

1. Visual vs. HTML.
So the place to put the post title is pretty obvious, as is the large white area where you actually type the post. BUT — there are actually a couple different options on what format you want to use to write you blog post. One is visual and one is HTML. The tabs for these two options are shown at point “1”. Basically, if when you change the appearance of your post (like, if you add an image, make text bold, etc.) and you actually want to see the result of the change in the editing box, then use the “Visual” mode. If when you make a change to the appearance of the post, you don’t want to see the result, but instead you want to see and be able to write the actual HTML, then use the HTML mode. I personally always write in the HTML mode. Depending on which mode you choose, the options along the gray bar at the top of the edit box will look a little different. Heads up, though – while working on one post, don’t keep toggling back and forth between the two, as it can cause some hiccups. Just pick the one you want and stick with it.

2. Inserting images.
So, you’ve titled your post, and you’re writing it, but you want to add an image. This is super simple. Just click the little button by “Upload/Insert” (shown at point 2 in the image above). A box will pop up – click the “Select Files” button, then get the image you’re wanting to use from your computer. Once it has uploaded, scroll down the pop up box … there will be various options in the box you can choose if you want, such as resizing the image, making it centered, or “Link URL” (if you want the image to be a link to somewhere, then put the address as the link URL). Click the “Insert into post” button at the bottom, and now it is in your post!

3. Creating links.
Maybe you want to link to another website in your post. Use your mouse to select/highlight the text you want to turn into a link. Then click the “link” button (shown at point 3) and paste the address you want the text to lead to into the box that open. If you want, check the box that says “open this link in a new window”, so that when people click the link they won’t leave your blog but instead the link will open in a new window. Click “OK”. Now your text is a link like this: this text is a link.

4. Adding video from another website.
This may not be something you use all the time, but it’s handy to know. If you want to upload a video straight from your computer, you would just add it the same way you add an image. But if you want to include a video from another website in your post (for instance, a YouTube video), you might think you should try to use the “embed” code YouTube offers – but you’ll find it doesn’t work on WordPress. Actually, it’s simpler than that, anyway. For this, make sure you’re editing in the “HTML” mode, and just paste the link to the video right into the box. You don’t need any code, just the video address. Make sure the address is on its own line, without any spaces before or after the address, and you should be good to go!

5. Put posts in categories.
Categories are really helpful on a blog. For instance, this post I’m writing is part of a 10 part series, so I put each post for this series in the category “DIY Blog Redesign“. Then if you click on that category, it takes you to a page that has all the posts from that category. It’s pretty helpful for navigating around the site. So when you write a blog post, choose which categories it goes in. You get to make up your own categories, and add them with the link at the bottom of the category box. You can also edit your categories in greater detail by choosing the “Categories” option under “Posts” on your dashboard sidebar.

6. Preview before publishing.
Want to see how your post is looking? Just click the preview button. If you’re using “visual” mode, this may not seem as necessary, but I still encourage you to preview your post before publishing. Then you can check, for instance, that your post’s title fits on one line, that your images aren’t too large, etc.

7. Save drafts.
WordPress automatically saves a draft of the post you are working on writing, but even so, if you’re not ready to publish, be sure to hit “save draft” before closing the post.

8. Scheduling a post to publish in the future.
At point 8 in the image above, you’ll see where it says “Publish immediately”. That means if you hit the “publish” button, the post will go live right away. But what if you want it to wait and not publish until tomorrow? Or next week? Just click the “edit” button next to it, and select the date/time you want. Make sure you hit “ok” once you’ve made your choice. Now the publish button says “schedule” instead, and when you click it, that means the post will be published on your blog at the time you selected. Very helpful. For instance, if I was smart, considering that we are moving tomorrow, I should have written this post two weeks ago and scheduled it for today. Buuuuut I’m not that ahead of the curve, so instead I’m staying up late to write. ;)

And, as we mentioned last week, you edit stand-alone pages and posts in the same way, so those first 8 tips apply to both. The difference is just that to start you would choose either the “Posts” or “Pages” option on the navigation bar on your dashboard. You can click here to see last week’s post all about pages.

The next three have to do with handling your media:

1. Adding new media.
So, I mentioned before how to insert an image (or other media) directly into a blog post. Sometimes, though, you want to upload a file without just inserting it directly into your post. Just click the “add new” button in your media library, and then you can either browse for the file, or drag and drop into the box.

2. Making printables available on your site.
A good example of a time you might want to upload something on your site without directly inserting it into a post would be if you want to have a PDF printable file available on your site. So, first you would upload it, as stated above. Then, you need to get the URL of the file. To get to the URL of any media you have uploaded, hover your mouse over that item in your media library. A few options will pop up, as you can see by point #2 in the image above. Click “edit”, then scroll down to “File URL”. Copy the address you see there. Now, when you write your post, you can use that URL to create a link, either by using the link button (as described in tip 3 above) or by adding the link to an image (as described in tip 2 above). Now when your readers click that link, it will open the printable!

3. Always upload image at the width of your blog post.
There really isn’t much point to uploading giant sized images to your site. You still want it to display only as wide as your post, and it just makes your site run slower. Also, I highly recommend not using images less wide than your blog post, because then you start having all sorts of different width images in your posts and it just looks messy. I have a few old posts like this and they drive me crazy. It looks so much better to always have your images the same width – no wider and no more narrow than your post. I recommend that before you upload an image you make sure it is that width. For instance, I only upload images to my site that are 640px wide. It keeps it nice and easy, because you don’t have to resize in your blog, keeps your posts attractive, and doesn’t bog down your site.

The next 7 tips are about plugins…

1. Adding a new plugin.
Plugins are a great way to add new tools and functions to your blog. If there is something you wish your blog could do, chances are you can find a plugin that can make it happen. To add a new plugin, first click the “add new” button. (yeah, surprise!) Then, search for the name of the plugin you want. Once you’ve found it, click the “install now” link. Once it finishes install *make sure* you click the activate button. Easy! :)

2. Finding new plugins.
Ok, so step one sounds easy enough – but how do I know what the name of the plugin is that I’m looking for? You can always search keywords, but the plugin search is only so good, so personally I like to Google “wordpress plugin (and whatever use I’m looking for)” to find the names of plugins I might be interested in. I’ll share a few types you might find helpful in some of the other tips.

3. Changing the plugin settings.
Some plugins have settings that you might want to change. For instance, if you have a plugin that lets people follow you on Twitter, you will need to set it to know what your Twitter username is. Some plugins will add options/settings to your sidebar, but you can also find if there are settings in the menu of your installed plugins, as shown at point 3.

4. Anti-spam plugins.
As I mentioned, I’ll give a few categories of plugins you might be interested in – one of which is an anti-spam plugin. We’ve talked before about the evils of CAPTCHA, and you definitely want to avoid that, but some sort of anti-spam tool will most likely be needed. Preferably, though, you want one that will be invisible to your readers. Akismet is what I use, and I’m very pleased with it, although it does cost a few dollars a month.

5. Social media sharing buttons.
In one form or another, you certainly want social media sharing buttons so that your readers can easily share your posts with their friends and followers. The three biggest, at least for me personally, are Facebook, Twitter and Pinterest, although there are many more. A plugin that automatically includes sharing buttons at the end of your posts is a must have in my book.

6. Editorial Calendar.
Having an editorial calendar can be SO helpful in scheduling posts ahead of time. I already mentioned earlier how to schedule a post for the future … but looking at your list of posts/drafts/scheduled posts does not make it very easy to visually see what you have coming up on various dates. Installing an editorial calendar (which can then be accessed on your dashboard sidebar under “Posts” -> “Editorial Calendar”) makes it easy to have a visual sweep of upcoming posts, and lets you easily create drafts for future dates that you can then write later. Love. it.

7. SEO tools.
There is a lot to SEO (SEO = Search Engine Optimization) and how it works. Showing up well in search engines can be very important to a blog, or any website. A plugin that helps SEO won’t really be a fix all … but it can definitely help. I personally love Yoast. Once you install it, on the edit page of each post there will be a box at the bottom where you can input keywords, search engine titles and descriptions, and lots of other helpful SEO stuff. It isn’t all you need to have good SEO, but it does help. If you’re serious about SEO, there is a ton of great info out there on the web to help you.

The last 7 tips are on settings options:

The menu shown above is what you would see in your navigation sidebar if you click on “Settings”. There are lots of settings you can explore under each option, but here are a few you might want to check on…

1. Time/date settings.
Under “general” options, you will find the time and date settings. Make sure these are set according to your time zone and such – it can be very frustrating to schedule a post and expect it to publish at a certain time, only to discover that your blog is on an entirely different time zone!

2. Unconvert emoticons.
I don’t know why, but the default setting in WordPress is that if you make a :) face, it automatically turns it into a cartoon smiley face. Personally, I think it looks kind of … odd, especially if it is on a professional blog. You can turn off this option under the “writing” settings.

3. Default post category.
I mentioned categories earlier in this post. If on a particular post you forget to put it in any category, WordPress just goes ahead and puts in the default category, “uncategorized”. However, you can change what the default category is under the “writing” settings. My default category is “blogging”. :)

4. Disable pingbacks and trackbacks.
Under the “discussion” settings you will find lots of options for how people can interact with you blog. One of these options is “pingbacks and trackbacks”. I would strongly recommend disabling these. Unlike comments, which allow for discussion, pingbacks and trackbacks are just a breeding ground for spammers.

5. Comment settings.
There are lots of other comment options you can choose from in the “disussion” settings, as well. Comments are a HUGE part of blogging, so look through here and make sure the settings are set to the way you want – for instance, make sure threaded/nested comments are enabled, that people don’t have to be members of your site to comment, that you will be emailed when there are new comments, etc.

6. Custom default blog avatar.
This is a more advanced tip, but if you really want to take your branding to the next level, you can create a custom avatar just for your site that shows up if people don’t have a Gravatar. For instance, I have my illustrated typewriter than shows up as the avatar – although, of course, Gravatar trumps that, naturally. (If you don’t have a Gravatar, it is a universal avatar associated with your email, and anytime you comment, that avatar automatically shows up – I definitely recommend setting up your own at gravatar.com) But what I’m talking about for blog design is the avatar that shows up as default if people DON’T have a gravatar. There are a few rather blah options that WordPress offers, but you can really brand-up your blog with a personalized one. Using the instruction above about plugins, add the plugin “Add New Default Avatar”. Then, using the instructions from my previous post on making your own graphics, create a branded avatar .. 80×80 is a safe size in Thematic. Then using the instruction in today’s post about media, upload your image to your media library and get the URL. Then go to the “discussion” section of your settings, and scroll down to the avatars. Paste the URL in the custom avatar box, then save changes. Now, along with the other options for avatars, there should be your new custom avatar image. Choose that option, and click “save changes” again. Your blog now has its own custom branded default avatar! WooT!

7. Default image settings.
Under the “media” settings, make sure that the auto embed is enabled, so that you can just paste YouTube addresses in (as mentioned before) … and it can also be a good idea to adjust the auto sizes of your media to fit the width of your blog posts. That way images you upload (if they’re not already the right size) will adjust to the width of your blog, and embedded videos will also fit your blog properly. Keeps things nice and neat!

Well, that makes 25 total! I hope these tips have been helpful for you. Did you learn anything new, or is it all old hat to you? Do you have some tips of your own to share? Leave your thoughts and comments below, I love to hear from you!

If you’ve missed the other posts in this series on DIY blog redesign, here they are:
Part 1: Discover your branding with “The Drawing Board” Printable
Part 2: WordPress vs. Blogger
Part 3: Design Tips + Design Worksheet
Part 4: Themes, Coding and Stylesheets
Part 5: Making your own graphics
Part 6: 7 Blog Layout Tips to Engage your Reader
Part 7: Blog Page: The Must-haves and the Panache
Part 8: 25 WordPress Tips (This is today’s post!)
Part 9: The Big Reveal
Part 10: 7 Ways to Promote and Market Your Blog

DIY Light Play: A fun break from packing

Packing and getting ready to leave for our move to Boston on Saturday has, of course, been dominating our time lately. But a combination of two things – coming across some forgotten belongings, and the need to take breaks and have some family time – lead to the following fun discovery:

We found a handful of glow sticks, and Tim suggested this idea. We turned off the ceiling fan, activated the glow sticks, and taped a different colored stick to each blade. Then we turned off the lights and turned on the fan – it looked sooooo neat! It was interesting to try the fan at different speeds – the faster you make it go, the more the colors blur into each other, actually approaching white, and we actually used it as a night light when it was time for little one to go to bed.

Our little girl loved it, and it was quite mesmerizing to watch. We all laid on the floor and watched it and enjoyed a break from packing boxes for a little while. I thought it would be fun to share – especially for those of you who have kids. :)

Then, of course, it was time to get back to packing. Just like it’s time for me to get back to packing after writing this post!

What do you like to do when you take a break? Share your thoughts and comments below, I love to hear from you!

Tips on blog pages: The must-haves & the panache

A few posts back I mentioned the importance of white space (especially in your background), but that if you are worried about it making your design too boring, do not fear! There are other ways to add panache to your site – ways that enhance rather than distract from your content. The banner and the sidebar we have already discussed – and today we’ll be talking about something that I consider to be often overlooked design-wise: your menu of stand-alone pages.

When I refer to “stand-alone” pages, I’m talking about pages you create that don’t shift down in order like regular blog posts – these are pages that stand on their own. For instance, the “About Me” page is a very common example of a stand-alone page. You can see my menu of stand alone pages right below my banner – each with my own pen and ink illustration. Personally, I think that menu is one of the main things that helps my blog design to be unique and branded. Plus, it helps with navigation, as several of those pages are designed to highlight particularly useful posts (like in the Tips & Tutorial gallery or on the Printables page).

In today’s post, I’m going to be sharing my thoughts with you on important and helpful ways to use pages, as well as tips ranging from practical to the more panache on how to set them up – and, as always, demonstrating on Lori’s new site for her blog, In My Kitchen, In My Life. And I’m reeeeeeeeeeeeeally excited about Lori’s new menu of buttons which I will be showing later in this post! The possibilities are fairly endless on how you might choose to use your pages. But here are my suggestions as a couple “must-haves” in your pages … as well as a list of ideas for “maybe-haves”, depending on what kind of blog you have.

An “about” page is HUGELY important for a blog. I’ve heard statistics that, in general, the “about me” page is one of the most highly visited pages on a site. Why? Because people want to know who you are and what the site is about! People like to talk and visit with someone they know. Use your “about” page to let people get to know you. Let’s say you run a weight-loss blog. Why do you? Is it because you have a touching story of how you lost a lot of weight yourself, and you want to help others? Or is it because you see the growing trend of overweight children in America and you want to help parents keep their kids healthy? People love to hear your story.

Here are a few fun ideas for ways you might approach your “about” page:

‣ ‣ ‣  Photographs and descriptions of you doing things pertaining to your blog subject
‣ ‣ ‣  A bullet list of interesting facts about you
‣ ‣ ‣  The story of how you got involved in whatever activity it is that you blog about
‣ ‣ ‣  A video for your about page
‣ ‣ ‣  Your own personal mission statement, and the things that matter most to you
‣ ‣ ‣  Humorous interview style
‣ ‣ ‣  Stories/pictures from your childhood that help define you
‣ ‣ ‣  Separate “about” pages for your blog itself, as well as each writer on your blog
‣ ‣ ‣  Etc! Have fun with it!

Some things to probably avoid on your “about” page…

‣ ‣ ‣  Writing in the third person. Unless you have highly unusual circumstances on your blog that make it extremely formal, write in the first person. We all know it’s you writing it. Imagine you are talking to your readers when you write it … and how odd it would sound to talk in the third person.
‣ ‣ ‣  Making it reeeeeeeeeeeeeeally long. It doesn’t have to be your WHOLE life story, just give people a glimpse into your life and a taste of your personality.
‣ ‣ ‣  Résumé style. People want to “meet” you on your about page … not feel like they’re being sold to or that you’re trying to prove something. Highlighting some accomplishments is fine, but try to keep it casual and personable. Awards/features/accomplishments can, in fact, have their own page, like a “Press” page.

But one way or another, have an “About” page on your blog! You visitors are looking for it.

Your contact information should be easy to find from any page a visitor may be viewing. A good way to do this is to have your contact page in your pages menu. There are any number of reasons a visitor to your site may want to get in touch with you – they may want to advertise on your site, they may be interested in guest posting, they may spot an embarrassing typo they want to alert you to, they may want to keep in touch with you on social media sites, they may just want to say hi! Have that contact info easy to find. How much contact info you share is completely up to you. I’ve seen people on large blogs even including their home address so people can send them gifts! Personally, an email address is the most personal info I put on my site … and even that is my “professional” email address, which gets screened through a couple filters before it gets forwarded to my personal email, to weed out the spammers. Also – helpful hint here if you’re concerned about bots scanning your site – you can always include your info in an image rather than in type. That way a real visitor will be able to see it, but it won’t get scanned the same way by bots and crawlers. Or you could always set up a “contact form” where people submit their questions/messages right on your site rather than providing contact info. But at the very least, it is a good place to share your links for how to contact you on other sites – for instance, your Twitter, your blog’s Facebook page, your Pinterest, etc.

Ok, so now you have an About page and a Contact page. What other pages might you want? Really, the possibilities are endless. Here is a list of ideas – and not all of these will be applicable to everyone and you wouldn’t want this many anyway – but hopefully this list of ideas will help get your mind rolling…

‣ ‣ ‣  Home/Blog Page (helpful, because a lot of people won’t be landing on your most recent post, if they’re coming from Pinterest or anywhere else that linked to a previous post)
‣ ‣ ‣  About Blog Page (in addition to an “about me” page)
‣ ‣ ‣  Welcome Page (where you can give first time visitors a tour)
‣ ‣ ‣  Shop Page (where you sell your wares)
‣ ‣ ‣  Press Page (where you highlight places you/your blog have been featured/awarded/etc.)
‣ ‣ ‣  Sponsor Page (info on advertising/sponsoring your blog)
‣ ‣ ‣  FAQ’s Page (your answers to frequently asked questions)
‣ ‣ ‣  Highlight Content Page (pages like my “printables” page or “tips and tutorials” page that highlight especially relevant content from your blog)
‣ ‣ ‣  Outside Pages (including a button in your menu that doesn’t lead to a stand-alone page, but rather links directly to a site outside of your website – for instance my “Cafe” button in my menu takes you to my Etsy shop, FlourishCafe – or another example would be a button that takes you to a subscription form)
‣ ‣ ‣  Links Page (a page that includes links to other pages, like if you want to recommend other blogs/books/resources/etc.)
‣ ‣ ‣  Map Page (a sitemap to help people get around your blog)
‣ ‣ ‣  Etc! The sky is the limit.

First, we’ll go over the basics – and next, how to get that extra panache with images and such. Since in this series we’re moving Lori’s blog from Blogger to WordPress, most of the tech stuff in this series is about how to do things on WordPress. However, in this instance, I actually wrote a blog post a while back when I was on Blogger myself about how to make stand-alone pages in Blogger. You can click here for that post … it’s like a glimpse into the past because it’s from my old blog. :)

Here are the instructions for WordPress. Sign into your WordPress dashboard. On the left-hand menu, you’ll see the option “Pages”. From there, you can select “add new”. This is what you’ll see (minus my notes, of course ;)

Super easy. Now let’s take it to the next level by creating a menu of buttons for our pages!

So, now you’ve made your pages. And we discussed in an earlier post how to make your own graphics that fit your branding and design choices, and these buttons are no different. If you want to make a button for each page in the menu (such as I have under my banner) make sure each image file is exactly the same size – or at the very least, all the same height. You want your menu to look uniform and even. Go to the “Media” section of your WordPress dashboard and upload all the buttons you have made for your menu.

Next, in your WordPress dashboard, go to Appearance -> Menus. Name your new menu (I called mine “top menu”), and save it. Next, look for the “custom links” box:

In the URL box, put the link you want it to go to. If it’s leading to one of your stand-alone pages, like your about page, put the URL for that page in this box. Or, if you’re wanting to link to an outside page, such as your Etsy shop or your subscription form, just put that link here – this is how you include a button to other sites!

Then, in the “Label” box, you will want to use the following code to make it display your button image:
 

<div style=”background-image: url(‘http://www.inmykitcheninmylife.com/wp-content/uploads/2012/08/about.jpg‘);background-repeat: no-repeat;padding: 116px 0 0 120px;”></div>

.. only you will want to edit this code. For one thing, you will need to change the address in green to the URL of the image file you uploaded. (to get the url of an image you uploaded: go to “Media”, hover over the image, click “edit”, then scroll down to “file URL” and copy it.) Also, the numbers after “padding” will need to be adjusted to fit the size of the image you uploaded. For instance, Lori’s buttons were 120×116, your’s will be a different size, most likely. Once you’ve adjusted the code as needed, and have put it in the “Label” box, click “add to menu”. (As I’ve explained before, I’m no coding wizard … I just tweak. For a more full explanation on this particular bit of code, you can check out this blog post where I found it.)

Repeat with each button you want to make! Rearrange order by dragging and dropping. Click “save menu”. Make sure that in the box at the top of the page that your new menu is selected to make it active:

(Or, alternately, if you don’t want to use it as the main menu at the top of the page, and you want to use it else where, you can add it as a widget on your widgets page.)

Let’s say, though, that on one of the buttons, you don’t want the button itself to link to anywhere, but instead you want a drop-down menu of options to come available. Here is how you would do that…

Make the button the same way, only leave the area for a URL blank. But input the image code the same way. Add to menu. So the button is ready, and doesn’t lead anywhere. Now to make the drop down menu, look for this box on the left hand side:

This is a list of all the pages you have made. Find the pages that you want to show up in the drop-down menu, select them, and click “Add to menu”. Then drag and drop those newly added pages under the button you want to be at the top – make sure you drop them so they are indented:

And now a menu will pop up with those options when someone hovers over the top button! Nifty, eh?

So *drum roll* … here is Lori’s site, now with menu buttons! She can always change them around to her own needs and desires, but for starters, here is how I’ve set it up:

She mentioned some types of pages she wanted, so she now has the following buttons:
– Blog
– About
– Recipes
– Printables
– Life Lessons (which goes into a drop down menu where she can feature any special series she chooses)
– Contact

… and, as we’ve discussed over and over again, any graphics you design for your site, like these buttons, should fit with your branding statement and design choices (style, medium, colors, etc.)

So what do you think about how things are coming along? Do you use your menu of pages as a design element? Also, I’d love to hear what pages you have set up on your own site, it would be interesting to see the variety of types of pages different bloggers have! Leave your thoughts and comments below, I love to hear from you!

If you’ve missed the other posts in this series on DIY blog redesign, here they are:
Part 1: Discover your branding with “The Drawing Board” Printable
Part 2: WordPress vs. Blogger
Part 3: Design Tips + Design Worksheet
Part 4: Themes, Coding and Stylesheets
Part 5: Making your own graphics
Part 6: 7 Blog Layout Tips to Engage your Reader
Part 7: Blog Page: The Must-haves and the Panache (This is this one!)
Part 8: 25 Tips for using WordPress
Part 9: The Big Reveal
Part 10: 7 Ways to Promote and Market Your Blog

Truth & Evidences: Macro-evolution vs. Micro-evolution

I almost started off by referencing “last week’s post” … but since I’m now on the every-other-week schedule for Wednesdays while we are in the process of moving, I guess it was actually two weeks ago! Anyway, in the previous post from this Truth & Evidences series we talked about the problems of where life could have come from in the first place if it didn’t come from a Designer. (If you’re new to this series, you can click here to see that post, or you can click here to see a list of all the previous posts from this series.)

Today we’re going to set aside the problem of how that first cell could have originated and look at the problems associated with getting from some simple life to the amazing and diverse amounts of life we have today. This is what Darwin’s theory of evolution is proposed to explain.

Now, often a person might say, “I don’t believe in evolution”, or of course on the other side – that they do. But really, it’s not all that straightforward. There is more than one kind of evolution, micro-evolution and macro-evolution. I certainly do believe in micro-evolution. Macro-evolution is the one I don’t buy. Here’s the basic difference:

There can certainly be changes within a gene pool – breeders use this to their advantage all the time. But in the end, it may be bigger, smaller, lighter, darker, faster, stronger – but, as in the above example, it is still a sheep. You may be familiar with Darwin’s finches:

On the Galapagos Islands, Darwin discovered these birds, and how their different beaks were adapted to the different tasks each bird needed – some better for cracking seeds, some better for needling insects out of small holes. This was significant in Darwin’s description of natural selection – that animals that best suited for survival were able to generate offspring and pass along their genes. The thing is, though, this is an excellent example of micro-evolution. They are all still finches. It wasn’t that some were observed to have developed a turtle shell or were half-reptile. It was just micro-evolution.

It is the same thing with the experiments scientists do with fruit flies, where they can get a fruit fly to grow extra legs, or have a third wing, and so forth. They are certainly changes … but they are still just fruit flies. And usually not very healthy ones, at that.

Micro-evolution does not prove macro-evolution. You might see some very convincing artists’ renditions of the steps between species, but an artist’s rendition is not proof. We often hear about “the missing link” – but it’s not as if we have the full steps from each species to the next, and there is just ONE piece missing. The missing links are countless. Here is an interesting quote from Gary Parker:

In most people’s minds, fossils and Evolution go hand in hand. In reality, fossils are a great embarrassment to Evolutionary theory and offer strong support for the concept of Creation. If Evolution were true, we should find literally millions of fossils that show how one kind of life slowly and gradually changed to another kind of life. But missing links are the trade secret, in a sense, of paleontology. The point is, the links are still missing. What we really find are gaps that sharpen up the boundaries between kinds. It’s those gaps which provide us with the evidence of Creation of separate kinds. As a matter of fact, there are gaps between each of the major kinds of plants and animals. Transition forms are missing by the millions. What we do find are separate and complex kinds, pointing to Creation.

But what about those photographs we see of a series of skulls leading up from apes to man? Those are actual bones, not just drawings – don’t those show the process of evolution? I’m sure we’ve all seen those charts – with the ape skull on the left and the “modern man” skull on the right, and the in between skulls of neanderthals and so forth. One of the basic problems with this is the very limited definition of “modern man”. Usually what is shown is a very European skull, kind of light bulb shaped. However that is not what all “modern man” skulls look like. For instance, in my family we have very oblong skulls, as you typically see shown in the in-between stages of evolution in those charts. In fact, my dad has measured his skull, and according to the ratios given by scientists for neanderthal skulls, his skull fits into that category. My skull is much the same shape as his .. more oblong and football shaped with a sloping back forehead, I guess I should measure mine! Maybe I would be classified as a neanderthal, too. And the fact is, there is a HUGE variety in skulls of the modern man, vastly different that the European light-bulb shape shown at the end of the chart. Imagine if my skull or my dad’s skull, or some of the many other diverse shapes of skulls were shown at the end of that chart – it wouldn’t look like such a smooth transition any more, would it? If we can have neanderthal skulls today .. why couldn’t mankind have also had neanderthal skulls in the past?

Changes in appearance within one species (micro-evolution) is a completely different thing than changes from one species into something different (macro-evolution). Micro-evolution does not prove macro-evolution.

Leave your thoughts and comments below, I love to hear from you!