This glazed ham is my go-to for lazy Sundays and holiday feasts—slow, forgiving, and packed with flavor. I love how the smoky sweetness seeps into every fiber, making even leftovers feel special. It’s not about perfection but about the ritual of creating something comforting and rich.
Why I Keep Coming Back to This Glazed Ham
It’s the slow build of flavors, the sticky, caramelized crust, and the comfort of knowing I can tweak every batch. The aroma alone makes the house feel festive, even on an ordinary day. Plus, it’s forgiving—if I overshoot or miss a step, I can usually fix it without ruining the whole thing. That’s what keeps me coming back, again and again.
Inside the Flavors: The Ingredients that Make or Break It
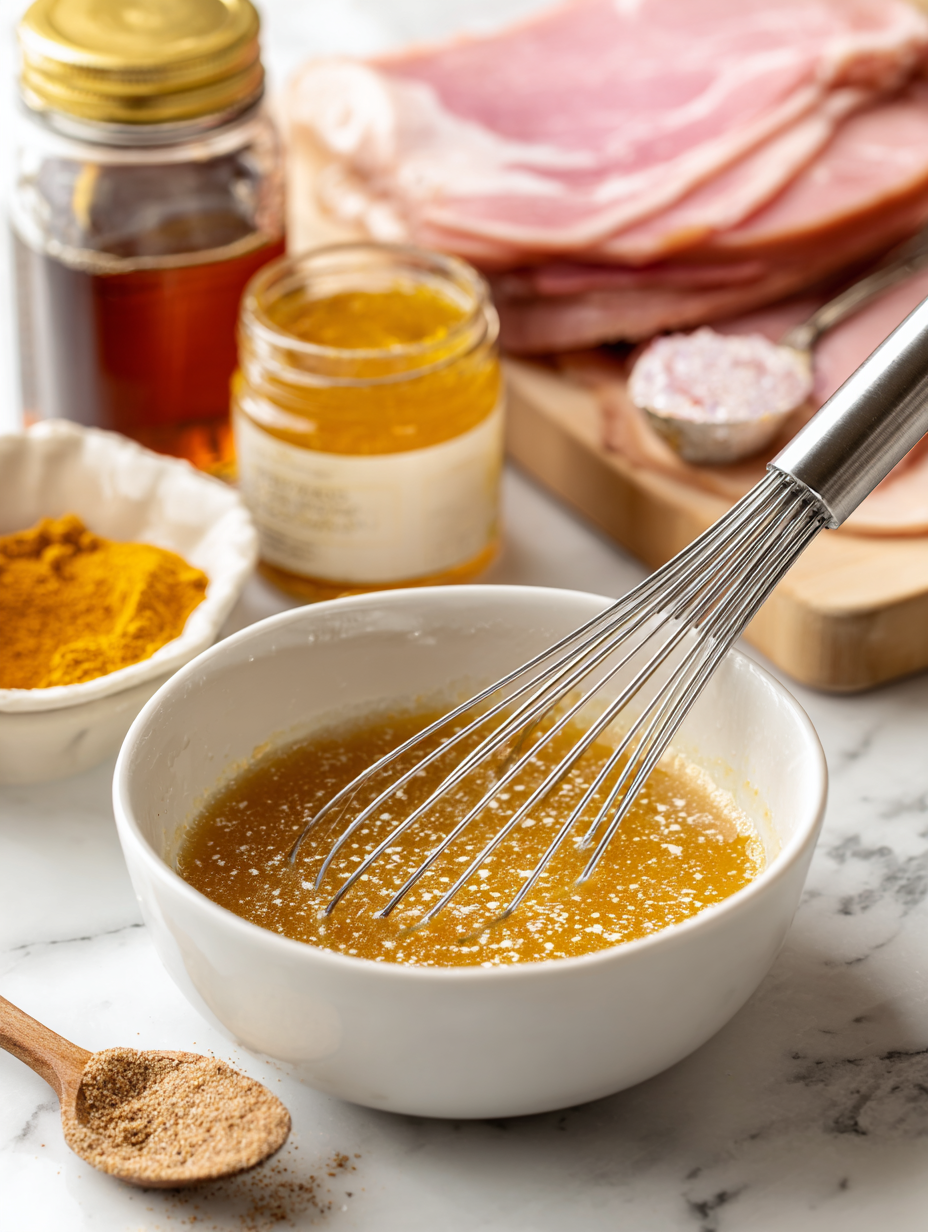
- Honey: Sweetens and thickens the glaze, adding a sticky, golden finish. Substitute maple syrup for a different sweetness.
- Dijon mustard: Brings a tangy depth that cuts through the richness. Use whole-grain for texture.
- Soy sauce: Adds a savory, umami punch, balancing the sweetness. Tamari is a gluten-free alternative.
- Smoked paprika: Gives a smoky warmth and vibrant color. Use regular paprika if unavailable.
- Brown sugar: Builds caramelization, enhances sweetness. Coconut sugar can be a subtle swap.
- Apple cider vinegar: Brightens the glaze with acidity, balancing sweetness. Lemon juice works if vinegar isn’t handy.
- Cloves (optional): Aromatic burst that hints at holiday spirit. Use a pinch or skip for a milder flavor.
Tools of the Trade for Glazing Glory
- Roasting pan: To hold the ham and catch drippings for basting.
- Sharp knife: To score the fat and slice the finished ham.
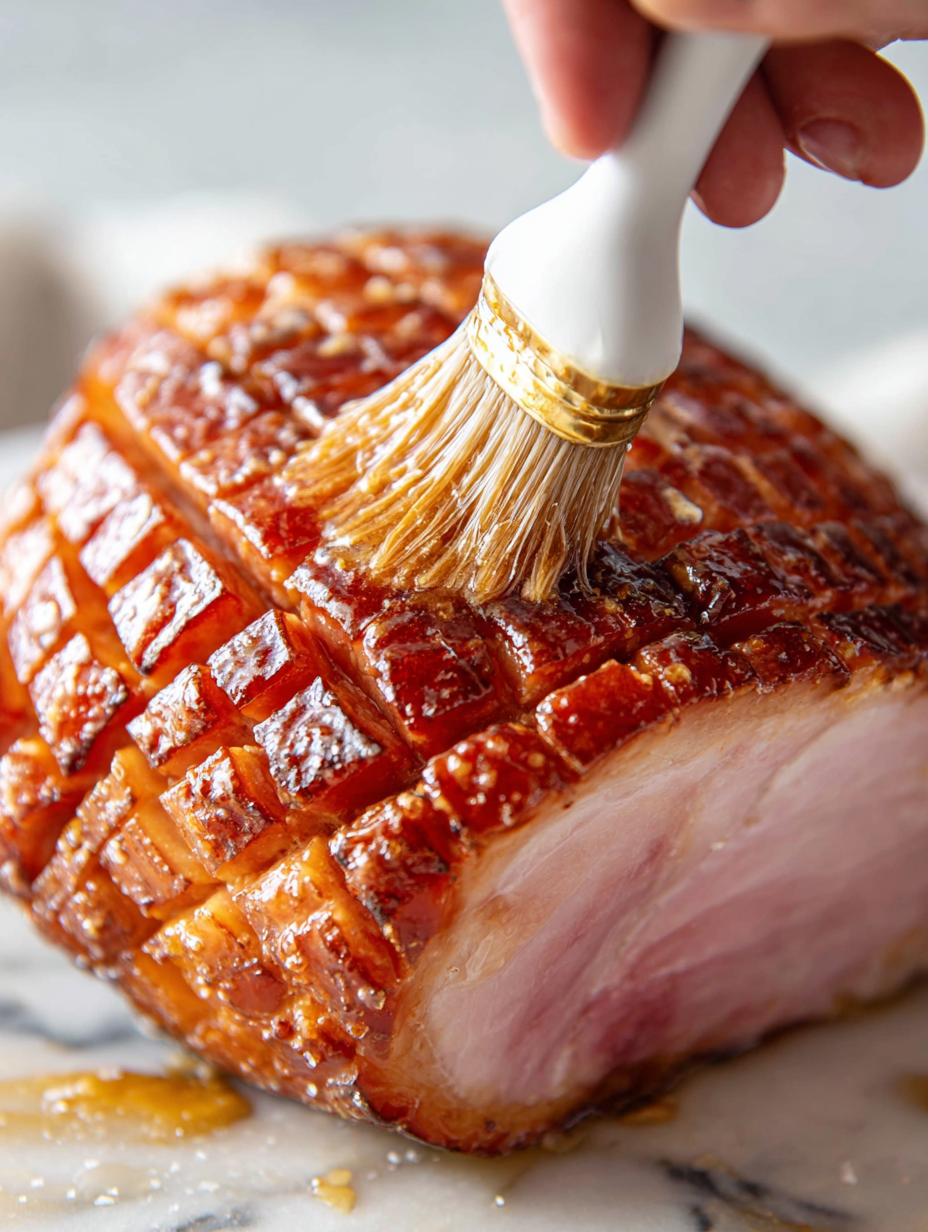
- Pastry brush: To apply the glaze evenly.
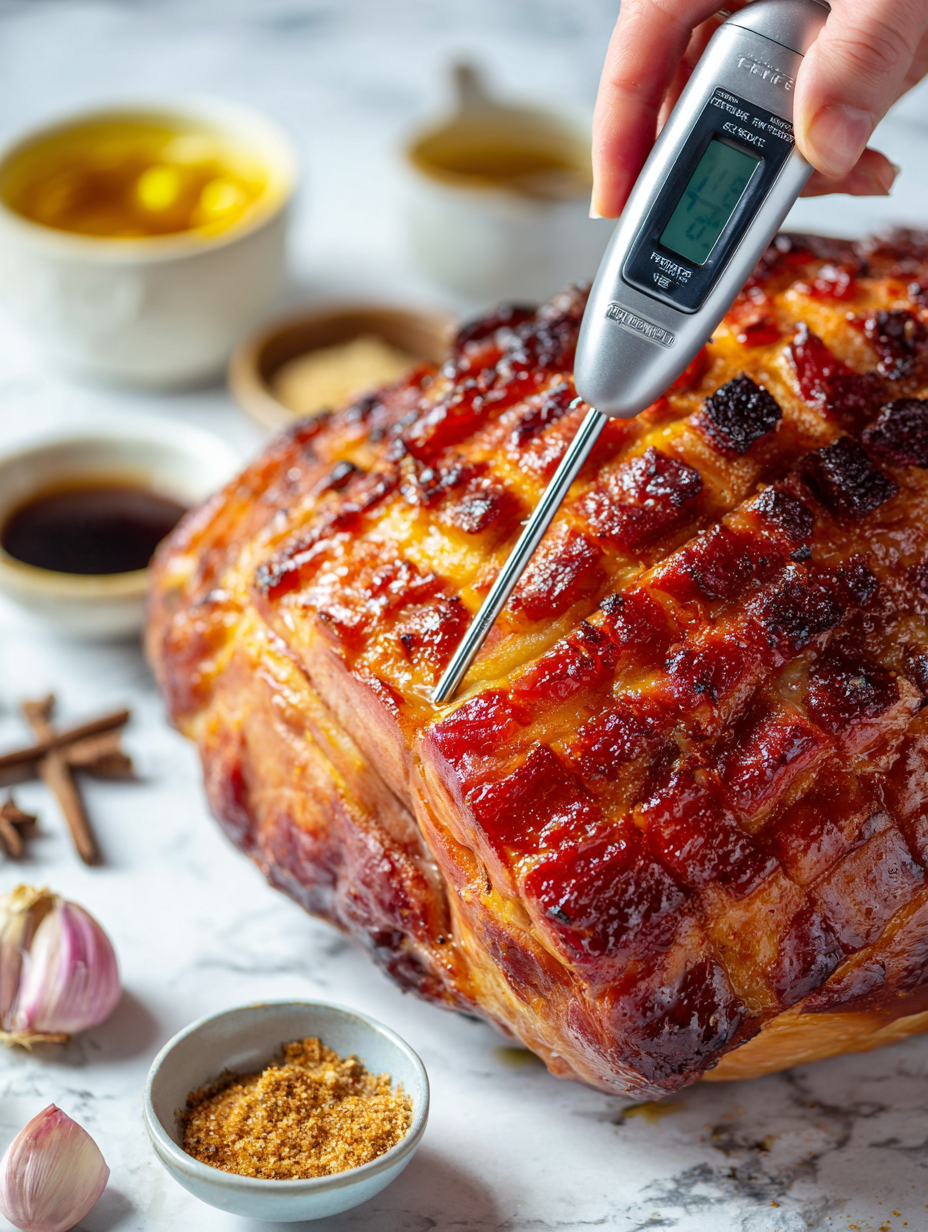
- Meat thermometer: To monitor internal temperature for perfect doneness.
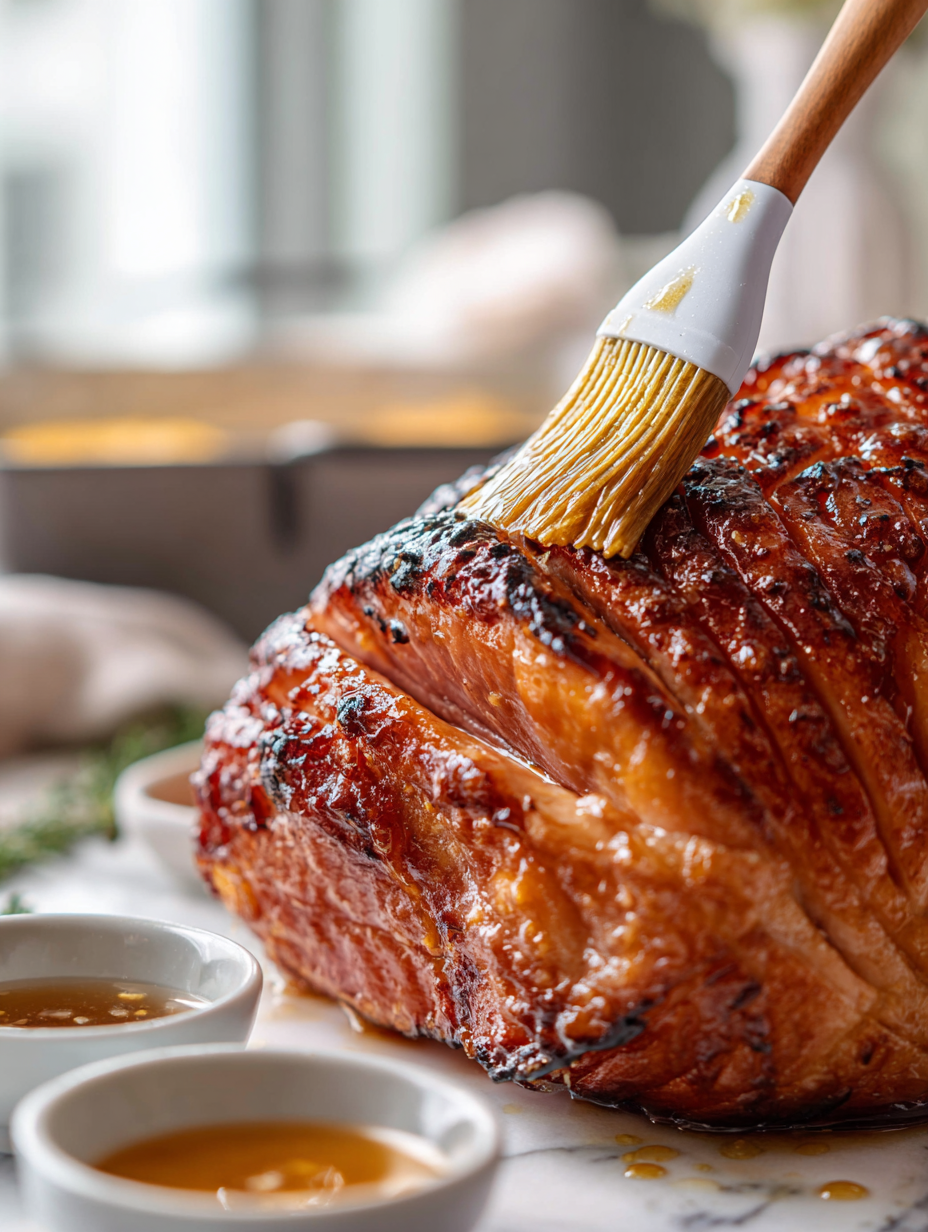
- Basting brush: For multiple glaze applications during roasting.
Slow and Steady: The Gentle Art of Glazing and Resting
Step 1: Preheat your oven to 160°C (320°F).
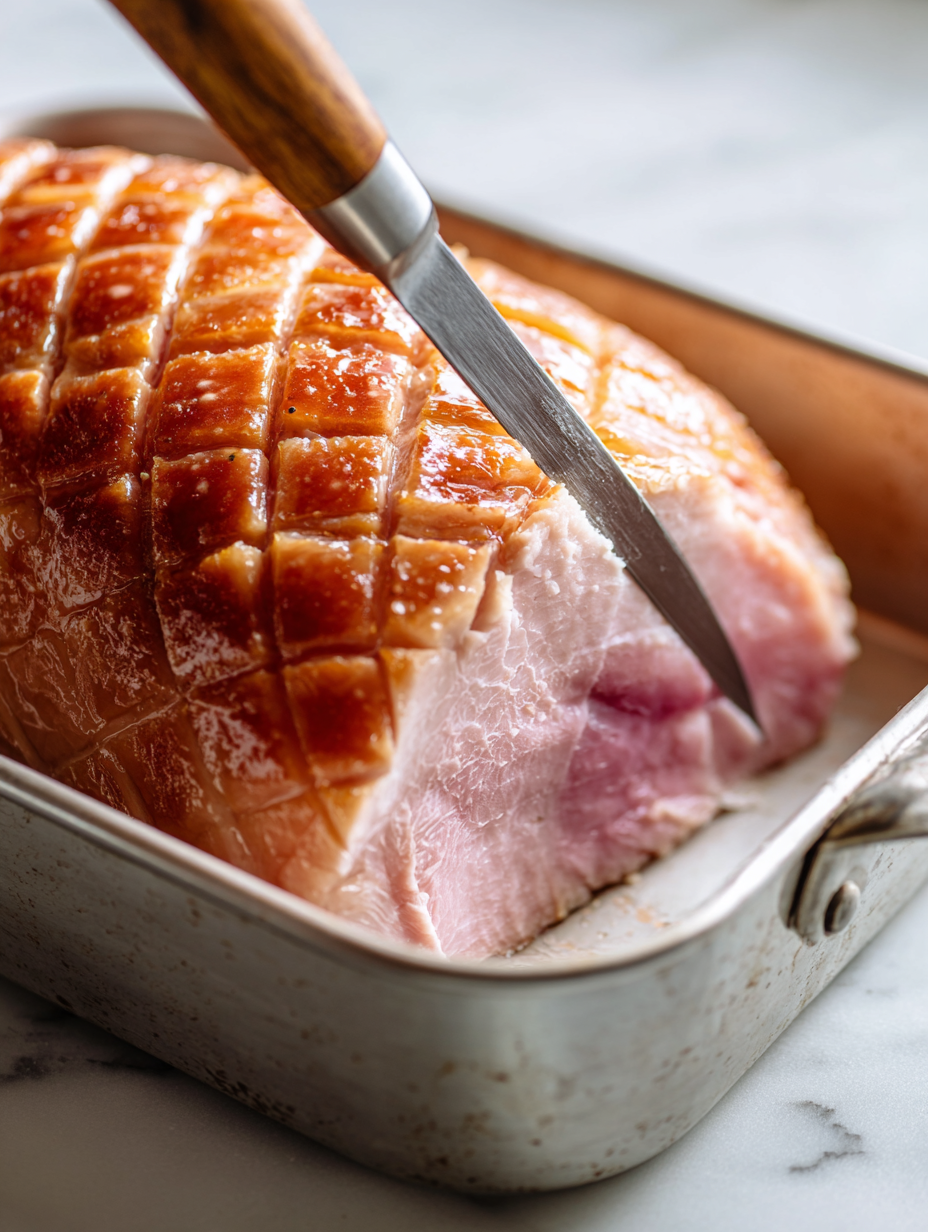
Step 2: Score the ham’s fat in a diamond pattern, about 1 cm deep.
Step 3: Mix your glaze ingredients: honey, Dijon, a splash of soy, and a hint of smoked paprika.
Step 4: Brush the ham generously with the glaze, making sure to get into the cuts.
Step 5: Bake in the oven for about 1.5 to 2 hours, basting every 20 minutes.
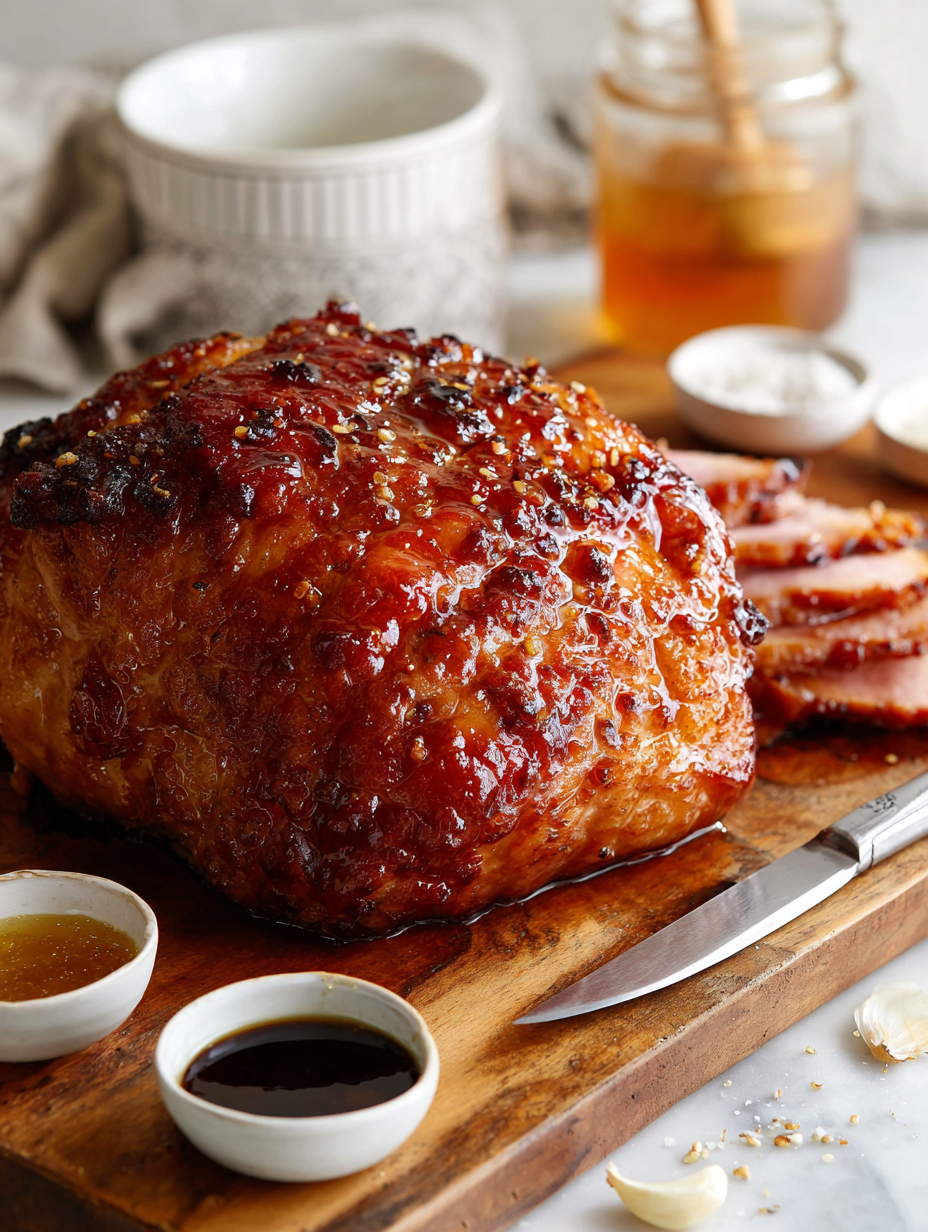
Step 6: Check for a deep golden color and a sticky glaze that glistens.
Step 7: Let the ham rest 15 minutes before slicing to keep it juicy.
Cooking Cues and Confidence Checks
- The glaze should be sticky and deep amber, not burnt.
- The ham’s internal temperature should reach 62°C (144°F) for juicy doneness.
- The fat score should render beautifully, crisping up slightly.
- The aroma will be sweet, smoky, with a hint of spice—trust your nose.
Oops! Common Glazing Ham Mishaps and How to Fix Them
- Burnt glaze.? If the glaze burns, cover the ham loosely with foil and lower oven temp to 150°C (302°F).
- Dry, tough slices.? If the ham is overcooked, let it rest longer to reabsorb juices and slice thinner.
- Runny, lackluster glaze.? If the glaze is too runny, increase heat for a few minutes to thicken.
- Undercooked interior.? If the ham is undercooked, return to oven and cook 15-20 minutes more, checking frequently.
This glazed ham recipe is a slow dance with patience. It’s not about rushing but about letting the flavors meld gently, creating a tender, oozy, caramelized crust that’s worth every minute. Personalize it with your favorite spices or a touch of bourbon for added warmth. Serve slices with a simple side and enjoy the comfort of a well-made, homey dish.


