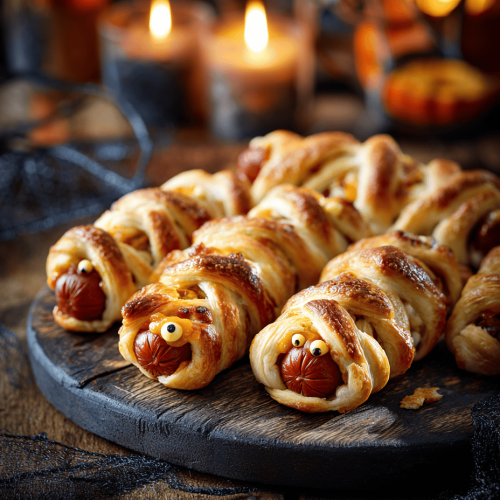
When I first made these mummy hot dogs, it was more about the chaos than the perfection. I was trying to get that crispy, cheesy wrap to look just right, but I kept snaking the dough too tight or too loose. Turns out, that imperfect, slightly messy look is what makes them so charming—and downright delicious. Nothing beats the smell of sizzling hot dogs cloaked in crispy pastry and tangled bandages of cheese, especially this time of year.
What really keeps me coming back to this recipe is the way it combines nostalgia with a little mischief. Everyone in the family lights up when these pop up on the Halloween table, even the pickiest eaters. They’re quick to assemble, fun to make, and the perfect balance of crispy, cheesy, and salty. Plus, they’re just a little unsettling in the best way—like edible little monsters ready to gobble up.
Why I Love These Mummy Hot Dogs (and You Might Too)
- I love how they turn a simple hot dog into a playful, spooky snack that sparks giggles and squeals.
- The chaos of tangled cheese and pastry feels a bit rebellious—like a culinary Halloween costume.
- They’re surprisingly forgiving—miss a spot of cheese or a crooked bandage and they still look adorable.
- Making them feels like a mini project, perfect for kids’ hands or a quick kitchen escape.
- Seeing everyone’s face light up when they bite into that crispy, cheesy mummy is pure joy.
Ingredient Breakdown: What Makes These Mummies Special
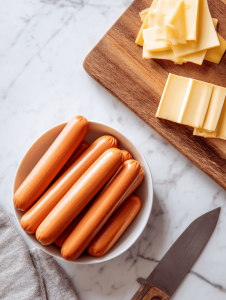
- Hot dogs: I prefer the all-beef kind—juicy and smoky, but veggie dogs work if you want a plant-based twist.
- Puff pastry: Flaky, buttery, and golden—if you can’t find it, homemade biscuit dough can do the trick.
- Cheese: Sharp cheddar or mozzarella—melts beautifully and adds that oozy, salty punch.
- Olive slices: Tiny eyes that give your mummies that spooky stare—skip if you prefer them more minimalist.
- Egg wash: Helps the pastry turn golden and shiny—brush it on just before baking for that perfect finish.
- Seasonings: A pinch of garlic powder or paprika on the pastry adds smoky depth—use sparingly.
Step-by-Step: Assembling Your Halloween Mummy Hot Dogs
Equipment & Tools
- Baking sheet: To hold all your mini monsters.
- Parchment paper: Keeps everything from sticking and makes cleanup easier.
- Sharp knife: For slicing pastry strips and tiny cheese eyes.
- Pastry brush: For egg wash or butter.
- Cooling rack: To let your hot dogs rest and stay crispy after baking.
Preparation steps
- Preheat oven to 200°C (400°F). Line your baking sheet with parchment paper.
- Unroll the puff pastry on a floured surface. Cut into long strips, about 1.5 cm wide.
- Wrap each hot dog with the pastry strips, leaving gaps for eyes and a mouth if you like.
- Crisscross and tangle the pastry for that ragged mummy effect. Secure the ends by pinching or folding.
- Place wrapped hot dogs on the baking sheet, leaving space between each.
- Brush the pastry lightly with egg wash. Sprinkle with seasonings if using.
- Bake for 15–20 minutes until golden and puffed—watch for that crispy, flaky appearance and a fragrant buttery smell.
- About halfway, check for even browning. If edges brown too fast, cover loosely with foil.
- Remove from oven and let sit on a wire rack for 5 minutes. The cheese will be hot and oozy right out of the oven.
Checkpoints & How to Know It’s Done
- The pastry is golden and crisp—no pale spots.
- The cheese is melted and slightly bubbly at the edges.
- Hot dogs are heated through—internal temp should be about 60°C (140°F).
Mistakes and Fixes: What to Watch Out For
- FORGOT to preheat your oven? Crank it up now—hot oven means crispy pastry.
- DUMPED too much cheese? Wipe off excess to prevent sogginess and messy baking.
- OVER-TORCHED pastry? Cover with foil and reduce oven temp slightly for even browning.
- TOO tight wrapping? Loosen pastry—hot dogs need some room to breathe and expand.
Quick Kitchen Fixes & Hacks
- When pastry cracks, gently press it back together with your fingers—no one will notice.
- Splash a little water on the edges if pastry isn’t sealing well.
- Patch small tears with extra pastry scraps—just press and bake.
- If cheese isn’t melting, turn up the oven temp by 10°C (20°F) for a minute or two.
- Shield over-browned parts with a quick foil tent—faint smoky smell is better than burnt.
Mummy Hot Dogs
Equipment
- Baking sheet
- Parchment paper
- Sharp knife
- Pastry brush
- Cooling rack
Ingredients
- 8 pieces all-beef hot dogs or veggie dogs for plant-based
- 1 package puff pastry thawed if frozen
- 1 cup shredded cheese cheddar or mozzarella
- 1/4 cup olive slices for tiny eyes
- 1 egg egg beaten for egg wash
- 1/2 teaspoon garlic powder optional, for seasoning
Instructions
- Preheat your oven to 200°C (400°F) and line a baking sheet with parchment paper to keep things tidy.
- Unroll the puff pastry onto a lightly floured surface and cut it into long strips about 1.5 cm wide—that’s perfect for wrapping.

- Wrap each hot dog snugly with a pastry strip, leaving some gaps to create a ragged, mummy-like appearance—tangle the strips for a chaotic effect.
- Place the wrapped hot dogs onto your prepared baking sheet, spacing them out evenly so they have room to puff up and turn golden.
- Brush the pastry lightly with beaten egg to give them a shiny, golden finish, and sprinkle with garlic powder or paprika if you like a smoky hint.
- Bake for about 15–20 minutes, or until the pastry is puffed, golden, and crispy with a fragrant buttery smell filling the kitchen.
- Check halfway through baking—if edges brown too quickly, cover loosely with foil to prevent burning while the centers finish crisping up.
- Once baked, remove from the oven and let them rest on a cooling rack for about 5 minutes—this helps the cheese set slightly and makes handling easier.
- Use tiny slices of olive as spooky eyes by placing them on the cheese while still warm, pressing gently so they stay in place.
- Serve your spooky, crispy mummy hot dogs immediately, enjoying the crispy pastry, melted cheese, and fun, monster-like appearance.


