Few treats evoke nostalgia quite like love letter cookies, but I’ve always been captivated by their delicate paper-like texture and the tiny, colorful messages hidden inside. As a child, I loved unwrapping each cookie to reveal handwritten notes, almost like edible postcards. Today, I see these cookies as a charming way to reconnect with simple pleasures, especially now when comfort foods carry extra meaning.
What makes this recipe stand out isn’t just the buttery richness or the vibrant icing—it’s the personal touch of writing sweet notes on each one. The process transforms baking into a meditative act, with each message a tiny love gesture. Plus, they’re surprisingly easy to whip up for unexpected guests or a little treat for yourself, with a nostalgic twist that feels like a warm hug.
WHY I LOVE THIS RECIPE?
- It sparks childhood memories of handwritten notes and secret messages.
- The buttery dough is rich but tender, perfectly crumbly with each bite.
- Decorating offers a joyful chaos—tiny brushstrokes of bright icing seemingly in a race against time.
- Every cookie feels personal; you can customize messages for any occasion.
- This recipe is a fun, stress-free way to indulge in cheerful baking.
AVOID MY DISASTER (You’re Welcome)
- FORGOT to chill the dough? It becomes too sticky—refrigerate for 20 minutes before rolling.
- DUMPED icing too thick? Thin with a splash of milk for smooth decorating consistency.
- OVER‑TORCHED cookies? Lower the oven temperature by 10°C next time for even baking.
- SKIPPED printing the message? Your ink might bleed—use food-safe markers instead.
QUICK FIXES THAT SAVE YOUR DAY
- When dough cracks, refrigerate for 15 minutes—pressure cracks seal right up.
- Splash a bit of vanilla extract on the dough for extra aroma and softness.
- Patch tiny holes with a dab of extra dough and re-roll gently.
- When icing runs, chill the cookies briefly—frostings will set with a prettier finish.
- If the oven’s too hot, use a thermometer—your cookies will bake evenly, crisp and golden.
These cookies are perfect for when you need a charming, homemade gift or a quiet moment of reflection. Their sweet, buttery aroma fills the kitchen with a comforting scent that lingers long after baking. Essential for nostalgic bakers or anyone craving a touch of handwritten magic, they remind us that sometimes, small gestures matter most.
As the seasons shift and we find ourselves yearning for cozy traditions, love letter cookies serve as a gentle reminder of connection. They’re not just treats—they’re tiny love notes that bridge generations and bring warmth to any table. Baking them feels like sharing a special secret with someone you cherish.
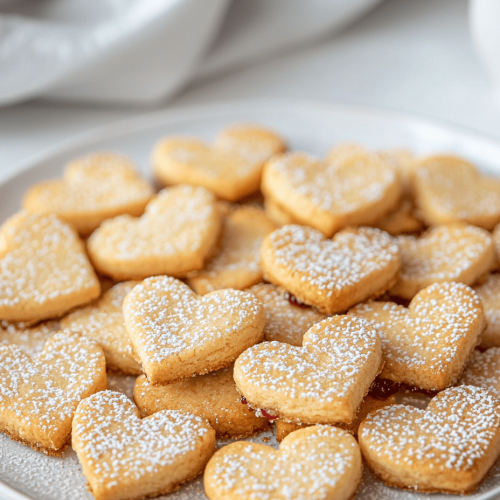
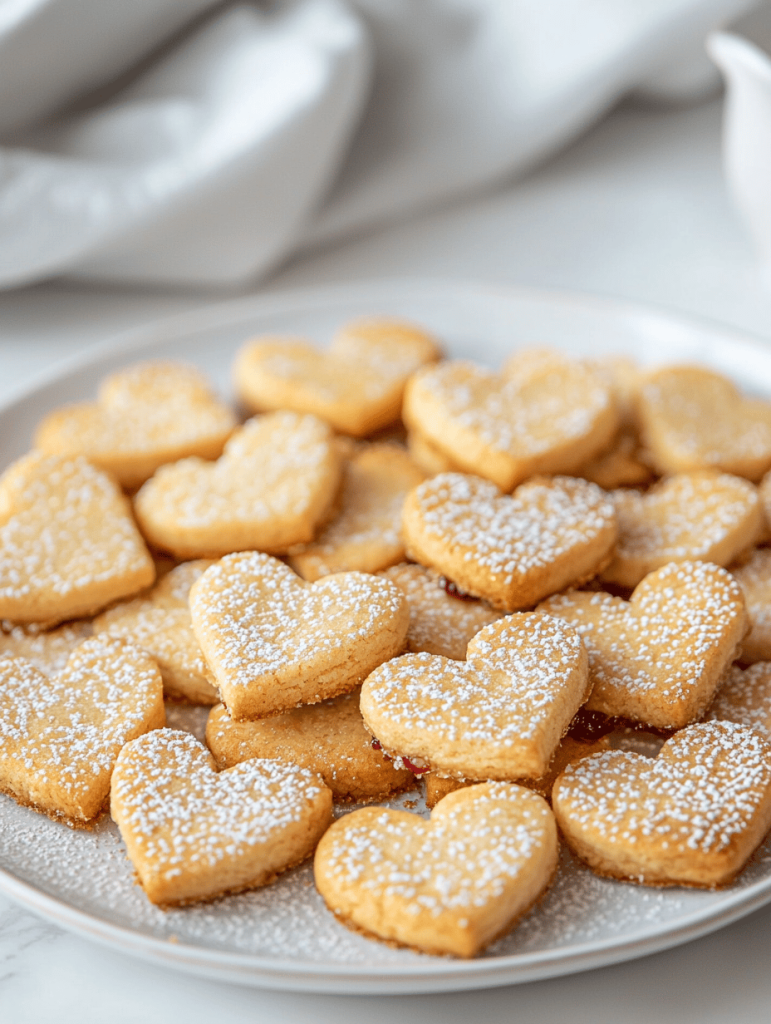
Love Letter Cookies
Equipment
- Mixing bowls
- Rolling pin
- Baking sheet
- Parchment paper
- Cooling rack
Ingredients
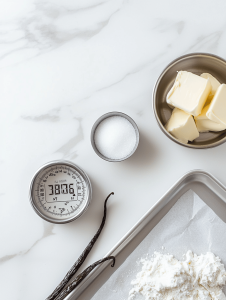
- 2 cups all-purpose flour sifted
- 1 cup unsalted butter softened
- 3/4 cup granulated sugar
- 1 large egg at room temperature
- 1 teaspoon vanilla extract
- optional food-safe markers or colored icing for decorating
Instructions
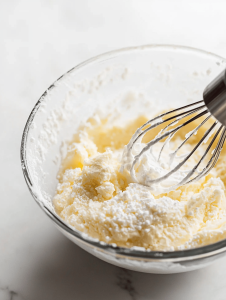
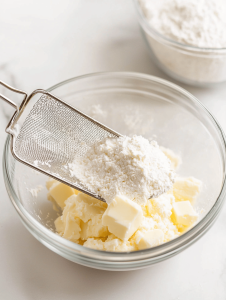
- Cream the softened butter and sugar together in a mixing bowl until the mixture is light and fluffy, and the sugar starts to dissolve, filling your space with a sweet aroma.
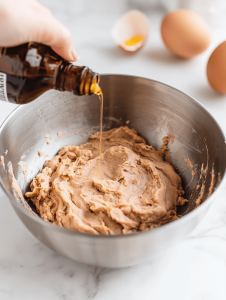
- Beat in the egg and vanilla extract until fully incorporated, creating a smooth, cohesive dough with a slight sheen.
- Gradually add the sifted flour to the wet ingredients, mixing gently until the dough comes together into a soft, workable ball—avoid overmixing to keep it tender.
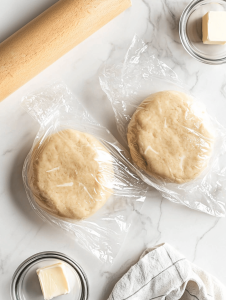
- Divide the dough into two portions, flatten each into disks, wrap in plastic wrap, and refrigerate for at least 20 minutes to relax the dough and make it easier to roll out.
- Preheat your oven to 350°F (175°C). Line a baking sheet with parchment paper to prevent sticking and ensure even baking.
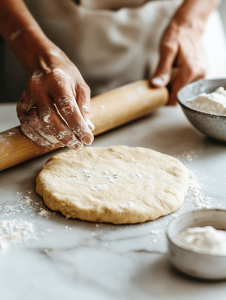
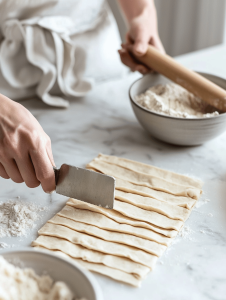
- Take one chilled dough disk and lightly flour your work surface. Roll out the dough to about 1/8-inch thickness, aiming for an even, thin layer—this is key to their delicate structure.
- Use a sharp knife or a rectangular cutter to cut the rolled dough into uniform strips or rectangles that resemble sheets of paper, helping to achieve that authentic love letter look.
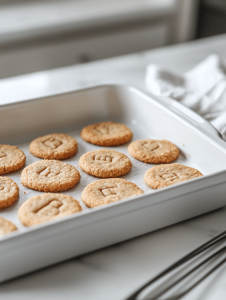
- Transfer the cut cookies to the prepared baking sheet, spacing them slightly apart to give room for slight spreading during baking.

- Bake the cookies in the preheated oven for about 8-10 minutes, or until they are just golden around the edges and still tender — they firm up as they cool.
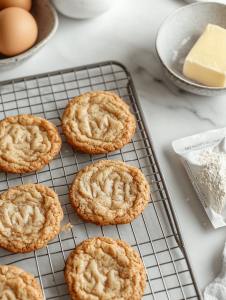
- Remove the baking sheet from the oven and let the cookies cool on a wire rack until they are firm and completely cooled, which might take about 10 minutes.
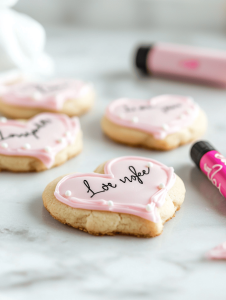
- Once cooled, use food-safe markers or colored icing to carefully add handwritten messages or decorative details to each cookie, mimicking tiny notes or letters.
Notes
In a world full of fleeting trends, these cookies hold a timeless charm rooted in simplicity and care. Their delicate crunch paired with colorful icing creates a delightful contrast that sparks joy in every bite. Sharing them with loved ones can turn a quiet afternoon into a celebration of nostalgia and kindness.
Whether as a gift, a family project, or a gift to yourself, love letter butter cookies offer a fleeting moment of happiness. They remind us that sometimes, a small sweet gesture can say everything words cannot. So go ahead, write your message—and bake your heart out.


