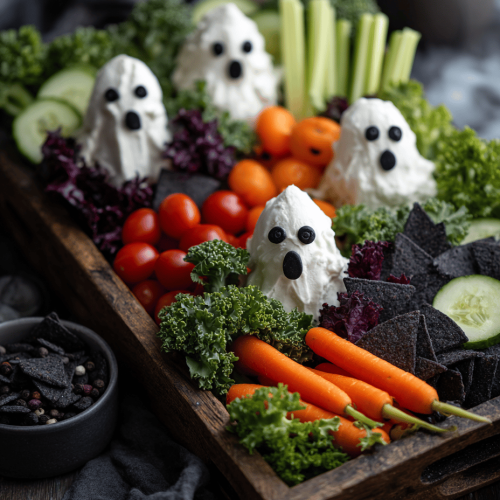
Sometimes, I get tired of the usual candy and pumpkin-shaped treats. This veggie platter feels like a quiet rebellion—no fuss, no sugar crash, just fresh, crunchy vegetables dressed up with a little creative flair. Plus, it’s perfect for sneaking in some greens while still having fun scaring the kids (and adults) with ghostly shapes.
What I love about this platter is the way it turns a simple snack into a conversation piece. It’s honestly so satisfying to see everyone’s eyes light up at the tiny ghost faces. And honestly, it’s kind of freeing—no perfect plating required, just a handful of veggies, some cheese, and a little bit of whimsy.
I also like how flexible it is. If you’re running late or missing a certain veggie, you can swap in what you have. It’s not about perfection, but about making something that feels cheerful and a little spooky without breaking the bank or your sanity.
## Why I Keep Coming Back to This Ghost Veggie Platter
– I love how it turns a snack into a festive centerpiece without much effort.
– Seeing kids giggle and adults sneak bites makes the kitchen feel lively.
– It’s a rare moment where I get to be a little creative with simple ingredients.
– I feel proud when everyone asks for the recipe—though it’s really just assembled chaos.
## Ingredient Breakdown: What Makes This Platter Work
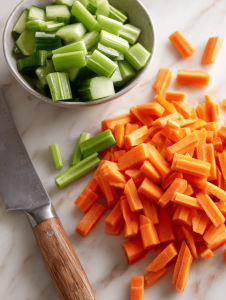
– **Carrots:** I prefer the orange ones, sliced into thin sticks. They add a bright, sweet crunch. Swap with jicama for a milder, juicier bite.
– **Cucumbers:** Cool and crisp, sliced into rounds or spears. If your cucumbers are bitter, peel them first.
– **Cherry Tomatoes:** Juicy and vibrant, perfect for tiny ghost heads. Use heirlooms for more color, if you like.
– **Cauliflower Florets:** White and sturdy, these keep their shape and add a different texture. Broccoli can work here too, with a slightly earthier flavor.
– **Black Olives:** Pitted and sliced, these are the spooky eyes. Kalamata olives give a smoky punch; green olives soften the look but are less intense.
– **String Cheese or Mozzarella Sticks:** Cut into small cylinders for the ghost bodies. If you want a softer feel, go for fresh mozzarella.
## Step-by-Step: Assembling Your Spooky Ghost Veggie Platter
**Equipment & Tools**
– Sharp knife for cutting vegetables and cheese.
– Small cookie cutter or end of a piping tip to shape ghost faces.
– Large platter or tray for assembly.
– Toothpicks or small skewers for positioning.
**Steps**
1. Wash all your veggies and set out your tools.
2. Slice carrots and cucumbers into sticks about 4–5 inches long.
3. Cut string cheese into 1-inch thick rounds and then halve or quarter for ghost bodies.
4. Arrange cauliflower florets and cherry tomatoes around the platter’s edges.
5. Use the cookie cutter or knife to punch tiny ghost faces into the cheese.
6. Place the cheese ghosts on the platter, positioning them so they look like floating spirits.
7. Dot their faces with sliced olives for eyes, pressing gently to secure.
8. If using toothpicks, stick them into the cheese to help hold the eyes or small veggies in place.
9. Add extra veggies around the ghosts for a color pop and balance.
10. Chill briefly before serving—this helps everything stay neat.
**Resting & Finishing**
– Let the platter sit for 10–15 minutes so the flavors meld slightly.
– Serve with a side of hummus or ranch if you want a dip.
**Checkpoints & How to Know It’s Done**
– Cheese ghosts are firm but not rubbery.
– Eyes are securely pressed in or pinned down.
– The platter looks balanced and inviting, not crowded or sloppy.
## Mistakes and Fixes for Your Ghost Veggie Platter
– **FORGOT to chill the cheese?** → Pop it in the fridge for 10 minutes to firm up, making it easier to cut and handle.
– **DUMPED too many olives in one spot?** → Spread them out for a more balanced spooky look.
– **OVER-TORCHED the cheese edges?** → Trim away burnt bits and re-arrange; it’s just cheese, after all.
– **MISSED a veggie?** → Fill gaps with whatever you have—radishes or snap peas work well.
## Quick Kitchen Fixes for a Last-Minute Spook
– When cheese faces slide off, splash a tiny drop of honey or honey mustard to help them stick.
– If veggies are watery, pat them dry thoroughly before arranging.
– When faces look sad, use a dab of cream cheese to re-attach eyes or mouth.
– Shield delicate veggies with a light drizzle of olive oil to prevent drying out.
– When cheese is too soft, quick freeze for 5 minutes then cut for cleaner shapes.
Ghost Veggie Platter
Equipment
- Sharp knife
- Small cookie cutter or piping tip
- Large platter or tray
- Toothpicks or small skewers
Ingredients
- 2 cups carrot sticks sliced into 4-5 inch sticks
- 2 cups cucumber sticks sliced into 4-5 inch sticks
- 1 cup cherry tomatoes for tiny ghost heads
- 3 cups cauliflower florets white and sturdy
- 1 cup sliced black olives pitted, for eyes
- 8 pieces string cheese or mozzarella sticks cut into 1-inch rounds
Instructions
- Wash all vegetables thoroughly and set out your tools for easy access.
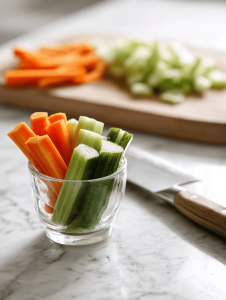
- Slice the carrots and cucumbers into long sticks about 4 to 5 inches in length, creating a uniform, crisp shape.
- Cut the string cheese into 1-inch thick rounds, then halve or quarter each piece to form small ghost bodies with a soft, creamy texture.
- Arrange the cauliflower florets and cherry tomatoes around the edges of your platter to add vibrant color and visual balance.
- Use a small cookie cutter or piping tip to punch tiny ghost faces into the cheese pieces, creating fun, spooky expressions.
- Place the cheese ghosts onto the platter, spacing them out to look like floating spirits, and press sliced olives into their faces as eyes for a spooky effect.
- If needed, insert toothpicks or small skewers into the cheese to help secure the eyes and keep everything in place.
- Fill in gaps with remaining vegetables, arranging them for visual balance and colorful contrast.
- Chill the platter for 10 to 15 minutes to help everything set and stay neat when served.
- Serve the spooky veggie platter with optional dips like hummus or ranch on the side for added fun and flavor.


