Imagine standing in your kitchen, the summer sun beating down, and all you want is something cold and bursting with fruit. But not just any icy drink—something that captures that perfect balance of sweet, tart, and refreshingly slushy. That’s where this cherry slushie comes in. It’s not over-complicated, but it’s honest, loud in flavor, and made with a handful of simple ingredients that really shine.
I’ve always loved how cherries feel like a secret stash of summer joy—deep red, glossy, almost oozing with juice. Turning those into a slushie feels like catching lightning in a bottle. It’s a little chaotic when blending, sure, but the result? Bright, icy, and just the right amount of sweet-tart to cool you down without fuss. It’s a reminder that sometimes, the simplest things are the most satisfying.
And honestly, I keep coming back to this recipe because it’s flexible. No fancy equipment needed, just a good blender and a handful of cherries. Whether you’re craving a quick treat or trying to impress a friend on a hot day, this slushie keeps it real—bright, bold, and totally doable.
Why I Love This Cherry Slushie—A Love Letter to Juicy Simplicity
- I love how the cherries turn into a vibrant, almost neon pink in the blender, making me smile before I even taste it.
- There’s a chaotic joy in crushing ice and blending it into a perfect, slushy texture—like childhood in a glass.
- It’s a nod to summer memories—strawberry fields, cherry picking, and that sweet, smoky smell of ripe fruit.
- Seeing friends’ eyes light up when they taste this—so fresh, so cold, so unexpectedly bright—makes me proud.
- This recipe reminds me that sometimes, the best flavors come from just a few honest ingredients.
Ingredient Breakdown—What Makes This Cherry Slushie Sing
- Fresh cherries: I prefer pitted, ripe cherries for that juicy, tart punch. If out of season, frozen works, just thaw slightly—more slush, less juice.
- Sweetener: A splash of honey or maple syrup amplifies the natural sweetness. Skip if your cherries are super ripe and sweet already.
- Lemon juice: Brightens everything up. If you only have lime, that works too, just a little zestier.
- Ice: Use crushed or cubed ice. Crushed melts faster, but cubes give a more textured slush.
- Water or cherry juice: Thin out the mixture if it’s too thick—think of it as watering down the intensity without losing flavor.
- Optional splash of soda: For a fizzy kick, add a splash after blending—instant party in the glass.
How to Make This Cherry Slushie—Step-by-Step
Equipment & Tools
- Blender: The heart of this recipe. Make sure it’s powerful enough to crush ice.
- Measuring spoons: For precise sweetener and lemon juice.
- Knife and pitting tool: To prep your cherries with ease.
- Glass or jar: For serving—go for something clear to show off that vibrant color.
Steps
- Pit the cherries—cut in half, remove the pits. Do it over a bowl to catch all that juicy goodness.
- Load cherries, ice, sweetener, lemon juice, and a splash of water into the blender.
- Start blending on low—gradually increase to high. Watch for the ice to break down and the mixture to turn frosty and vibrant.
- Blend until smooth but still slushy—about 30 seconds. If too thick, add a little more water or juice, then pulse again.
- Check the consistency—if it’s more ice than juice, add a splash more liquid and blend briefly.
- Pour into a glass. If you want fizz, top with a splash of soda and give it a gentle stir.
Resting & Finishing
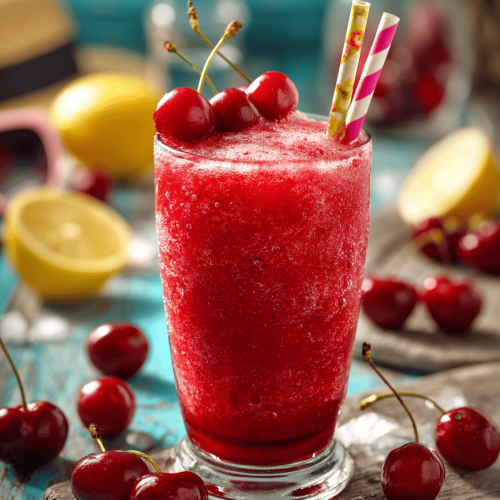
Serve immediately for the best icy texture. Garnish with a cherry or a lemon wedge if you’re feeling fancy. No need to rest—just sip and enjoy the burst of cold and cherry goodness.
Checkpoints & How to Know It’s Done
- It should be icy and vibrant pink—no big chunks of ice.
- The flavor should be a balanced mix of sweet and tart, not overly icy or watery.
- The texture should jiggle slightly when shaken—perfectly slushy, not liquid.
Mistakes and Fixes—Keep Your Slushie on Point
- FORGOT to pit the cherries? Blend them with pits—just be prepared for a slight bitterness or a gritty texture—strain if needed.
- DUMPED too much water? Add more cherries or ice to thicken it up—avoid a watery mess.
- OVER-TORCHED the ice? Use crushed or smaller cubes next time—less melting, better texture.
- SELDOM measure the lemon? Add a squeeze, then taste—adjust acidity as needed for brightness.
Quick Kitchen Fixes for Cherry Slushie Success
- When the mixture is too thick, splash in a little more juice or water—blend again for smoother consistency.
- When flavor feels flat, stir in a tiny pinch of salt or a dash more lemon—brightens everything up.
- Splash some soda on top if it’s too icy—adds fizz and lifts the flavor.
- Patch a dull color with a quick squeeze of fresh lemon—shimmering pinks are worth it.
- Shield from melting by serving in pre-chilled glasses—keeps that icy crunch longer.
Cherry Slushie
Equipment
- Blender
- Measuring spoons
Ingredients
- 1 cup pitted cherries fresh or thawed frozen
- 1 cup ice crushed or cubed
- 1 tbsp honey or maple syrup optional, adjust to taste
- 1 tbsp lemon juice freshly squeezed
- 1/4 cup water or cherry juice to thin out the mixture if needed
- optional splash of soda for a fizzy finish
Instructions
- Pit the cherries, cutting them in half and removing the pits over a bowl to catch all that juicy goodness.
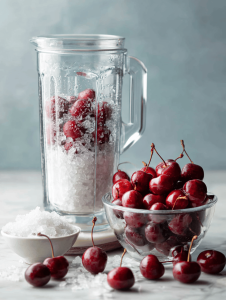
- Load the pitted cherries, ice, honey or maple syrup, lemon juice, and a splash of water into your blender.
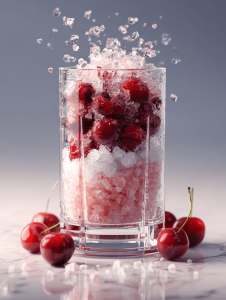
- Start blending on low speed and gradually increase to high, watching the mixture turn vibrant pink and frosty as the ice breaks down.
- Blend until smooth but still slushy—about 30 seconds—adding a little more water if it’s too thick, then pulse again.
- Check the texture—if it’s more ice than liquid, add a splash of water or cherry juice and blend briefly until you reach the perfect slushy consistency.
- Pour the bright pink slushie into glasses. If you like, add a splash of soda on top for a fizzy kick and give it a gentle stir.


