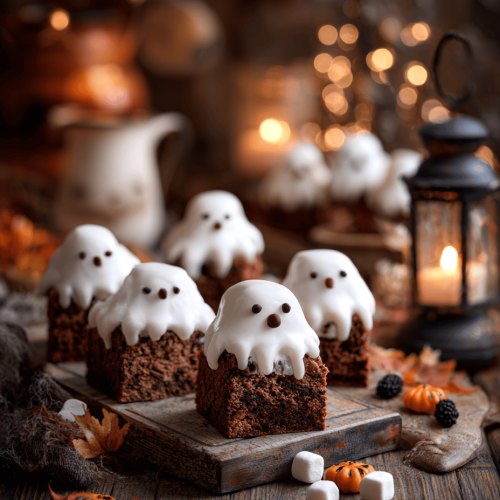
Why I Keep Coming Back to These Ghostly Brownies
I love how these brownies turn a simple chocolate fix into a playful, spooky spectacle that kids and adults alike can’t resist. There’s something nostalgic about biting into a fudgy square that’s been transformed into tiny ghost figures—like a mini Halloween miracle. Plus, the chaos of piping whipped cream and placing mini chocolate chips keeps me on my toes, and I swear, the messy moments are part of the fun.
Every October, I find myself craving these because they remind me of carefree fall nights and ghost stories told around flickering candles. They’re not just treats—they’re little memories in the making. And honestly, watching friends’ faces light up when they see these ghosts is a small, sweet victory I look forward to every year.
What I Love Most About Making These Ghost Brownies
- The way the whipped cream ghosts jiggle just slightly when you pipe them—so delicate, yet so fun to create.
- Seeing all the tiny chocolate chips become tiny eyes and mouths—such a simple detail that makes a big impact.
- The smell of melting chocolate and vanilla filling the kitchen—pure comfort with a hint of mischief.
- Feeling the satisfaction of piping perfect little ghosts after a long day—small wins, but sweet ones.
- Sharing these with friends and watching their surprised grins—Halloween magic in edible form.
Ingredient Breakdown: What Makes These Ghosts So Good
- Dark Chocolate: I go for high-quality bars, because rich, bittersweet chocolate makes the brownies deeply fudgy. Swap with semi-sweet if you prefer less intense flavor.
- Butter: I use unsalted butter for control, but salted butter adds a subtle savory note that balances the sweetness—try it if you like a salt-kissed edge.
- Sugar: Granulated sugar keeps things straightforward, but brown sugar can add a molasses undertone if you want more complexity.
- Eggs: They give structure and moisture; skip or reduce slightly if you want a denser, more fudge-like texture.
- Flour: Just enough to hold everything together—gluten-free works if you swap in almond or coconut flour, but watch the moisture content.
- Whipped Cream: Heavy cream whipped stiff creates those perfect ghost forms—add a splash of vanilla for extra flavor.
- Chocolate Chips: Mini chips are adorable for eyes; regular chips work fine, just push them in before setting.
The Step-by-Step Guide to Spooky Brownies
Equipment & Tools
- 8×8 or 9×9 baking pan—size depends on how thick you want your brownies.
- Silicone spatula—scrapes the bowl and folds in ingredients smoothly.
- Double boiler or microwave-safe bowl—melting the chocolate and butter.
- Hand mixer or whisk—whipping the cream until stiff peaks form.
- Plastic piping bag or zip-top bag with a corner snipped—shaping the ghost’s head and arms.
- Small spoon—placing the chocolate chips as eyes and mouth.
Steps
- Preheat your oven to 175°C (350°F). Line the pan with parchment—ready for the batter.
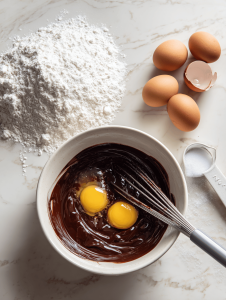
- In a heatproof bowl, melt the chocolate and butter over simmering water or microwave in 30-second bursts, stirring in between. The smell should be rich and cocoa-y.
- Stir in sugar, then eggs one at a time. Mix until glossy and smooth—don’t overmix, or the brownies get tough.
- Fold in flour gently until just combined. A thick, shiny batter should form—like melted chocolate pudding.
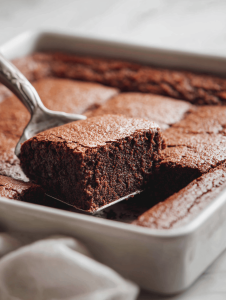
- Pour into the prepared pan. Bake for 20–25 minutes—edges will look set, center slightly jiggly but not wet.
- Cool in the pan for 10 minutes, then transfer to a wire rack. Let fully cool before decorating.
- Whip the heavy cream with vanilla until stiff peaks form. Fill the piping bag and pipe ghost heads, arms, and bodies on the cooled brownies.
- Use mini chocolate chips to add eyes and mouths. Chill for 15 minutes to set the whipped cream ghosts.
Mistakes and Fixes: Common Pitfalls and How to Rescue Them
- FORGOT to line the pan? Tape parchment in place with a little butter—easy to lift out.
- DUMPED too much flour? Gently fold in a splash of milk to loosen the batter.
- OVER-TORCHED chocolate? Scrape off the burnt bits and add a pinch of extra butter for shine.
- GHOSTS look droopy? Chill the whipped cream a little longer before piping.
Quick Kitchen Fixes for Spooky Success
- When ghosts deflate, splash a tiny bit of milk on top and re-whip briefly.
- Patch cracked ghosts with a dab of whipped cream and smooth with a toothpick.
- Shield delicate whipped cream with a light dusting of cocoa powder for a spooky shimmer.
- If cream isn’t stiff enough, add a pinch of sugar and whip again—shiny and firm.
- When chocolate chips aren’t sticking, gently press them into the whipped cream ghosts with a damp finger.
Decorating these brownies is half the fun, and the messy, imperfect ghosts often turn out the most charming. The smell of melted chocolate mingling with vanilla and whipped cream is pure October comfort. These little ghosts aren’t just treats—they’re tiny, edible pieces of Halloween mischief that keep the season alive a little longer in the kitchen.
Ghostly Brownies
Equipment
- 8x8 or 9x9 baking pan
- Silicone spatula
- Double boiler or microwave-safe bowl
- Hand mixer (or whisk)
- Plastic piping bag or zip-top bag with a corner snipped
- Small spoon
Ingredients
- 200 g dark chocolate high-quality preferred
- 115 g unsalted butter
- 200 g granulated sugar
- 3 large eggs
- 60 g all-purpose flour
- 240 ml heavy cream for whipping
- 1 tsp vanilla extract
- 100 g mini chocolate chips for eyes and mouths
Instructions
- Preheat your oven to 175°C (350°F) and line your baking pan with parchment paper, ensuring it's ready for the batter.
- In a heatproof bowl, melt the dark chocolate and butter together over simmering water or in short bursts in the microwave, stirring until smooth and glossy—your kitchen will fill with a rich cocoa aroma.
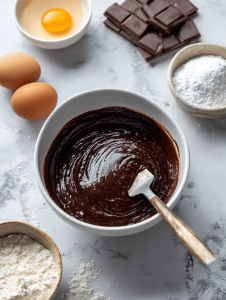
- Stir in the sugar, then add eggs one at a time, mixing well after each addition until the mixture is shiny and smooth—watch for a glossy texture.
- Gently fold in the flour just until combined, maintaining a thick, shiny batter that resembles melted chocolate pudding.
- Pour the batter into your prepared pan and spread evenly with a spatula. Bake for 20–25 minutes until the edges look set but the center is slightly jiggly—your kitchen will smell irresistibly chocolaty.
- Remove from the oven and let it cool in the pan for about 10 minutes, then transfer to a wire rack to cool completely—this helps the brownies set properly.
- While the brownies cool, whip the heavy cream with vanilla using a mixer until stiff peaks form—that’s your whipped cream for the ghosts.
- Fill a piping bag or a small zip-top bag with the whipped cream and pipe ghost shapes—heads, arms, and bodies—on top of the cooled brownies for a spooky effect.
- Use mini chocolate chips to create tiny eyes and mouths on each ghost for expressive faces—press them gently into the whipped cream.
- Chill the decorated brownies for about 15 minutes to help the whipped cream ghosts set and hold their shape.
- Serve these playful, fudgy brownies with your favorite fall drinks and enjoy the delightful combination of rich chocolate and spooky fun!


