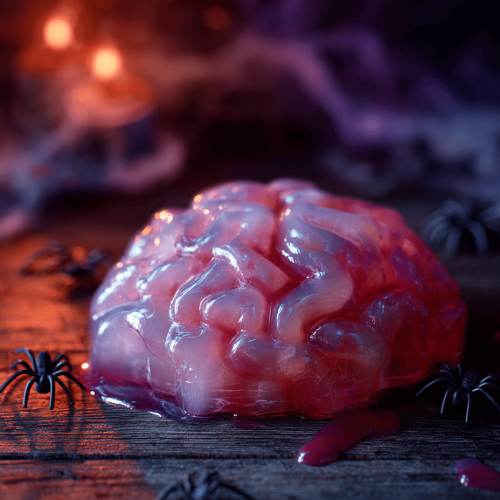
Why I Love Making This Grossly Fun Dessert
There’s something oddly satisfying about turning a simple gelatin into a grotesque, brain-like mass. Maybe it’s the childhood thrill of playing with fake guts, but making this mold always brings a little chaos to the kitchen. It’s a messy, sticky project that somehow ends up delighting everyone at the table.
Plus, it’s a perfect way to get creative with textures and colors without fuss. I love how the gooey, translucent look makes it feel alive—like something out of a mad scientist’s lab. It’s a weird, nostalgic treat that’s guaranteed to turn heads and spark giggles, even from the most serious guests.
What I Love About the Ingredients — And Why They Matter
- Unflavored Gelatin: I prefer the plain stuff—it dissolves smoothly and lets the spooky color show through. Swap for agar-agar if you want a vegan twist, but it’s a different set-up process.
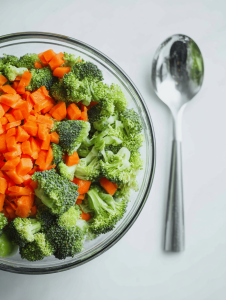
- Red Fruit Juice: Bright, tart, and a little sweet—think cherry or cranberry. Use grape juice for a darker, more sinister look, or pomegranate for that smoky, ruby hue.
- Blueberry or Black Currant Juice: Adds depth and a cool, eerie tint. If you don’t have these, black food coloring works but loses that natural vibe.
- Vegetable Glycerin: I add just a splash for that oozy, slightly glossy finish. Skip if you prefer a matte, less slick appearance.
- Food Coloring: Use red and blue—don’t shy away from being bold. A few drops make your ‘brain’ pop in the dim light, but start small and build up.
- Optional Edible Glitter: A sprinkle of shimmer can make your brain look slimy and real. Skip if you want a more subdued, gross-out aesthetic.
Step-by-Step Guide to Creating Your Creepy Brain Mold
Equipment & Tools
- Silicone brain mold or silicone cake pan—makes demolding easier and safer.
- Medium saucepan—gentle heat to dissolve gelatin evenly.
- Whisk—helps dissolve gelatin without lumps.
- Measuring cups and spoons—accuracy matters for the right jiggle.
- Dropper or small spoon—used for layering or adding details.
- Plastic wrap—keeps the mold clean if you want to chill it beforehand.
Steps
- Start by blooming your gelatin: sprinkle 2 tbsp over 1 cup cold water, let sit 5 minutes until spongy.
- Heat the juice mixture in the saucepan over low heat (around 70°C/160°F). No boiling—just warm and fragrant.
- Add the bloomed gelatin: stir constantly until completely dissolved, about 2-3 minutes. The mixture should be clear and slightly thickened.
- Pour in a few drops of food coloring—test with a toothpick for intensity. Remember, a little goes a long way.
- Optional: stir in glycerin and glitter for that slimy, shimmering look.
- Pour into the mold—fill slowly to avoid air bubbles. Gently tap the mold on the counter to settle the gel.
- Let it cool at room temp for 15 minutes, then transfer to the fridge. Chill for 4 hours or until fully set.
- Check for doneness: it should jiggle like a real brain, with a slight crackle when tapped.
- To unmold, dip the mold briefly in warm water (not hot), then invert onto a plate. Handle gently, it’s delicate.
Mistakes and Fixes to Keep Your Brain Perfectly Gory
- FORGOT to bloom gelatin: Dissolve it in warm water first, or it won’t set properly.
- DUMPED too much food coloring: Result is overly dark or muddy; start with a drop and add more.
- OVER-TORCHED the mixture: It becomes thick and rubbery; keep heat low and stir constantly.
- FAILED to chill long enough: Your mold won’t set; give it at least 4 hours or overnight.
Quick Fixes for Kitchen Nightmares
- When your gelatin is too runny, add a pinch more bloomed gelatin and reheat gently.
- Splashed juice outside the mold? Use a damp cloth to clean the edges before un-molding.
- When the mold sticks, dip briefly in warm water—then carefully wiggle free.
- Got uneven color? Mix your dyes thoroughly before pouring, or layer with a dropper.
- Feeling overwhelmed? Chill the mixture longer or use a smaller mold for quick results.
Making this Halloween Brain Jello is a wild ride—messy, fun, and oddly satisfying. It’s not just about the creepy look, but the tactile pleasure of shaping something so gross yet edible. Sometimes, these goofy projects turn into the highlight of a party or a good story around the table.
Besides, in a season full of pumpkins and candy, this odd, slimy creation offers a break from the sweetness. It’s a reminder that sometimes, the best treats come with a little chaos and a lot of laughs. No matter how you slice it, this brain mold is a strange, delicious way to celebrate the spooky season.
Grossly Fun Brain Mold
Equipment
- Silicone brain mold or silicone cake pan
- Medium saucepan
- Whisk
- Measuring cups and spoons
- Dropper or small spoon
- Plastic wrap
Ingredients
- 2 tablespoons unflavored gelatin sprinkled over cold water to bloom
- 1 cup cold water for blooming gelatin
- 1 cup red fruit juice cherry, cranberry, or pomegranate
- 1 cup blueberry or black currant juice adds eerie tint
- 1 teaspoon vegetable glycerin optional, for glossy finish
- few drops food coloring red and blue
- optional edible glitter for slime effect
Instructions
- Sprinkle the unflavored gelatin over the cold water in a small bowl and let it sit for 5 minutes until it becomes spongy and bloomed.
- Heat the red and blueberry juices in a saucepan over low heat until warm and fragrant, avoiding boiling. Once the mixture is steaming, remove from heat.
- Add the bloomed gelatin to the warm juice mixture, stirring constantly until fully dissolved and the mixture is clear and slightly thickened. This takes about 2-3 minutes.
- Drop a few drops of food coloring into the mixture, testing with a toothpick until you reach the desired intensity. Remember, less is more at this stage.
- If using, stir in a splash of vegetable glycerin and a sprinkle of edible glitter to add a slimy, shimmering effect.
- Pour the mixture slowly into your silicone mold, filling it carefully to avoid air bubbles. Gently tap the mold on the counter to settle the liquid evenly.
- Let the mold sit at room temperature for 15 minutes, then transfer it to the fridge to chill for at least 4 hours, or until the gelatin is fully set and jiggles like a brain.
- Once set, dip the mold briefly in warm water to loosen the edges, then carefully invert it onto a plate. Handle gently to maintain the shape.
- Your grossly fun brain mold is ready to serve! Slice or display whole for a creepy, gelatinous centerpiece that’s sure to delight and gross out your guests.


