Skip to content

Starting back up the “Truth & Evidences” Series

Well, our timeline has definitely been a little different in Boston than I had expected, but I did mention wanting to start back up the Truth & Evidences series during October … and, hey, there are a couple hours left. :)

Since its been a couple months since I took a break from the series during the craziness of moving, this post will just be a recap, and then I’ll plan to continue this series every other Wednesday, Lord willing, as we were doing earlier.

The topic of this series of posts is a discussion of whether there is actual or absolute truth in religion, is there only one truth, or whether everything is just relative? Does faith need evidence? If there is truth, what is it? Is there actually a God? If so, how can we know who he is?

Here is what we have discussed in the posts from the series so far.
The first few posts were on whether there is absolute truth or not, and the role of faith:

1. Truth: Is it just a matter of faith?

2. Is there absolute truth?

3. Are some things false?

And the next posts were on some evidences to support faith in the existence of a deity:

4. Every Effect Has a Cause

5. The Problem of Nothing

6. Design Requires a Designer

7. The First Life

8. Macro-Evolution vs. Micro-Evolution

… and we’ll be continuing on evidences for the existence of deity, and then moving into the question of even if we accept that SOME deity exists, how can we know anything more specifically about that deity? I hope you’ll join me for the series, and as always, feel free to comment or contact me privately, as you wish. :)

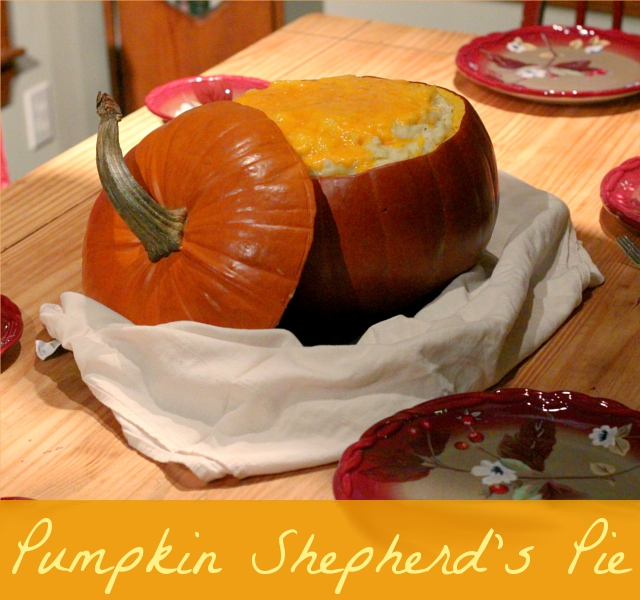
Put it in a pumpkin! Shepherd’s Pie

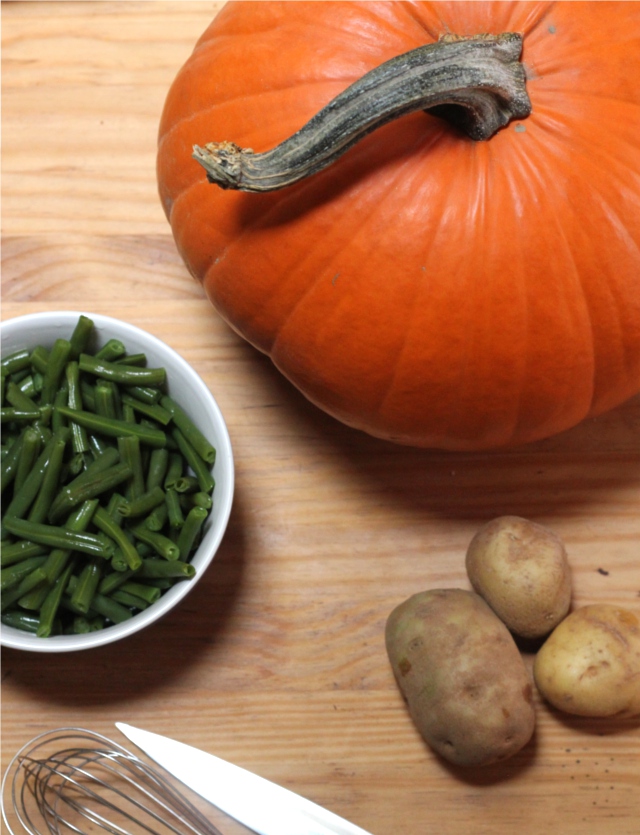
I decided to make shepherd’s pie recently for our family and some friends – and one of my friends suggested putting it in a pumpkin! Apparently this is something that others I know have done, but I had never heard of it. But, you know me, if it’s unusual and quirky and delicious sounding, I’m up for it!

You can use whatever shepherd’s pie recipe you like (I tend to cook off-the-cuff, not measuring or anything – I think I had about 15 spices in mine!) but cooking in a pumpkin called for a little different strategy than a normal shepherd’s pie. Here are some info tidbits and tips for cooking it in a pumpkin:

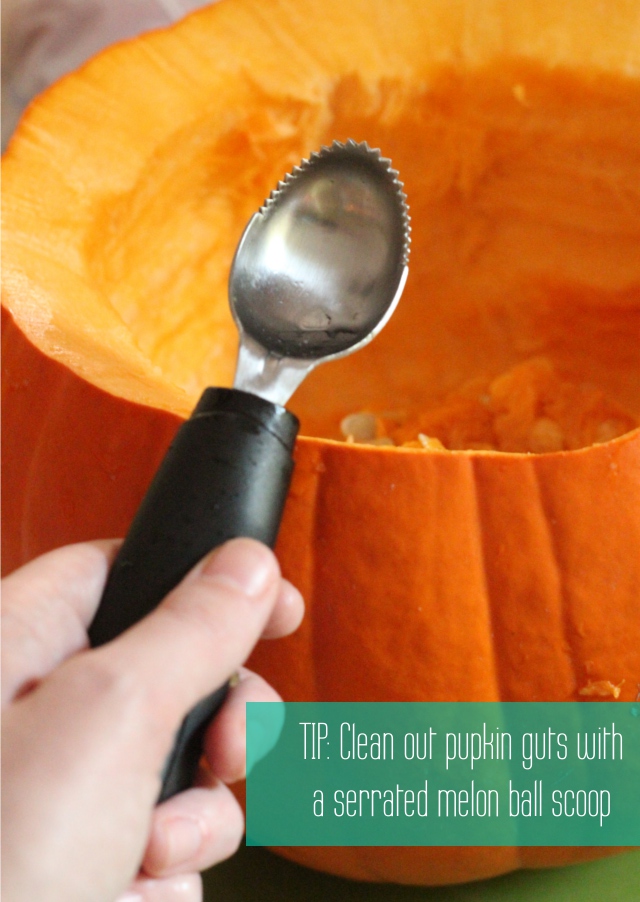
– First cut out the top of the pumpkin, and clean out the guts. I found that a serrated melon ball scoop worked GREAT for this.

– Don’t cook it with the lid on top. I tried first cooking the pumpkin alone (unfilled) and leaving the lid on the pumpkin. After baking it at 400F for about half an hour, with a little water inside to steam it, I took it out to check on it – and the water inside was cold. So I took the lid off, and baked it for about another half hour at 450F with much better results.

– Once the pumpkin is started to be little more cooked (though not completely soft), use a fork to “fluff” up the sides of the pumpkin. You’ll get an effect similar to spaghetti squash. Do this all around the pumpkin so that pumpkin will be able to mix into the shepherd’s pie – but leave enough of the wall intact for the pumpkin to still be sturdy.

– Pour in the base of the shepherd’s pie mixture (I recommend having it a little more heavily seasoned than usual to balance with the pumpkin), and then top with mashed potatoes. Put back in the oven – if you have time to cook it longer at a lower temperature, the flavor will be better. Or if not, it will still be good, but the leftovers the next day will be better than the first meal, because it will have more time to meld together. Put cheese on top of the potatoes a few minutes before it comes out of the oven.

-Consume! Preferably with friends – it takes a lot of shepherd’s pie to fill a pumpkin, so it is a good autumnal meal when you have a lot of mouths to feed.

After doing this meal, it definitely made me curious to try cooking more foods in edible “bowls”. Have you ever done this? Or have any other ideas? Share them below! :)

Double Critique Week!

Well, after an unintentional week off, I’m back up and running for the Creative Business Challenge. :) Last week we talked about product photos and descriptions. I wanted to talk about the two of them together, because in a sense they are doing something similar – providing information about your product in a way that appeals to your target market. However, it is just a lot to cover in one post, so we’re still on that topic for this week, looking more at practical ways to put it into action by doing two shop critiques.

If you missed last week’s post, you might want to go back and check it out, here. It covers a lot of the general concepts of product photography and descriptions that we’ll be talking about putting into practice in this post. And while the tips today are directed at two shops in particular, my hope is that it will be helpful and applicable for others as well. One is a handmade shop, and one is a vintage shop, so it should cover a variety of topics.

Well, let’s jump in!

The first shop we’re going to look at is Julia’s Fit, run by mother/daughter duo Julietta and Mariya. Here is the question they asked:

One or two particular areas I would like to learn how to improve in my biz are: Photos and stories. Photos are our number one weakness. Since we both have full-time jobs, we try to experiment on weekends, but that’s not barely enough time. Goal #1 is to improve our photography by far.
Stories are another things that we need to work on. Every item has a story that needs to be told. We are looking to find an approach that works for us and doesn’t make us feel like we’re “bragging” when we describe our items. We think that by improving these two sides of the business, advertising won’t be that much of a problem than it is now.

Great questions! Let’s take a look at their shop…
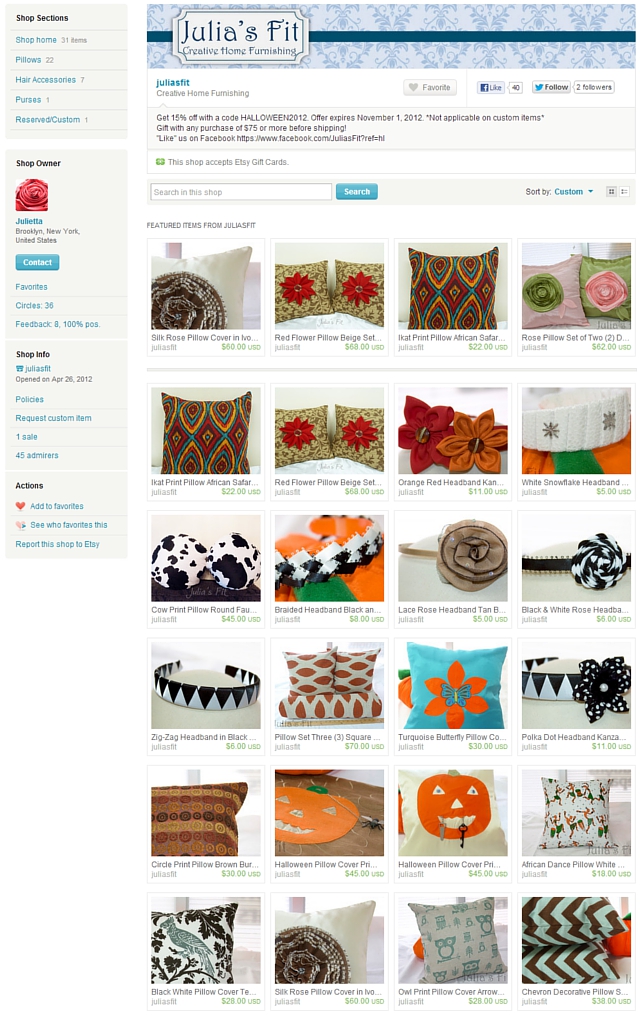
First, some things they are doing well…

– Photography lighting: I know you said you only have the weekends to work on photos, but it looks to me like you’ve got the lighting part of it figured out really well! Your photos are bright, clear and well-lit without getting any glare or reflection. This is an interesting photography critique, because as far as the technical side of getting a nice photo (things like lighting, crispness, focus, white balance, etc.), it looks like you already have a good handle on that. It will be more in the side of styling and such that improvements can be made. But as far as the technical side of taking the photos, you’re doing a great job.

– Profile: It is always good to have your profile page filled out so people can learn more about the artist(s) behind the shop, and they’ve done a nice job of giving info about themselves in a friendly way, yet keeping it succinct.

Things that are good, but could be better…

-Tags and titles: They’re doing a great job of using all 14 tags (all Etsy shop owners should do this! The tags are one of the ways that people find you in the searches, so make sure you’re using all 14 slots for tags). However, both the tags and the titles could be used even more effectively. Etsy now allows phrases in your tags, so use that to your benefit. Instead of just “blue” you can put “navy blue” or “blue pillow” or, even better, “navy blue pillow”. Just make sure the words actually do flow in an accurate phrase (like “navy blue pillow”) as opposed to just a list of words that don’t make a related phrase (like “pillow cushion soft”). Right now though, most of your tags look like they are just one word. If someone searches “blue pillow”, listings with “blue pillow” with respond better than if they are only tagged separately with “blue” and “pillow”. So think of phrases that people might search for your items, and be sure to include them in your tags and titles.

Things that can be improved….

-Shop cohesion: I think it would be good for you to do some brainstorming about your target market. What is your shop about, and what type of person shops there? I see you have home decor pillows, and that you mentioned in your profile that also do duvet covers and such, but then there are also head bands and bows. And among the pillows there are some pillows that would be at home in a trendy urban apartment, where as some would be more at home in a cute setting with kids, while others look more traditional (as shown in the photo below). Now, I am by no means saying that variety is a bad thing! I’d just recommend deciding what direction to go, and choosing variety within that direction. If you want to keep the hair bows and more fun kid type pillows, you could find a way to tie that together. Or, if you want to be a home decor shop, you could find a way to tie together different styles of pillows. But at the moment I think it is hard for a visitor to know whether your shop is the place for them – whether they are shopping in a upscale home decor shop, or a cute and fun family shop, etc. Neither is necessarily better than the other (although the price you need to get for your items may affect the decision), it’s more just an issue of cohesion so that when your target market comes into your shop, they say “Oh, yes, this is the place I would want to buy ____.”
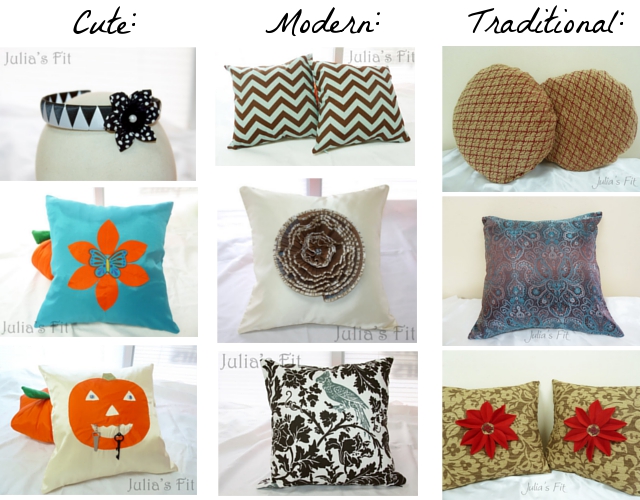
– Photography styling: Once you have a sense for which direction you want to go, choose one or maybe two ways that look good with that style, and use that same setting to photograph all your products to keep cohesion. Personally, I think you have a GREAT thing going with this setting:
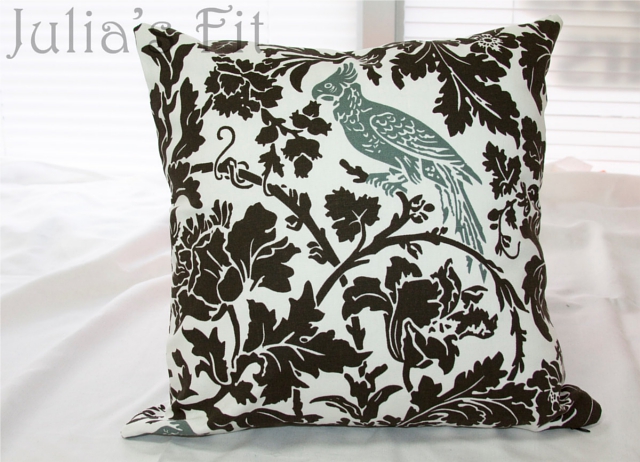
I think this setting is excellent because the white sheets and white window in the background are just enough to give the pillow a current and homey atmosphere – but without distracting from the pillow itself. I would reshoot all your pillows in this setting, but I would personally recommend the following changes:
– remove the watermark. It distracts, and with this type of item, the chances of someone stealing your photo and passing it off as their own is fairly slim. Or, if you’re just not comfortable without a watermark, I’d move it somewhere much less obvious. Besides distracting a customer in the photos, having a watermark can make it harder to get on the front page, on blogs, etc., etc.
– the way you are currently cropping the photo in thumbnail view to where it is just a corner of the pillow can make it hard to tell what the photo is of … I would recommend showing at least 3 if not all 4 sides of the pillow instead of just 2 so that it is clear what it is when people see the photo in their search results.
– maybe play around with photographing the pillows at an angle in addition to straight on?

– Descriptions: I know you mentioned that this is a troublesome spot for you. Let’s look at the description for these pillows:
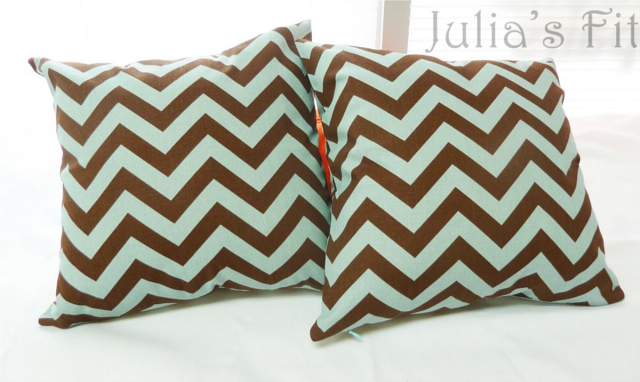
Here’s a pair of pillow covers in a very popular chevron print. Designer is Premier Prints. This is lovely color scheme of brown and light blue aqua. Very versatile print, would go great with any type of home decor or space. Invisible Zipper is located on the bottom, and blends in with the aqua stripes perfectly. The fabric is a 100% thick cotton. Size about 17” by 17”. Inserts not included.

Thanks and Happy shopping!
********************************
P.S.: International buyers, please be advised that all customs fees are completely out of my control. Check with your local post office for details on customs fees in your area.

I think the first paragraph of the description would be alright if this was a catalog or mass produced item. You cover a lot of the basics – size, color, whether the insert is included, etc. However, this is a handmade item by you. Think about the question, “Why should someone buy a handmade pillow cover from me instead of a pillow cover from a big store?” The description needs to reflect the answer to that. And I think that you might have an easier time explaining that once you’ve figured out the direction for your shop. Those of us who sell on Etsy basically have specialty shops. If you have a good field of your specialty and who it is that would be interested in it, I think it becomes easier to tell your “story”. Just to illustrate, I’m going to imagine I’m you, that I made these pillows, and that I’m going to have the shop specialize in the modern styles of pillow…

After a busy day in the city, it is so nice to curl up on the couch with a hot cup of coffee and a cozy pillow. I made this set of modern brown and aqua chevron pillow covers to keep your apartment both cozy and stylish. Slip them onto pillow inserts and toss on the couch for an instant lift to the room. Lovingly handmade of thick 100% cotton with a hidden zipper, it will hold up well to the tumultuous life of a throw pillow (squeezes, cuddles, pillow fights, and being cried on during chick flicks).

Not that this is necessarily what you would have in your description, but I just wanted to demonstrate that having a particular feeling to your shop and a certain demographic in mind can make description writing a lot easier.

After an opening paragraph to give some personality, I would recommend bullet point lists of details so that people can easily find more info. I gave an outline last week for a user friendly way to write descriptions that you might find helpful. Also think about what details should be included. I see you have that section about international customs at the end, and I think it comes across as a little intimidating. It is certainly all true, but I’d recommend making it a little friendlier. Instead of saying it is out of your control, just state that it is their responsibility. Some other questions that customers will be wondering that should be answered in the description – how long after purchasing the item will it be shipped? it is machine washable? how will it be packaged? etc.

So here is an imaginary example of what the whole thing might look like, based on the outline from last week…

After a busy day in the city, it is so nice to curl up on the couch with a hot cup of coffee and a cozy pillow. I made this set of modern brown and aqua chevron pillow covers to keep your apartment both cozy and stylish. Slip them onto pillow inserts and toss on the couch for an instant lift to the room. Lovingly handmade of thick 100% cotton with a hidden zipper, it will hold up well to the tumultuous life of a throw pillow (squeezes, cuddles, pillow fights, and being cried on during chick flicks).

— Details —
These handmade pillow covers:
∙ measure 17 x 17 inches.
∙ are made with Premier Prints fabric.
∙ are 100% cotton.
∙ are machine washable.
∙ do not come with pillow inserts.
∙ open with an invisible zipper.

— Shipping —
This item ships within 3 business days of payment, and is carefully packaged in a poly sleeve.
International buyers are responsible for any customs fees that may apply in their own countries.

— Want more? —
Interested in something a little different?
Browse my shop for additional modern styles of home decor: http://www.etsy.com/shop/juliasfit
Or click the contact link below if you are interested in a custom order!

I love your pillows (especially that bird one – SO cute!) and I think once you hone in on your target market and if you approach descriptions more from the point of view of getting the reader to imagine using and recognizing the quality of the pillow, rather than feeling like you have to say “this is amazing!”, that might help about feeling like “bragging”.

Well, I hope that these tips have been helpful! Let’s go on to shop number two …

Shop number two for a critique is The Little Red Owl, which is a vintage shop run by Amy. Here were her questions…

one or two particular areas i would like to learn how to improve in my biz are: i have just opened my shop recently and i would love to learn how to better reach my target audience and how to properly price my items. i am also new to facebook (i have a page for my business only) and i would love to get a better handle on that as well. thx! love the blog!

Alright! Let’s take a look at her shop…
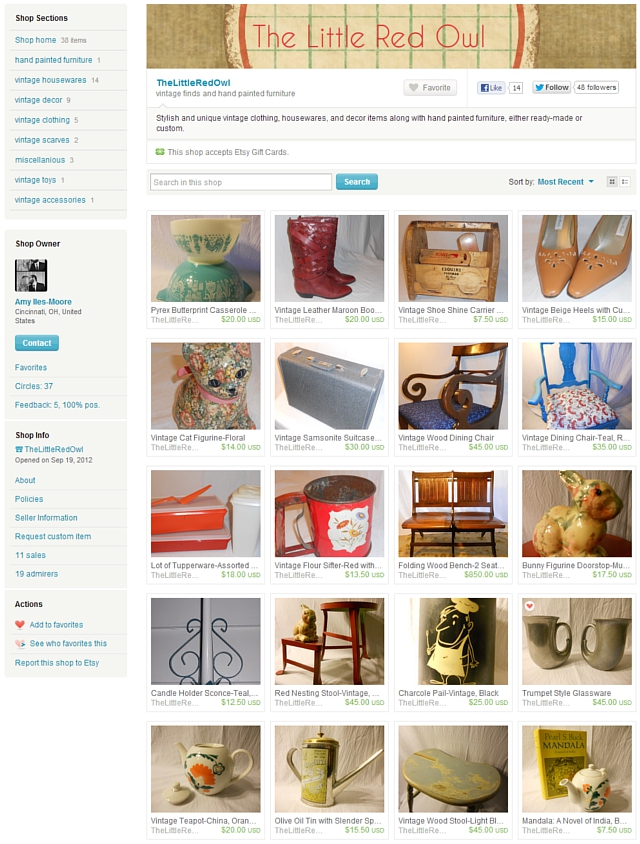
First let’s take a look at some things she is doing well…

– Number of listings: Having about 2 pages of items is a great number to start out a shop with – its enough listings to have an established looking shop, and have a fair amount of variety for shoppers to look through. As you find what types of items sell well and such, then, you can continue to build. But you’re at a great number of listings for such a new shop!

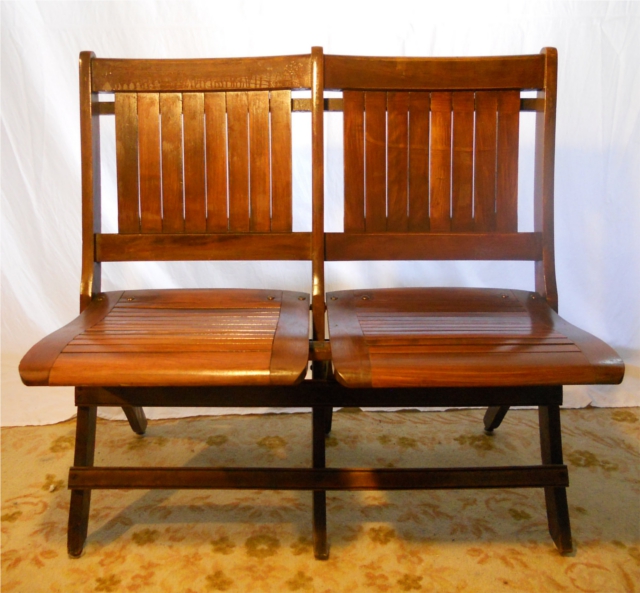
– Variety of price points: It is tremendously helpful to have items at a variety of price points in your shop. Big ticket items, like the chairs below, don’t move too fast but the whole time they are in your shop they tend to bring in more traffic. But then you also have smaller ticket items that can have a quicker turnover with that traffic. Personally, your prices look very appropriate to me, too, as someone who used to sell vintage.
– Banner and avatar: I absolutely love the feeling evoked by your banner and avatar. It gives a great vibe for the style you’re going for right away when people see your shop, and having a picture of yourself in your avatar is a big plus, because people love to see the owner behind the shop, so nice job on those!

Things that are good but could be improved:

-Profile: I see you have your profile filled out, which is good, but it seems to be outdated. You mention wanting to open an Etsy shop, and it is now open. You also mention that you want to blog, and give a link – I would recommend perhaps removing that, and then adding in the link and info for your blog once you start doing it. I do see you have your About page filled out nicely, though, which is great!

– Facebook: We’ll be looking more at marketing and such next week – but I did look up your page on Facebook. It’s great that you have a Facebook page, that can be very helpful in marketing! However a few things I noticed that could be improved:
– your cover photo is stretched. I’d recommend creating a new photo that would fit better in the space.
– post on your business page about once a day. More than that, and people will start to “hide” your posts. I’d recommend un-linking it from Twitter and such to keep from overwhelming your followers.
– Keep your posts relevant to your business. Try sitting down and really brainstorming who your target market is, and think about what things are helpful to them. For instance, if you find a blog post that talks about caring for vintage items, that would be a perfect kind of thing to share. Or post pictures of behind the scenes work at your place getting items ready for your shop, etc. But try to keep it relevant – people “like” your page to follow The Little Red Owl, so give them updates that are related to their interest in that.

Things to be worked on:

-Photography Logistics: It looks like you are using indoor lighting and/or flash in your photos. I would highly recommend using diffused natural lighting instead. You could shoot outside in the shade, or inside near a well-lit window. Indoor lights creates unflattering lighting, sometimes distorted colors, and a flash creates glare on the items. Also, make sure your photos are fully in focus and non-blurry, that you can see the whole item in the first photo (especially for unique vintage items where people might not be able to guess what it is from a close-up), that it is not washed out, and that the white balance is properly adjusted.

-Photography setting: When you have a shop with a lot of variety, as vintage shop tend to do, it can be difficult to keep a cohesive shop. A cohesive shop is very valuable in appealing to a certain target market. I get the impression that your target market has an appreciation for quirky meets classic. I think that having one fairly simple background that has just a little bit of quirk without being distracting, and shooting every item in that same place, and at the same angle would be helpful to make your shop recognizable, branded, and cohesive. I kind of like the photo with the white background, but kind of teal colored base for the item to sit on … especially if you were to shoot the photo head on rather than at a downward angle so that the color was more below than behind the item. You could maybe even get away with using some of the red pattern you are currently using in some of your photos, but use it as a base instead of a background, so that the color or pattern is just below rather than behind the item. Enough to make it quirky and unique, but not enough to distract. Here is the photo I am talking about:
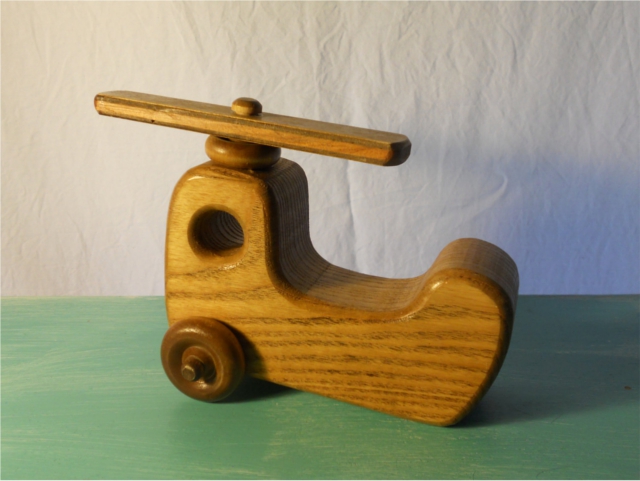
Play around with different backgrounds, and find something that you can use pretty much across the board (at least on all the small items, and then maybe one different but similar setting for all the larger items/clothing), and shoot all the items in that same setting. White is good, but if you use a sheet, make sure it is not wrinkled, as that can be distracting and also looks unprofessional.

I definitely love your vintage finds! I think I am someone in your target market. :)

I hope these tips have been helpful both for the shop owners above, as well as other Etsy shop owners!
If you have any thoughts or comments, please leave them below!

Photos & Descriptions: Your product in its best light

Well, we are on to week 4 in the Creative Biz challenge! This week we are going to be looking at a couple of topics that came up a LOT in the post where you all posted your creative biz questions: photography and descriptions. A few things have to be in place before really honing those two, though – you have to have a great product, know who your target market is, and be pricing to actually make a profit. Those points are what we have talked about in previous weeks, so now we’re moving on to product photos and product descriptions.

In both of these two topics remember this: you’re trying to use this medium to convey the essence of your brand in a way that is effective to your target market.

First off, let’s jump into photography. Here are 7 tips (and if you followed my blog design series, you’ll recognize a certain amount of overlap)

1: Excellent lighting makes more of a difference than an excellent camera
Your product photography isn’t going to be printed and hung on walls as art. Its primary purpose will be fulfilled in a relatively small online image. You don’t need a fancy camera with a huge number of megapixels. I took my product photos with an old point and click for a long time. Excellent lighting, though, makes a HUGE difference. Avoid using a flash at all costs. Use natural light – but not direct sunlight. Great places to find diffused natural light are near a window, or outside in the shade.

2: The garnish should not be larger than the food
Props/backgrounds/settings can really set the stage for your photos. But just like a beautiful plate of food, the garnish can help make it more appealing but shouldn’t overwhelm or distract from the main dish. Remember, props and backgrounds should be enhancing the visual appeal of your product, not distracting away from your product.

3: White space is your friend
This doesn’t mean you necessarily have to have a completely white background, but leaving some white or simple areas for the eye to “rest” can help your items really pop – as opposed to everywhere being busy or cluttered. You can also get the same effect by having the product in focus, and the background out of focus.

4: Do your own thing
Your shop photography is an excellent opportunity to convey your own signature branding and shop aesthetic. Don’t just base your photos on someone else’s photos; think about how you can portray your own unique style in your photos. This doesn’t mean you have to reinvent the wheel, though. For instance, there are plenty of shops modelling vintage clothing against a white background, and you can do that too .. but if your model is always wearing a bowler hat, that’s going to be unique and identifiable.

5: Limit your photography choices
It’s a good idea to not have a completely different background/style/setting in each and every setting. For instance, if you’re selling earrings, if one photo is of them hanging on a tea cup, one photo on a chalkboard background, one photo on red fabric, one photo on a model, one photo on sand, one photo on wood, etc., etc. – it’s going to be distracting and make your shop less cohesive. Not every background has to be the same, of course, but if you limit to just a few that convey the same style and use them repeatedly in your shop, it will help to convey your branding and style. This also really helps to keep cohesion when you have different types of products in your shop.

6: You aren’t trying to appeal to everyone
Focus on appealing to your target market with your photography. If your target market is stay-at-home mothers, don’t worry whether urban hip-hop teens are going to love your product photos. If you target market is 20-something guys who are into geekery, don’t worry if your product photos aren’t appealing to 40-something fashionistas. As a small handmade business your goal is appeal to a niche market, not to appeal to absolutely everyone.

7: Your photography should always reflect your branding statement
I recommend having a “branding statement” – a short phrase the encapsulates the style and message you want to convey through your shop. I made a free printable to help develop a branding statement – it was originally meant for blog branding, but much of it applies to shops as well: www.theflourishingabode.com/2012/07/diy-blog-design.html All aspects of your shop should convey your branding – your listings, your photos, your packaging, etc. I find this is easiest when you can actually state your branding in a single statement.

Now let’s talk a little about descriptions…

Writing descriptions can be a challenge, because there are a few different goals you want to accomplish with a description and they don’t necessarily always want to play nicely together. Such as…
– appealing to your target market
– including all the necessary details to compensate for the fact the viewer can’t examine it in person
– using keywords to boost your SEO
– conveying the unique value of your product
– communicating that you have other related items if this one if not quite what the viewer is wanting
– being succinct and easy to read

Online attention span is generally fairly short. Because there is so much information to convey in your description, I used to write reeeeeeeally long wordy paragraphs in mine. But when someone scrolled down from the photo to find huge chunks of text, it actually had the opposite effect of what I was wanting: if it felt like too much to read, the easiest response was to just leave the page.

I have since found the best friend of description writing: bulleted lists.

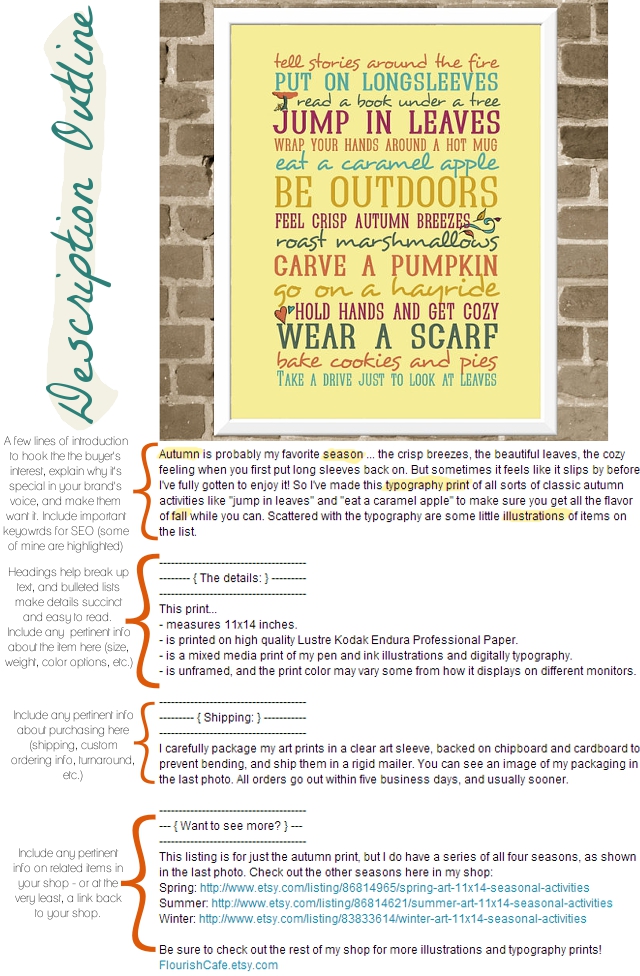
Of course, there a number of ways you can do an effective product description, but here’s a general outline that I use on my listings (such as the one below) and I hope you will find helpful:

For some more tips on writing item descriptions, you can check out this helpful article on Etsy’s Seller Handbook Blog.

The critique this week is for Elizabeth Hong, owner of Hyperbole Hong. Here is what she posted in the critique request thread about today’s topic:

How can I make my items (through descriptions, photos, etc.) appealing to more people without losing my personality in the mix, or is sterilization a good thing

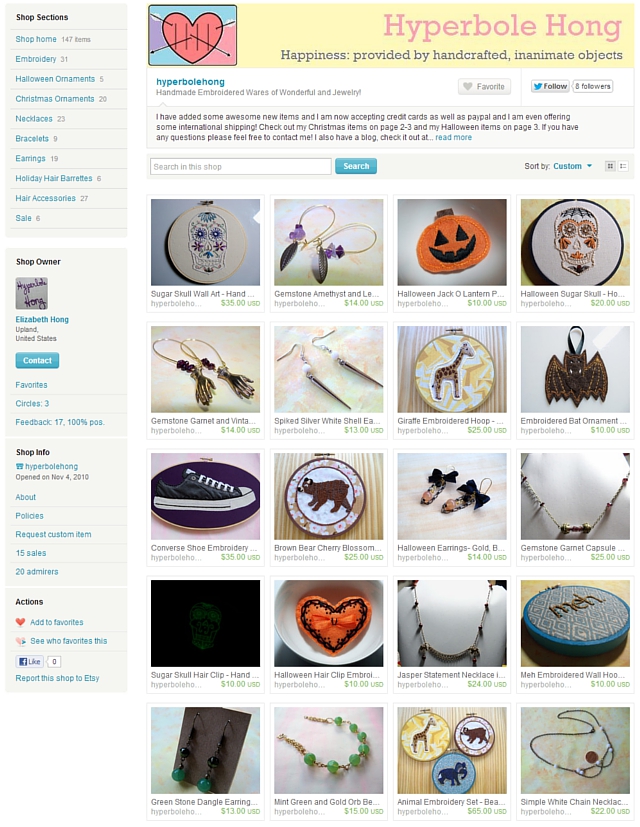
Thanks for the question!! Let’s take a look at her shop:

First of all, let’s take a look at some things she is doing well…

– Profile and About page: People like to learn about the person behind a handmade business, and Etsy recently gave a unique opportunity to provide this with the “About” page, where you can put up behind the scenes pictures of your process, information about you as an artist and more. Elizabeth has both her her profile and her about page filled out nicely, with interesting info and photos to give people a look into her creative process.

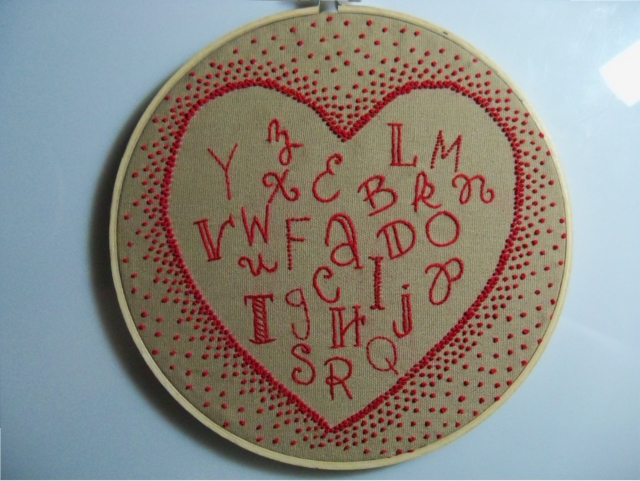
– Craftmanship: her items are look to be very well made. The embroidery in particular jumps out at me .. I’ve tried embroidery and mine never looks so good! :) Her eye for detail is clear in her work, such as the piece below.

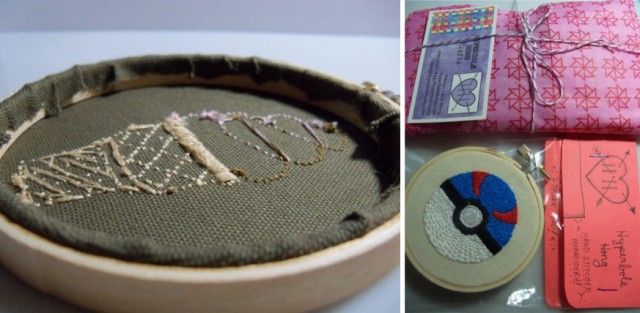
– Secondary photographs: she is doing a great job of giving great visual information in the additional photo spots. Etsy lets you put up a total of 5 photos, so it is in your best interest to use all 5, and let each photo give new information. Since the viewers can’t pick up and turn over the item in their hands, use the photo spots to show them as much about the product visually as possible. For instance, she shows the backs of her embroidery, how she packages her items, and other great info in her additional photos.

Now we’ll move on to some things to improve:

– Finding the common thread: I know she mentioned “appealing to more people”, but really the goal isn’t to appeal to a wider audience, but rather to appeal more strongly to a narrow market. I love the eclectic-ness of her shop – from earrings with bows, to geekery inspired decor, to an embroidery piece based on a dress from Singing in the Rain. However, finding a common thread to the shop would be good, and how it ties together in appealing to her target market. She mentioned sterilization, and that is certainly not what I’m talking about – in fact it is the opposite, because the goal is to appeal just to her target market, not to absolutely everyone. I think it would be good to come up with some kind of phrase as far as what the shop is ABOUT and WHO it is that would be shopping there. For instance, the target market for the more formal looking necklaces is probably quite different to the target market for the Pokemon embroidery. (And side note here for Elizabeth – perhaps you have taken care of licencing and such for trademark names and such that you are using, but I wanted to throw this word of caution in here in case you haven’t … things like “X-box”, “pokemon”, “Nintendo”, etc. need to really be looked into as far as the legal side of things and whether you can use them. I know I get lots of requests for custom pieces in my shop that incorporate modern quotes that I simply can’t use due to copyright issues. So that is just a word of caution for you to be careful about the legal side of things.) But coming up with what the unifying theme of the shop is would be helpful in terms of branding and marketing it most effectively. The branding printable from my blog series might be helpful – it was intentionally designed for branding a blog, but could also be helpful in terms of a shop. You may find that you decide to focus on some items instead of others as a result of your theme.

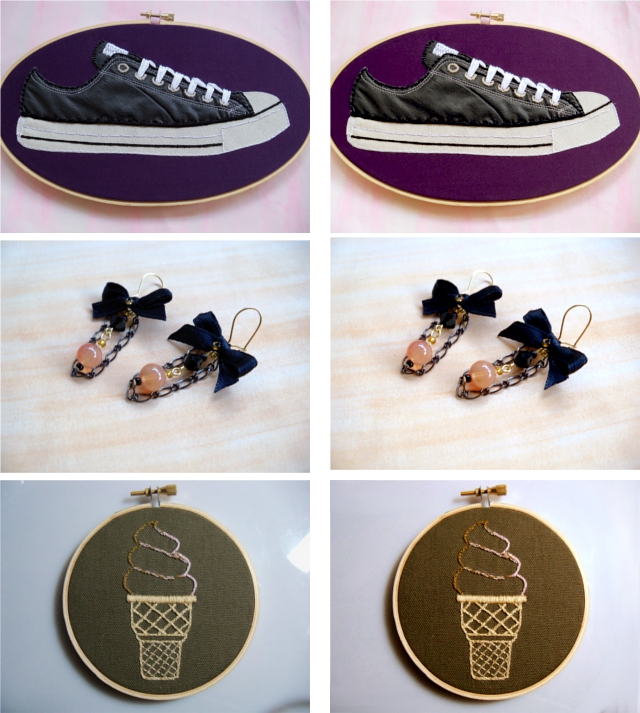
– Unifying your photography style: Once you’ve established the connecting theme of your shop, I’d recommend choosing one photography style to shoot all the different items. When you do have a variety of items, I think photography is a great way to tie them together. Think about your branding theme, and then I’d recommend choosing one or two backgrounds/settings that reflect that without distracting from the items, and use that to shoot them all. And the photography doesn’t have to be “sterilized” – you can put your personality into it! But I’d just recommend limiting the styles. Currently, I see some items in cups, some items on wood, some items on white, some items on a tree, some items on a jewelry form, etc., etc. Narrowing that down will help your shop feel more cohesive. As far as what background to choose … personally, since your items themselves have so much personality, you don’t want to distract TOO much with a competing background. If you use a white background though, you might think about brightening or touching up the color just a little in an image editing program. Here are a few that I think are successful in having a non competing background, and then I’m also showing the result of just a subtle adjustment in a photo editor:

I think these kinds of backgrounds really allow your items to pop – and ever though there is variety in those three items, they flow better with the similar backgrounds. I especially like that on the last two, we can see the entire item, even in thumbnail.

I think backgrounds you might want to avoid are the really bright/deep colored backgrounds (they are fun, but to the point of overwhelming the item itself especially in the thumbnail size image that people see in search results, and the item itself is what you want people to notice and remember) or the hair clips in cups (props should help reflect something about the item – since they were in cups, it looks like they are some kind of tea cozy or herbal sachet or something, to me, and it wasn’t until I started reading that I realized they were hair clips).

– Descriptions: I really like that you are conveying personality in your descriptions, and I think that is an excellent thing to continue. I especially like that you talk in the first person (“I was inspired to make this when..”), as that helps to drive home that these are handmade goods. A couple pointers, though, that might help you to be able to take your descriptions to the next level:
– Be concise but high impact: Keep words and sentences that pack a punch, put them higher in the description, cut out fluffier parts
– Put details in list form
– Have a description format that you use on all listings.

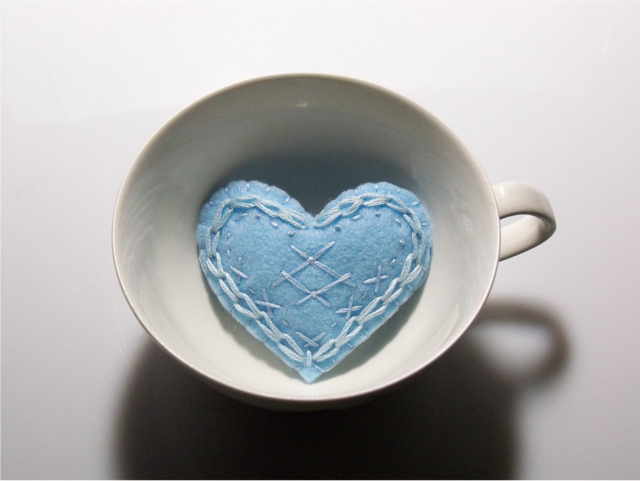
For instance, on this hair clip:

The description you have …

I love cute and unique hair accessories but it’s always so difficult to find something I can get excited about and something that can actually support some hair. That’s why I created this hair clip! I was in a creative rut when I designed these but I had a goal to come up with a hair accessory I could make for myself that would show off some embroidery but not look completely outrageous (well, maybe not completely), and I finally made this. I loved it so much I have made it in every color I have, so if this color isn’t to your liking please check my other listings.
This is a cute and frivolous hand cut light blue felt heart hand embroidered with matching and contrasting embroidery floss then filled with new poly fiber fill and blanket stitched closed. I then hot glue the slightly puffy heart to a metal hair barrette which is then stitched together for an added level of security.

I only use these metal barrettes because I feel they are the only option out there than can securely hold hair without slipping. If you are interested in a set please contact me.
Each item I make is handmade and because of this each one is slightly unique. This item is ready to ship and I usually ship in two days or less.
My embroidered heart hair ornament is approximately 3” x 2” at its widest part.

Everything I make is hand stitched, hand cut and hand assembled by me from my own sketches.

… could become (and I pretty much used words you already wrote, just rearranged)…..

This is a cute and frivolous hand cut light blue felt heart hand embroidered with matching and contrasting embroidery floss. I love hair accessories but it can be difficult to find something cute and unique that that can actually support some hair. That’s why I created this hair clip! The slightly puffy heart is filled with new poly fiber fill and blanket stitched closed, then both glued and stitched to a metal hair barrette for an added level of security.

More details on this sweet heart:
– it measures approximately 3” x 2” at its widest part.
– I use these metal barrettes for the back because they are so effective at actually holding hair.
– This item is ready to ship and I usually ship in two days or less.
– Everything I make is hand stitched, hand cut and hand assembled by me from my own sketches.

Want something a little different?
I love this style of hair clip so much, I made them in a wide variety of colors. Check out the hair clip section of my shop to see the other options: http://www.etsy.com/shop/hyperbolehong?section_id=10455263

That way it makes it easy for a potential customer to take in all the necessary info at a glance, but still conveys your personality – just condensed to the more powerful parts!

I hope this has been helpful for Elizabeth, and others as well! (By the way, Elizabeth, I am totally digging those earrings with black bows!)

Are photos and descriptions something you struggle with? Leave your thoughts and comments below! :)
Tomato Cream Sauce Recipe

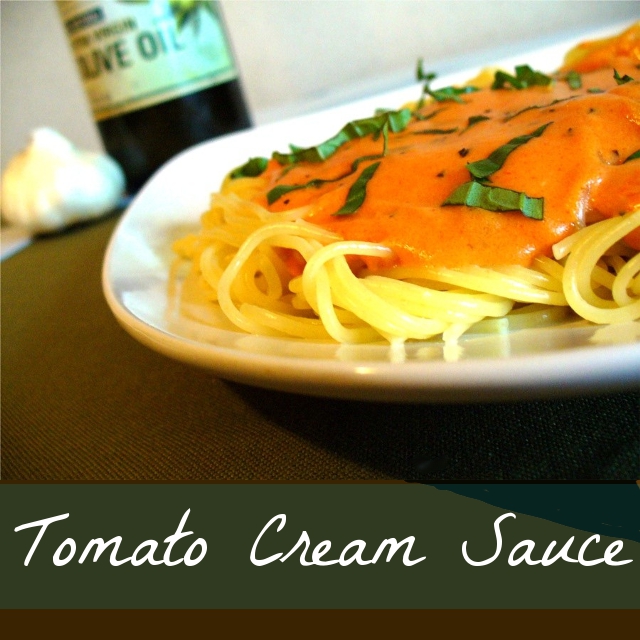
I was at a restaurant a while back and I ordered an omelet – it came with a rich and creamy tomato sauce on top and plenty of fresh basil. I looooved it! The omelet was good too, but the sauce was spectacular, so I went home and experimented to make this recipe to be served on pasta instead – a thick and creamy tomato sauce.

My family loves it, and it is so easy to make! Unlike regular marinara sauce which often needs to cook for a long time to get a good depth of flavor, this sauce develops a rich and full flavor immediately. I hope you’ll enjoy it!

Tomato Cream Sauce

4 Tbsp. Butter
3-4 Cloves Garlic, Finely Minced
5 Tbsp. Flour
2 ½ Cups Half and half
1 Tbsp. Dried Basil
½ Cup Parmesan Cheese
24 oz. Tomato Sauce
Pasta of choice
Fresh Basil and Mozzarella to garnish (optional)

1- Melt butter in a deep skillet over medium heat. Add minced garlic and sauté briefly, taking care not to burn the garlic.
2- Add flour to the butter and whisk together to make a roux. Allow roux to brown just slightly, continuing to whisk.
3- Slowly add in half and half, whisking continually to thicken. Add Parmesan cheese. Mix in basil. Cook and whisk for about 3 minutes.
4- Once the mixture has reached a creamy thickness, add in tomato sauce. Allow to cook at least 5-10 minutes, stirring occasionally.
5- Serve over pasta of your choice (I recommend angel hair pasta!) and garnish with minced fresh basil and mozzarella, if desired.
6- Enjoy! Generously serves 4-6.

This recipe is definitely in my arsenal of quick dinners that can be thrown together at the last minute. And I’m always interested to add more recipes to that category! What do you like to make when you’re running behind on time?

One of the hardest parts of creative biz: Pricing

My apologies that this post is a day late! I usually stay up really late on Thursday nights (or stay up late into Friday morning would be more like it) to put up my Friday post. I must admit that sleep won over this week. Life has been crazy lately. (Although, is life ever NOT crazy and busy? I guess not.)

Anyway! On to this week’s topic for the creative biz challenge, which I think is one of the stickiest:

Pricing. It is hard to figure out how much to charge, especially on handmade items. Pricing feels strange because it is a reflection of how valuable an item is that we have made – and that can feel uncomfortable. I know when I first opened, I felt embarrassed to charge anything more than just the cost of the materials. But it’s even harder for one person to tell another person what they should be charging for their handmade items. Only the artisan know just how much time and effort went into each piece, how much they are relying on the income of the business, as well as other factors. But in the end, you ARE running a business, so you need to get your prices in alignment, or your business won’t be able to stay afloat.

Before moving forward, here is an important question for you: is your shop a hobby or a business? I’ll tell you something I haven’t told you before – at this current time, my online sales and business are our family’s only source of income. It is a short term situation, but even so, it means that my prices HAVE to be profitable. If your shop is just a hobby, and you’re not actually trying to make money from it, you’re going to approach things very differently. I want to make it clear at this point – I’m not saying that money is the most important thing *at all*. If you want to just keep it laid back and only pay yourself back for the supplies you use, you have every right to do that. My advice in this post, though, is for those who are looking to run a more profitable business and have it as a source of income.

I will say this – in general, handmade businesses (such as many of the ones on Etsy) charge prices that are far too LOW. If you are trying to price in competition to the prices you see in stores, like at a department store, you are pricing too low. You (most likely) do not have employees, machines, or the ability to mass produce. Don’t try to price in competition with a company that has those things. They can afford to make a small amount of profit per sale, and rely on the fact that they are having a huge number of sales. Your strategy should not be the same as them. If you are a one of kind, uniquely crafted, artisan brand, then price accordingly!!

Here is one litmus test that I feel can help you gauge whether your prices are high enough: businesses expect that when they place a wholesale order, that they will be paying only 50% of retail price. Suppose a company contacted you with interest in placing a wholesale order. Look at the items in your shop – if you charged wholesale price (half off) for a large order from your shop, would you still be making a good profit? If not, your prices are too low.

Also, realize that people expect the value of the item to be reflected in the price. When I first opened my first shop selling jewelry, I had people flat out say they wouldn’t buy from me because my prices were so low they just assumed I had a low quality product. That may sound harsh, but it is good to know! I put a ton of work into each piece, handcrafting even the beads themselves, but the price did not reflect that. So people assumed that it wasn’t a quality product. Think about it – if you went in to a painter’s gallery, and there was a large original oil painting for sale for $5, what would be your thought? “What wrong with it? Is it actually an original? This can’t be what I thought at first – the price is too low.” If you have a quality product, reflect that in your price. Buyers who want to buy handmade items are looking for quality, not cheap disposable items. They expect to pay that price.
And if you have buyers who are wanting to only pay cheap prices, like you might find at a discount store, you need to find a new target market. You reach out to different target markets with different pricings. Let’s face it – very few of us are selling necessities. We are selling luxury items. Right now, I am on a tight budget. I can’t buy a lot of luxury items. Right now, I am probably not your target market. And that’s fine! I’m not entitled to your products. You should be pricing for who IS your target market – people with disposable income. People who can afford luxury items. I remember one of the Etsy admin making a good point – if you want to get a good idea of your target market, it is someone like you, but who has a lot more money. Price with that in mind.

You might be afraid of sales going down by raising your prices. Interesting tidbit: when I raised my prices, my sales have gone UP, not down. But even if your sales went down – is that always a bad thing? That may sound strange, but stop and think about it. Let’s say you have 5 sales this week at $10 each – that is $50. Now let’s say you raise your price to $20 next week, and your sales drop to 3 sales that week. That is $60. It is fewer sales, but higher profit. Plus, it is less work for you to make/list/ship 3 items than 5. I know it’s easy to gauge your shop by how many sales you have, but really that is not the test. I’d rather have fewer sales at higher prices so that I can actually keep up, than to have TONS of sales, but not making much profit and working myself to the bone.

Ok, but let’s get down to some brass tacks. On what should I base my price? Here is a formula that I’ve heard before, and while this is by no means the right formula for everyone, check this out just for kicks …

((hourly wage x hours spent) + cost of supplies) x 2 = wholesale price

wholesale price x 2 = retail price in your shop

And let me not this: your hourly wage should NOT be just minimum wage.

Now this is just a loose formula, not an exact science, and you very well may decide not to go with the final result. It isn’t the formula I personally use, but it is an interesting guideline. You may judge that it doesn’t work for you because maybe you work very slowly so the hours are inflated, or you may realize the market just won’t bear the final price. BUT I hope at the very least this will give you a little sticker shock in a good way: you should probably be charging more than you are right now. At the very least, even if it is not double like in the formula, I’d suggest that you make sure your wholesale price is more than covering just your expenses (paying yourself and your supplies cost are EXPENSES, not profit) so that you could do wholesale profitably. And then your retail price (the price you charge in your shop) should be double that.

Ok, now it is time for this week’s critique. Here is the question that Olya from OboCreations posted in the opening thread:

“the topic i suggest is a challenge of a turning a hobby to a business. how do i combine it with my daily job and compete with those who are doing full time?. They can devote 8-12 hours per day to Etsy shop vs me spending this doing other things. Seems a catch 22 – to quit my job i need my business to pick up – yet how to do that if all i have is the night? one of the aspect is setting priorities and here comes the question of what they are. As a small business especially as starter you face the need to address so many different aspects – set up online shop, make description, photos, SEO, dig into forums, promote, get social media, make packaging, find bloggers etc etc etc. So remembering i only have few hours before i collapse to sleep – where should i start?”

I think a huge part of the answer to her question is today’s topic: pricing!

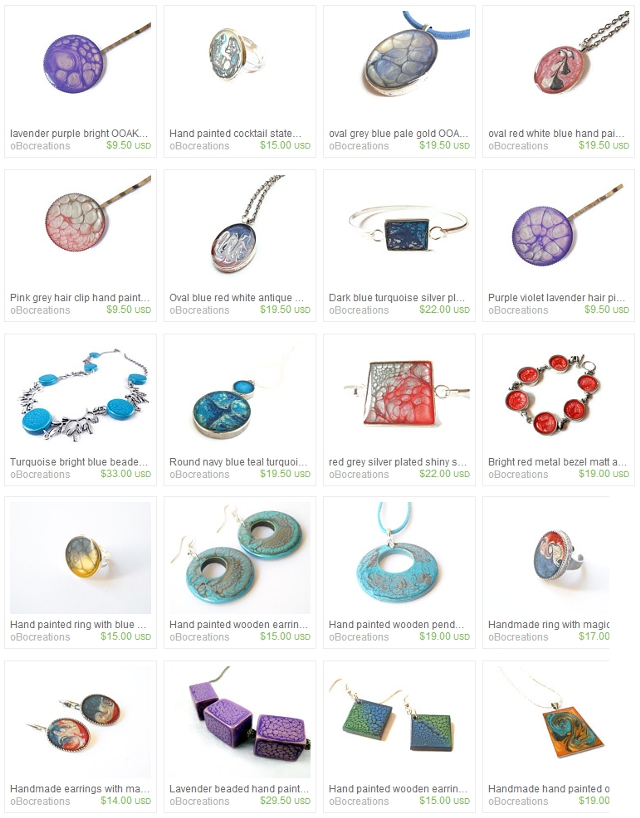
Let’s take a look at her products:

Ok, first of all let’s point out some things Olya is doing well about…

Listings: She just opened her shop this summer, and she already has 100 products listed. This is absolutely amazing!!! One huge thing to have a great shop is having enough listings to be able to be found easily in the search and to have enough variety to offer visitors to your shop enough options for them to be able to browse through and choose from. So you are far ahead of the curve on this one, Olya, nice going! In fact, if I were you, I probably wouldn’t add more listings until I started to see how sales are going to do on your product. But the fact that you’ve been photographing and listing that many products is amazing – nice going!

Policies and Profile: You have them both filled out, which is great, and I especially appreciate your very clear policies and info on what to expect since you are shipping from Switzerland. Very, very helpful, especially since most buyers on Etsy are from other countries, so that is very smart to have all that information, well done.

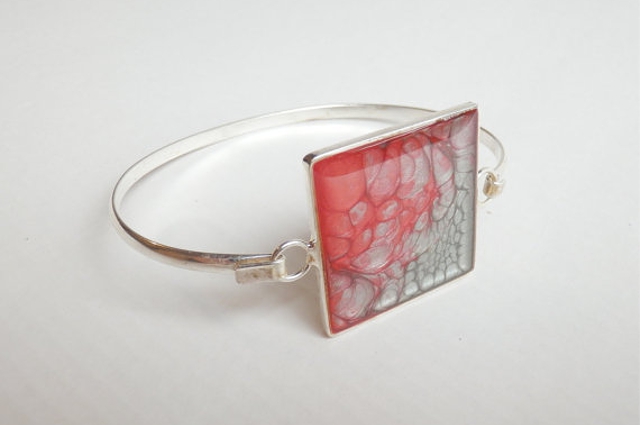
Photos: Your photos are so crisp and clean and look absolutely catalog worthy! They look really professional and clear to see the item. Being able to fully and clearly see the item is of utmost importance in product photography, and you’re doing a great job of that. On the (possible) downside, that catalog look is something people already see a good bit, especially in jewelry, and can also come across as very sterile. Since jewelry is SUCH a saturated market on Etsy with SO many jewelry sellers, it can be hard to stand out. I used to sell jewelry, and it was hard, I know! The style of photography is one thing you can use to help differentiate yourself. Maybe in the future you might think about modeling some jewelry or play around with conveying your branding in your photos? But in asking where to start, you definitely don’t need to do anything like that first because overall your photos are very impressive. I especially like when you leave them not quite so whited out in the background, like the one below. Great work on photography!!

Descriptions: I really like that in this listing on the above bracelet you drive home the handmade nature of it in the description: “This cute Silver colored shiny brass metal bracelet is hand painted using my very special technique. I have used silver grey and red color and let them interact and mix with one another to form this lovely shade and magical pattern . On top the artwork is covered by a high gloss top quality jewelry resin. It protects end enhances the image making it look almost 3d.” Knowing that kind of info is SO important. There are a huge variety of jewelry sellers, so this unique and very handmade technique is very important to emphasize. I think it is important to make that clear in all your listings. On Etsy, it is perfectly acceptable to purchase an already made pendant and use it in the jewelry you make. But since you’re going a step further and painting the pendants yourself, you want to make sure people realize that! Also, watch out for capitalization. Starting sentences off with lower case letters, or using “i” instead of “I” in your description can make it feel less professional. It is one of those things that may seem little, but really can make a difference.

And now, an area to improve:

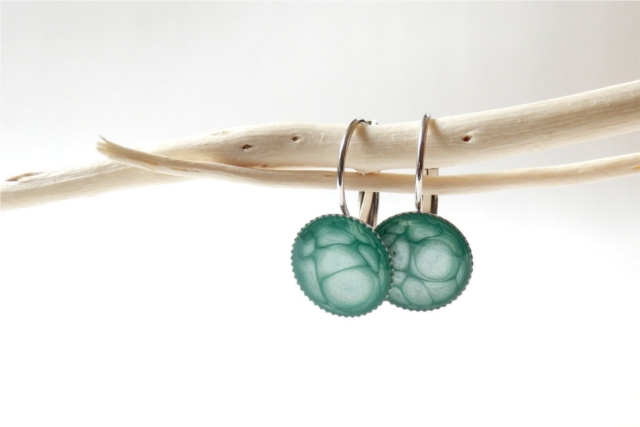
PRICES!!: Now, not being the artisan myself making the jewelry, I can’t tell you exactly where you should be pricing your items, but I DO think they are under priced. For instance, these earrings are $14:

I can go to the mall and easily find a regular pair of earrings for $14, and they are not hand painted originals from a jewelry designer in Switzerland. Your earrings are!! I think your earrings deserve a higher price tag. If I were to put your price into the formula backwards … Your retail is $14. That means your wholesale is $7. Which means $3.50 is what is there to cover paying you and your supplies. Not to mention Etsy and PayPal fees, which will add up to about another 50 cents. Basically, it doesn’t seem like you’re making much, if any, profit. So if you’re looking for advice on how to go from hobby to business, especially since your time is limited and valuable – make sure you charge for your time! Take a good look at your prices – if your shop suddenly sold out tomorrow, would you have enough money to repurchase all the supplies you would need AND pay yourself to do all the work to restock your shop – AND have also made profit? If not, then you need to start by figuring out a pricing structure that will be actually workable business-wise. If it wouldn’t be profitable for that to happen in one day, it is also not going to be profitable for that to happen over time. So once you’ve figured out what WOULD allow you to make a profit, then try out those prices in your shop for a while. Like we talked about before, make sure you drive home the value of the product in your descriptions, highlighting the handmade nature of the jewelry, and maybe tweak somethings in your shop to reflect a higher end price tag, like maybe a banner that is less cutesy, and work on marketing to your target market. But if you find the market won’t bear those prices, it might be time to look into tweaking your product, like we talked about in the first post of this series. Because if you’re trying to make the switch from hobby to business, you need to get paid for your work at a level that actually is profitable, not just covering your costs. Especially considering it doesn’t sound like you have a lot of extra time you can just pour into this!

Anyway, I hope that has been helpful, both for Olya, and for any of the rest of you who are running a creative biz. I know pricing can feel sticky and hard to figure out, but it needs to be figured out if you want to go from hobby to business.

I told you some of my early pricing woes and mistakes – do you find pricing easy?

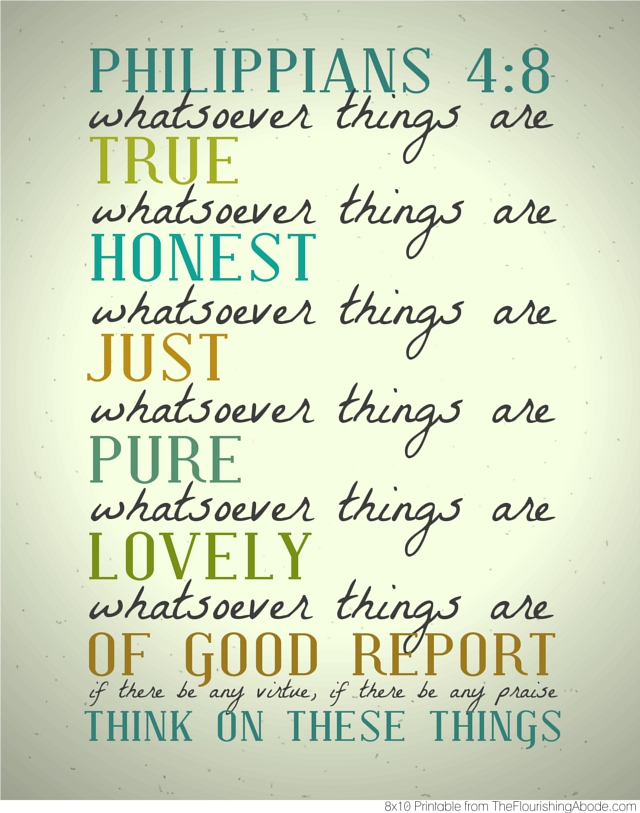
Printable of Philippians 4:8

If I were to tell you I had a letter from a man in prison, who had not committed the crime he was imprisoned for, who had been mistreated and abused, who had no wife or children to comfort him, who just found out that people he should have been able to count on were slandering him, and that he might soon be executed – how do you think that letter would sound? Depressed? Angry? Bitter?

That prisoner is the apostle Paul, and the letter is the one he sent to the church to Philippi, which we now call Philippians – and it is a letter full of joy. He continually talks about rejoicing throughout the letter. How is that possible?

Paul had his eyes on what was eternal. He was not short sighted. He was focused on what was eternal. Anything that is a problem in this life – even being executed – is in the end just a temporary problem. The joy of heaven, on the other hand, is eternal. He looked at life with the proper perspective, as he stated in Phil. chapter 3…

But what things were gain to me, those I counted loss for Christ. Yea doubtless, and I count all things but loss for the excellency of the knowledge of Christ Jesus my Lord: for whom I have suffered the loss of all things, and do count them but dung, that I may win Christ. … Not that I have already lobtained this or mam already perfect, but I press on to make it my own, because Christ Jesus has made me his own. 13 Brothers, I do not consider that I have made it my own. But one thing I do: nforgetting what lies behind and straining forward to what lies ahead, 14 I press on toward the goal for othe prize of the upward pcall of God in Christ Jesus.

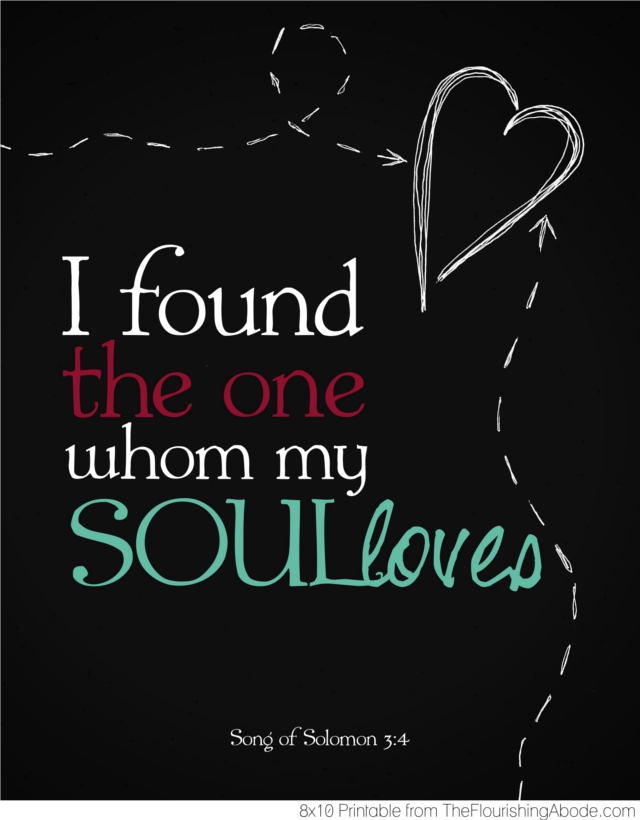
He looked that the things which were eternal. The things that are truly true, pure, lovely, worthy of praise. He thought on these things, as he encouraged us to do in Phil. 4:8. And when you are looking at that, anything on this earth is temporary – and that puts all our problems in perspective.

I think this is such a beautiful book. I’ve had Philippians on my mind lately, especially because of the upcoming Philippians Bible study. I’d encourage you to read Philippians and think about the things Paul says. And if you’d like to discuss it together, I am always up for that! Just let me know. :)

What passages do you find particularly encouraging?

Tomato Basil Pie: perhaps my favorite food

I really should have posted this recipe a little while back when fresh summer tomatoes were so plentiful! This is one of my favorite dishes (especially in the late summer) which I learned about from Lori and her mother … although, truth be told, I do make this even when tomatoes are less in season. Just don’t tell Lori. ;)

I mentioned recently, too, the amazing and simple pie crust my friend Lindsey makes. So we’ve had a great trade-off where she makes pie crust and I fill it with Tomato Basil Pie and our families enjoy dinner together! I wanted to share this recipe with you, too, because it is just soooooooooooo good … and a little of the beaten track. I know it is an idea I never would have come up with myself!

Tomato Basil Pie

Crust:
3 oz. of cream cheese
1 stick of butter
1 cup of flour.

Let the cream cheese and the butter come to room temperature, then blend ingredients together. Roll out dough. Put in pie dish, and bake, about 10-15 minutes at 350F.

Filling:
1 ½ c. grated mozzarella cheese, divided
Fresh tomatoes. The original recipe I think called for about 7-10 roma, but I sometimes use more and/or other tomatoes, depending on how many people I’m feeding, and whether we are using Lindsey’s deep dish pie dish (in which case I also loosely double the rest of the ingredients)
1 c. loose fresh basil leaves
4 large cloves of garlic
½ c. mayonnaise
¼ c. Parmesan cheese
1/8 t. ground pepper

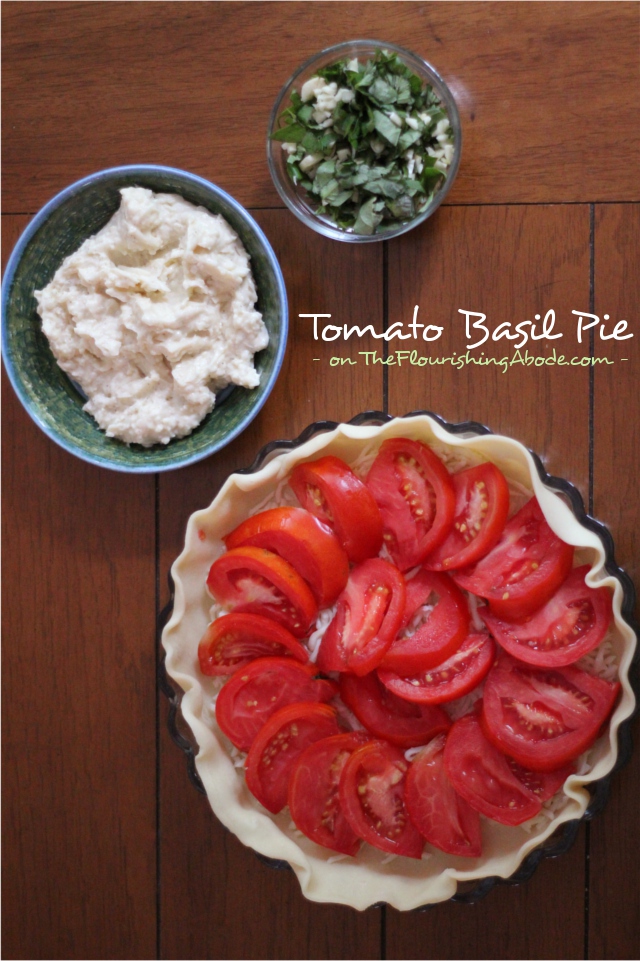
1. At some point earlier in the day, cut up the tomatoes into fairly thick slices and spread out on a dish cloth or paper towels to allow the tomatoes rest and drain off some of the liquid.
2. Sprinkle 1/2 cup of the mozzarella into the baked pie crust.
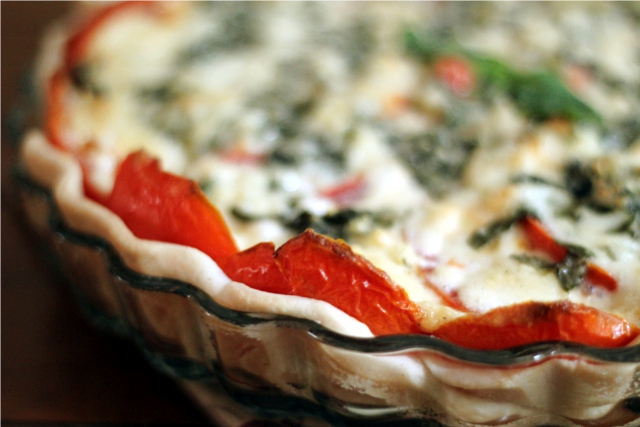
3. Lay out the tomato slices over the mozzarella. (as shown in first photo)
4. Mince the garlic and basil, and toss together. Sprinkle this mixture on top of the tomatoes.
5. Mix together the mayo, Parmesan, remaining mozzarella, and pepper. Dollop this mixture on top of the pie, and spread around.
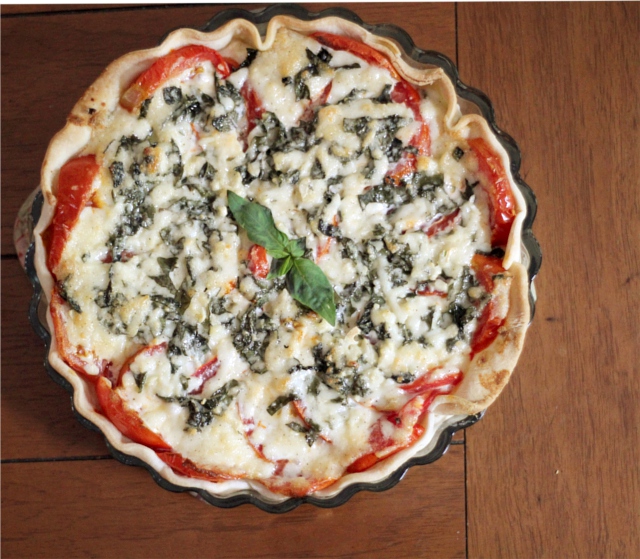
6. Bake about 40 minutes at 350F. I like to add one last sprig of fresh basil on top just to make it look pretty.
7. Gobble it up!

I’d have to say this is one of my family’s favorite foods. I sometimes add in a handful of grilled chicken, or serve with a salad. But that is mostly just to stretch is – honestly, all we really want is the pie itself, such a beautiful mix of fresh tomatoes, basil and garlic, meeting creamy cheesy richness. It. is. so. good.

What do you think? Sound good? It’s a recipe I never would have thought of on my own, but I loooove it. In case you can’t tell. ;) What are some of your family’s favorite dishes?

Your target market: Who and where are they?

So let’s say you are selling crochet doilies. Should you be marketing to young urban men? Um, let’s go with NO. A hugely important part of running a successful creative business is understanding your target market.

So, we’re going to talk about who your target market is and how to find them, as well as doing a shop critique of one reader’s shop! But before we get into figuring out all of that … why is it so important to know your target market?

In the questions you asked me in the opening post, a lot of people asked “how can I increase views and sales”? What is the different between those two? Let’s say for a moment I had a guaranteed way that for $10 you could get 5,000 views tomorrow, but that ALL of the views would come from 12 year old girls who love horses, listening to whatever is the current top 40, and glitter. Some of you might find that to be a great opportunity. Others of you might be thinking, “5,000 views in one day would be nice … but I don’t think they would be into what I’m offering”. Or here is another scenario – let’s say you could get a celebrity endorsement of your product, and the options were Paula Deen, LeBron James, or One Direction. Your choices reflect the importance of knowing your target market.

You need to know who you are marketing to in order to be able to market to them effectively.

We can talk about marketing, photography, views, etc., etc. – but if you’re trying to market pearl necklaces to bikers, or photographing baby hats on adults, or getting views on your photography only from fellow photographers who prefer their own work anyway – it’s not going to do much good, because you’re appealing to the wrong crowd. Yes, you want to make your shop more appealing and draw people in … but you want to make your shop appealing to and draw in the people who actually want to BUY your items. Would you rather have 800 views where only 1% of the people buy, or 300 views where 50% of the people buy? Your target market is the people who actually want to BUY from you.

So you want these people to buy from you. How do you make that happen?

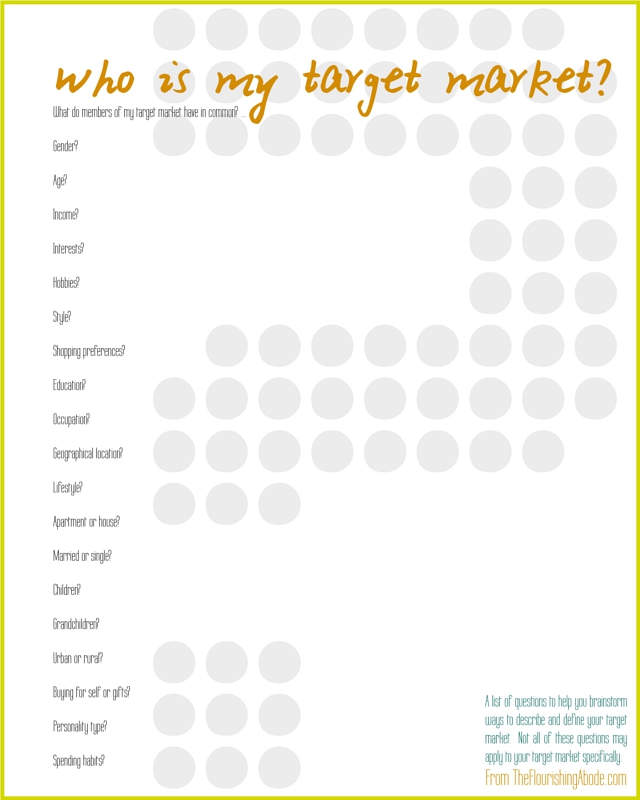
Step 1 – define and describe your target market. And no, just saying “women between the ages of 20-50” isn’t enough. That describes waaaaaaaay too broad of a group. That could cover a new grandmother, and an indie singer/songwriter, and a stay-at-home mother of 5, and a college fashionista. Those four people all will have very different buying habits. When figuring out out target market, you want to narrow down much more than that. Here is a printable list of questions – not all of these may shed light for every seller, but hopefully this will get your thoughts rolling:

Once you have a good feel for who your target market is…

Step 2 – find and appeal to your target market. There are a variety of ways to appeal to your target market: firstly through your product itself (like we talked about last week), as well as how you do your product photography, through your descriptions, through the style of your shop as a whole, and through the price of the product (and this does NOT necessarily mean a low price). Those various topics, though, are all ones which I will be devoting an entire post to in the future, so in this post we’ll be focusing more on FINDING the people in your target market.

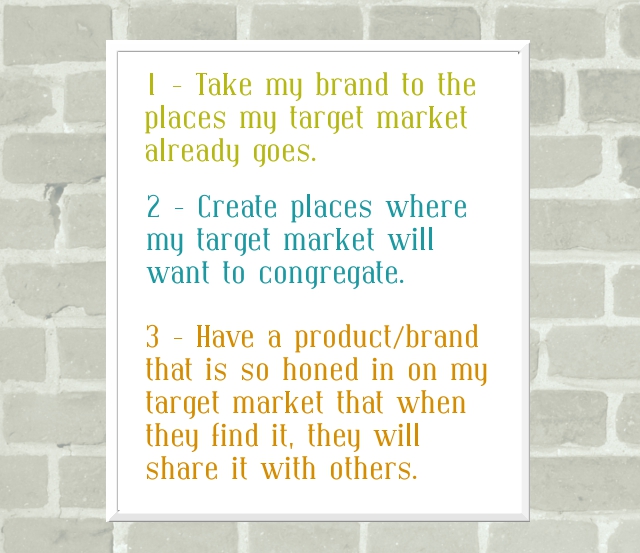
I have three basic strategies when it comes to getting in touch with my target market:

So, firstly, finding the places where my target market already goes. Personally, this why I sell my prints on Etsy rather than on my own site. If you are running a creative business, probably one of the features of your target market is that they like to buy from small/handmade businesses. That target market is shopping on Etsy, and other such similar sites. But, of course, that is still too broad, so even within Etsy you need to be seeking your target market. Think about how your customers actually search. Will they be searching “chunky cobalt knit neckwear” or will they be searching “blue scarf”? If your target market is trendy, and cobalt is a trending color, then you’ll be more likely to include that in your tags/titles. If your target market is less trendy, then blue will be of more value to you than cobalt. In general, make sure you have the more simple terms covered first right at the beginning of your title, then move on to more specific terms that are helpful, but probably not as often searched. Make sure you use ALL 14 tags on your listings, and fill them with words and phrases that have meaning to your target market. And, as we will talk about in later posts, make sure your photos are styled in a way that your target market will be drawn to them.

But even if you are only selling on Etsy, that doesn’t mean Etsy needs to be the only place you are seeking out your target market. Think about other (and non-commerce) sites where your target market is already gathered. Some of these would have some cost – for instance, taking out an ad on a website that your target market likes to visit, or do a giveaway on a blog your target market likes to read, etc. Some of these wouldn’t have to cost any money at all – for instance, you could join a forum that your target market uses and include your website in your profile there if that is allowed, or do a guest post on a blog your target market reads, etc. Yes, it takes time to find these places, and it is different for every target market.

Side note here – One thing you should not do is spam. Each of your reading this may have very different target markets, but I will tell you one thing that I know about your target market: they don’t like to be spammed. Think of it the same way as if your target market was all hanging out in one coffee shop – would you run in, yelling at the top of your voice about your products? Or would you put a flyer about your products on the bulletin board, maybe ask they cafe if they are interested in carrying your items, etc. Behave the same way online.

Ok, moving onto part 2 of my strategy: creating places your target market would like to congregate. I think this is most easily done with a blog. A blog allows for much more interaction than a shop alone. Plus, with a blog, you can offer highly valueable content for your target market for free – and that will draw them in. I think it was Mayi Carles who first enlightened me to this: a good way to come up with blog content is to ask yourself, “What problem does my target market face?”, and then post ideas and solutions on those topics. Is your target market made up of stay at home moms? Post family friendly recipes, home organization tips and activities to do with kids. Is your target market made up of outdoors-y types? Post camping how-to’s, tips on what to pack while backpacking, or give instructions for your favorite trail mix. Posting about topics that your target market will find helpful – and clearly linking to your shop on your blog – can be a great way to get in touch with your target market.

And the third part of my strategy: have a product and brand that appeals to strongly to your target market that they want to tell others about it. Like we talked about last week, having a really strong product is so crucial. But once you have a really sellable product, and a good feel of your target market, and put in some work to start getting in touch with your target market – the good news is that the internet offers soooo many ways for people to share the things they like. Pinterest, Tumblr, Facebook, Twitter, etc., etc. Word of mouth is such a great thing, and when your target market starts spreading the word about you, things can really take off. The thing is – that doesn’t necessarily come easy to get to that point. It takes a lot of work of experimenting with your products, as well as studying and finding your target market.

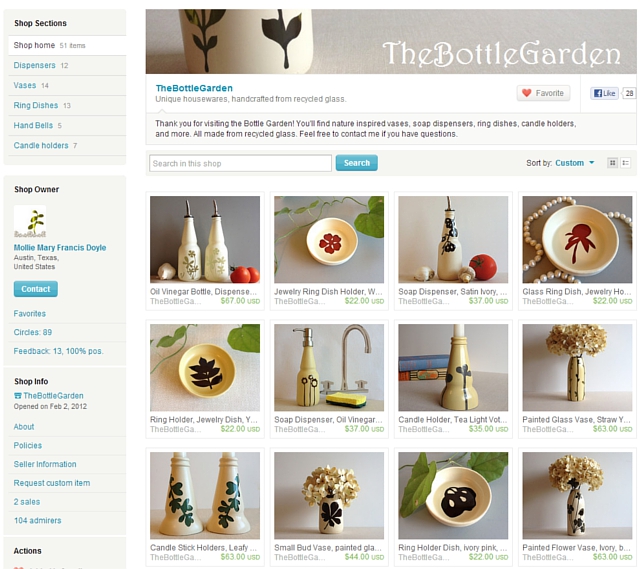
OK! Enough of general discussion, let’s go ahead and take a look at one of the shop owners who asked specifically about target markets. It is Mollie Doyle, owner of the shop The Bottle Garden – take a look:

First of all, let’s point out things she is doing really well on:
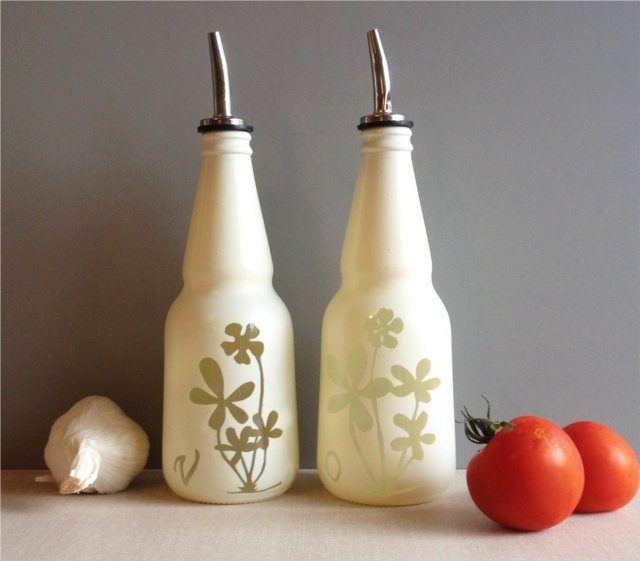
-Photography. WOW. These photos are just absolutely gorgeous. The photos have a great ambiance without distracting or competing with the items themselves. The items really stand out, which is great. Also, there is a great cohesiveness to the shop as a whole, with all the items being photographed in a similar way. Gorgeous photos, Mollie!
-Profile. If you browse her shop and visit her profile, she has some great info there on what she does, written in a friendly and interesting way .. this is a great thing to have in a shop!! People who buy handmade love to know something about the person behind the shop.
-Policies. Filled out, clear, concise, and professional, which is exactly what you want. People are less likely to buy from a shop with no policies … or policies that leave them confused or uncomfortable.

And a couple things that are good, but might be tweaked:
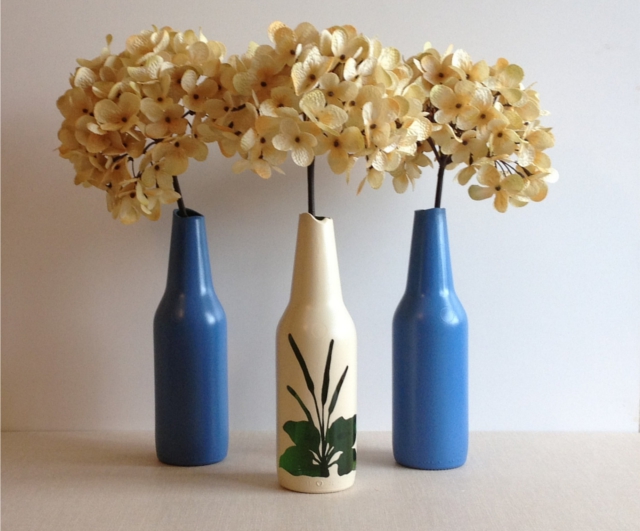
-Descriptions. With a name like “The Bottle Garden”, and with the beautiful products in your shop, people are naturally going to be curious about your work – what you did and how you do it. And I don’t mean giving away trade secrets or anything, but along the lines of what you shared on your profile page … that these are recycled bottles and the neat things you have done to transform them. I really like how you put some of that info right at the top of this listing:

…where you wrote, “I designed this bud vase with a smooth broken edge. The top of the glass was carefully broken to create curves and then polished smooth.” That gives some great insight into the work you put in on these pieces! That kind of info is so valuable to a potential buyer. I know you mentioned price being a question – we’ll be getting into price more in a future post, but the more you make it clear the work that goes into each piece, the more likely people will be to pay a higher price tag. Also, in terms of searching, having really relevant words like “recycled” right near the top of the description would be great. I’d encourage you to start of each description talking a little about what it was you did to the piece, a couple sentences, and sprinkle in good keywords. That will be good in terms of people searching, as well as the top part is what the most people will actually read.

And lastly, a couple things to improve in, especially with regards to today’s topic:
-Target market. Really take some time to think about who you are trying to sell to – look at your beautiful products and think about who it is that would be buying this. A couple things jump to mind as I look at your products – because of the recycled nature of your products, the eco-conscious go-green demographic is one that I think would be a great fit for you. Another angle you could look at is the home decor aspect. Think of women with beautiful houses who enjoy decorating them with unique and quality items, and how much they would enjoy your items. Combine those two, and you’re definitely getting into a niche market! Green home decor is a topic I see around the web quite a bit … in fact after a quick search, I found this list of Top 50 blogs about Green Interior Design … sounds to me like 50 places where your target market already is! I’d suggest looking into pitching your products to relevant blogs – you’ve definitely got the great photos that blogs like that love. Also, if I were you, I’d tweak the tags and titles to involve more terms that pertain directly to your target market. Things like “eco friendly”, “go green”, “eco conscious”, “upcycled home decor” “up cycled” (different spellings are good to cover!) “green interior design”, etc. Monitor your stats to see which terms are bringing people in, and tweak as needed. And, of course, if you find that “eco-conscious women with expendable money for home decor” is too narrow, you can always try marketing to the eco-friendly sector more broadly, or to those interested in home decor and housewares, whether green or not.

A couple other ideas for getting found – have you considered joining an Etsy treasury making group? Having high quality photos is a prerequisite to the groups that give the best results, and since you have that, you might want to go for it. Teams like that do have a time comitment, so you’d have to weigh it. I used to be on several treasury teams and while I was doing that, I made it on the front page of Etsy quite often. Eventually, though, I grew to the point that I was bringing in my own traffic and the time commitment was just too much. But it can definitely be a helpful way to network and grow when you’re starting out. Same thing with social media, or if you would want to consider a blog – you have to weigh which ones are really beneficial and useful to you. We’ll be talking more about social media and such in more detail in a future post.

Overall, Mollie, GORGEOUS shop! I think it’s just an issue of really honing in on your target market and starting out seeking them where they are, in the Etsy search terms, on green design blogs and so forth. Good luck!

I hope this post has been helpful for Mollie and for others as well. Are you trying to figure out your target market too? Have questions or comments about it? Leave them below, I love to hear from you!