Skip to content

Challenge

One Item, Multiple Upcycles – Hack Challenge 6!

A couple weeks ago for the Hack-a-Week Challenge, I took the idea of a no-assembly-required hack and posted several ideas on that theme. This week is another multiple idea post, but this time all of the ideas revolve around upcycling the same item: a sign stake. You can pick one up at the hardware store for about a dollar, and ram it into the ground, and use the two coils to hold up a sign (as it is intended to be used) … or you can buy two and think outside the box on how to use them!

A couple points … You might prefer to spray paint them first, but since I was using the same ones for different projects, I just left the neutral metallic. And if they sit too low to the ground for your preference, you could insert them into two planters, instead of the ground, to make them higher and also be able to display indoors. Here are the repurposing ideas I came up with…

‣ ‣ ‣ IDEA #1: Bunting Holder!
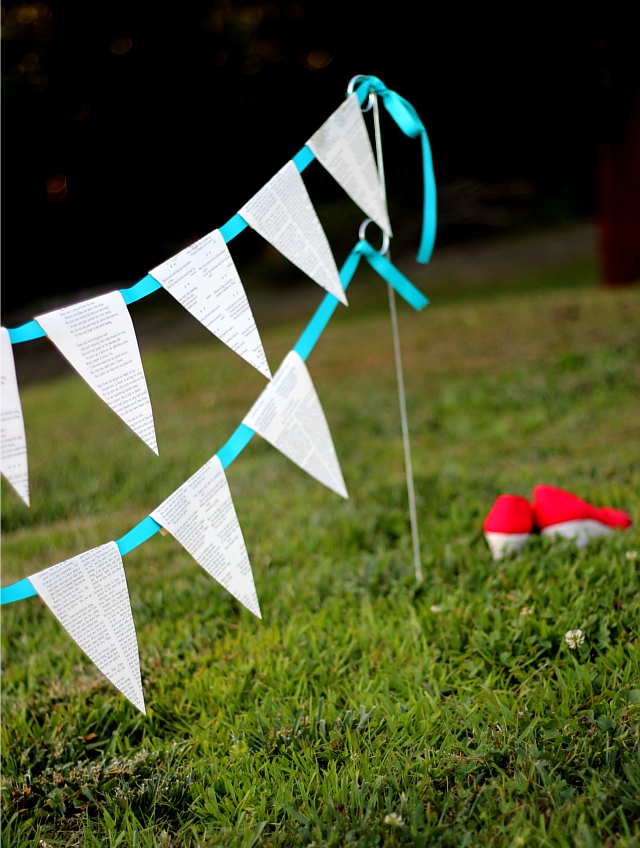
I simply love buntings, but the two things that generally stop me from making/displaying them are that 1: time-consuming sewing is involved, and 2: I don’t seem to have any handy ways to hang them. But this bunting setup solves both of those problems!
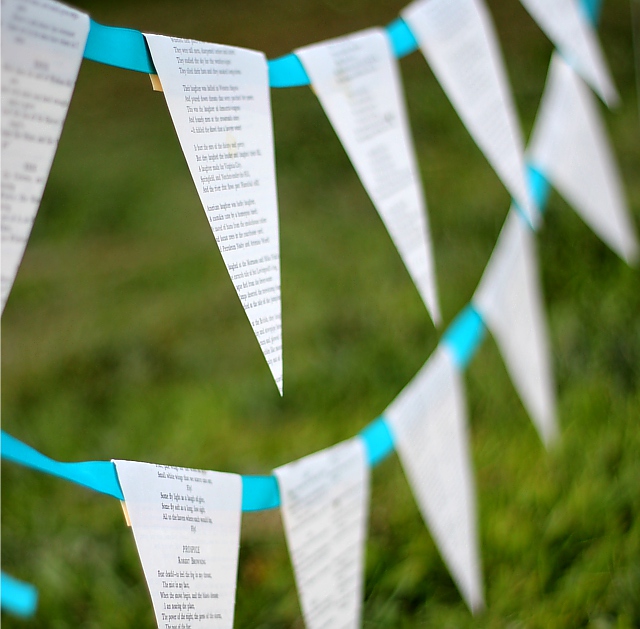
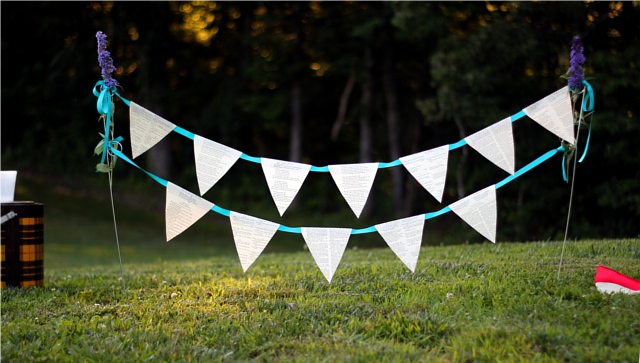
Instead of a fabric bunting, this is made from book pages and ribbon, so it is a completely no-sew project. Simply find a book that is no longer used for reading (you can find plenty of beat-up books at the thrift store), remove pages from the book, and then cut out the shape you need for the bunting pennants. For the kind of bunting I made here, it’s just a triangle with the top side extended and reshaped to be able to fold over the ribbon and still have enough overlap past the ribbon to have a gluing surface to hold it together. Then just spread glue on that top edge, and fold each bunting piece over the ribbon – and you have your bunting! I made two lengths, because the sign posts have two loops, and I liked the idea of a double layer. Stick the sign posts in the ground, and tie on the bunting. If you want to make the metal loops less noticable, you can just weave something decorative through them – for instance, I used a couple long stemmed flowers:
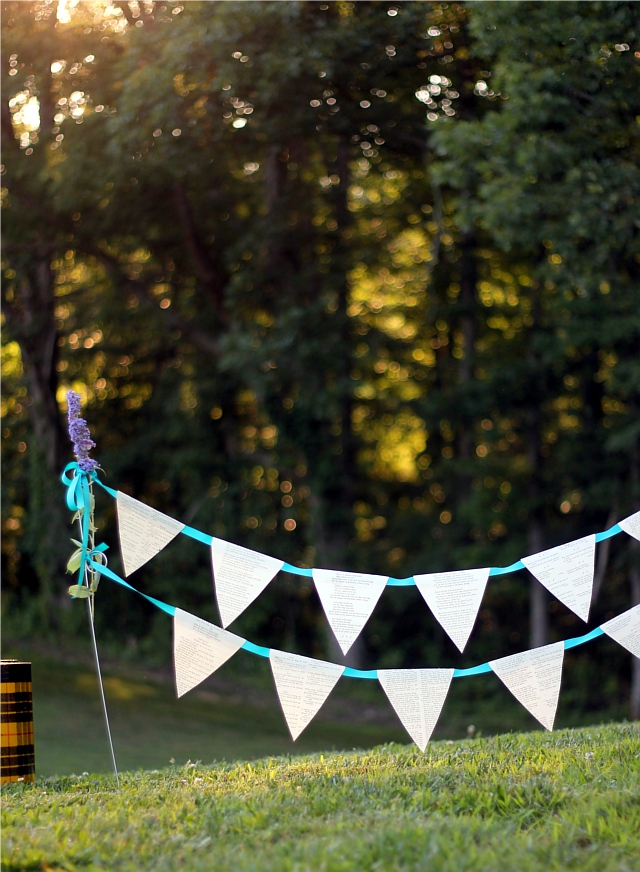
Now, isn’t that cheery?

‣ ‣ ‣ IDEA #2: Have a kid’s painting party!

My little one loves to paint. Our apartment has carpet in every single room – and in most rooms, very light carpet. So basically any painting has to happen outside! Which is a lovely place to paint, of course, but the main problem is that the wind likes to sweep away the freshly made masterpieces. But stick a couple sign stakes in the ground, tie on some ribbon, gather art supplies and invite some other kids over to have a painting party! Display the new paintings, as they dry, by attaching them with clothespins to the ribbon. Depending on how many kids you have, you may want more than one “drying rack”, but the good news is that they are so cheap to make.
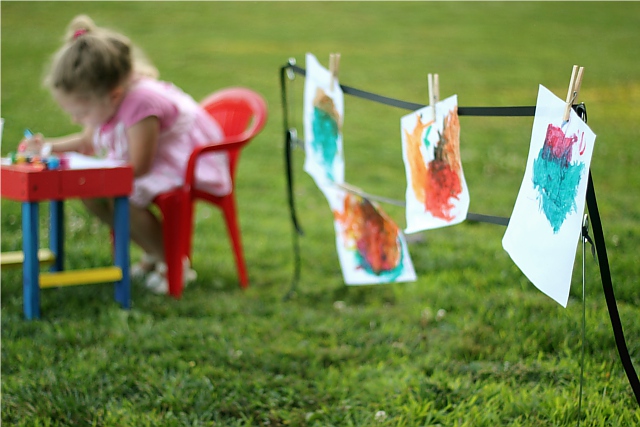
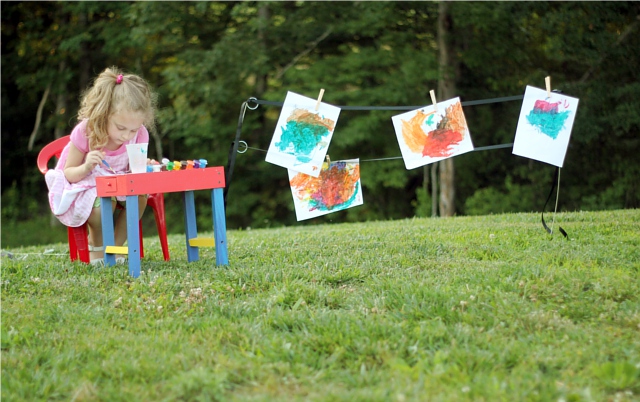
My little girl loved it. :)

‣ ‣ ‣ IDEA #3: Crafty display!

Displaying art is not just for little kids, of course. Sometimes you have your own art and such to display … such as if you have a craft booth at a farmer’s market or fair. And it wouldn’t be limited to hanging art .. you could hang signs or info about your goods, or even fliers for people to take. But it might be a new and eye catching way to display your crafty wares. Here it is, with some of my own prints from my shop, FlourishCafe.
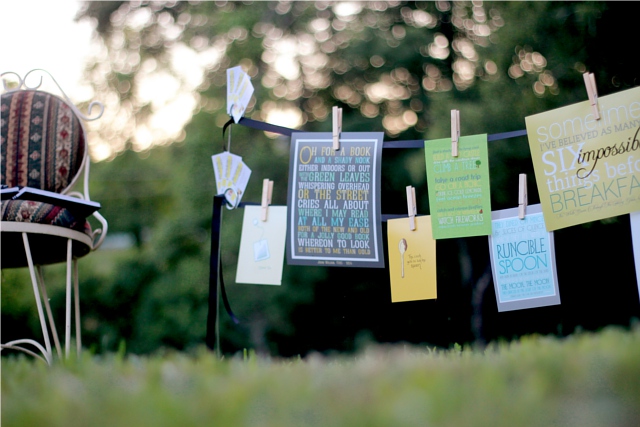
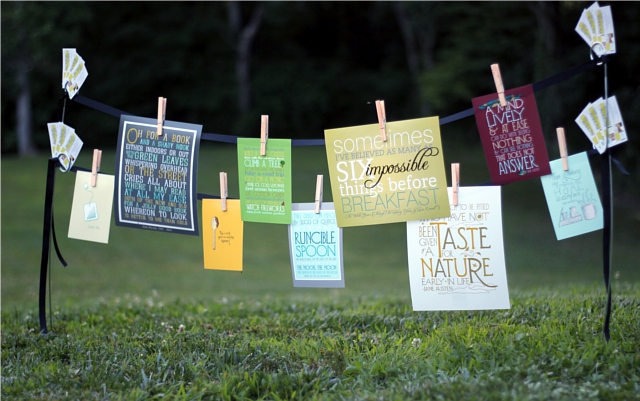
‣ ‣ ‣ IDEA #4: Wedding sign!

One of the things I learned in getting ready for our wedding, almost six years ago, was that anything labelled “wedding” or “bridal” automatically cost twice as much as the same exact item not labelled “wedding”. For instance, white wedding table cloths vs. just white table cloths. There may be no discernible difference between them except for the fact that one has the word wedding on the label, but it’s generally going to cost a lot more. As a result, I found that buying non-official-wedding-items-that-were-still-white-and-looked-just-like-wedding-items and using them for the wedding was a lot more cost effective. The same idea struck me with these. Now I’m sure you would want to disguise them or paint them, but at an outdoor wedding (like mine was) I imagine the stakes in the ground with swags of tulle going back and forth, with bows at either side, and maybe a sign hanging in the middle that says “Seating this way” or “take a program”, and have a basket of programs next to it, etc. For this particular example, I recreated a quick version of the illustration I made for our wedding invitations and attached it to the back of a light-weight willow wreath, and hung it in front of sways of tulle. Unfortunately the light was failing as I was working on this last night, and so I didn’t get a decent shot of the whole thing, but I’m sure you get the picture. Here is a shot, though, of the “framed” illustration hung between the sign stakes:
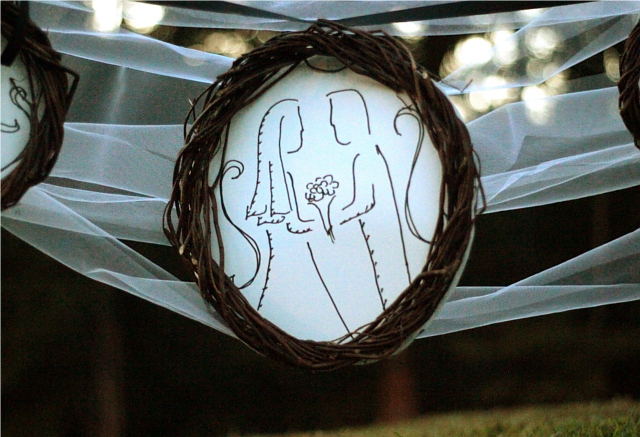
Tim liked seeing it. :)

Anyway, those are a few ideas for ways to repurpose a simple item – a sign stake!
Which is your favorite? Or do you have another idea to share?
Let me know in the comments below, I love to hear from you! :)

Hack Challenge 5! DIY Tray from Auto Glass

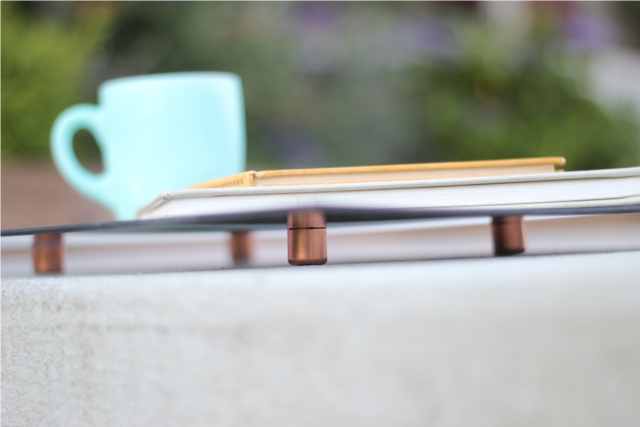
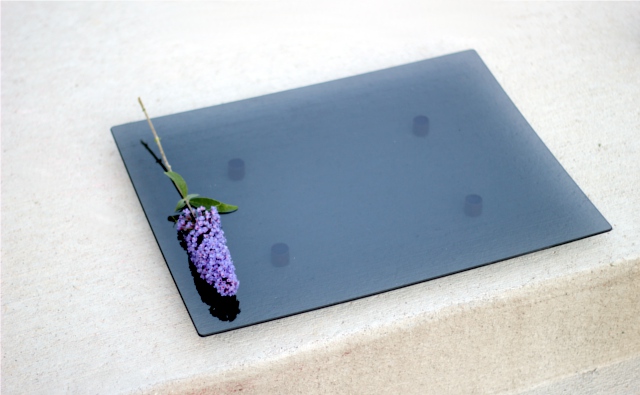
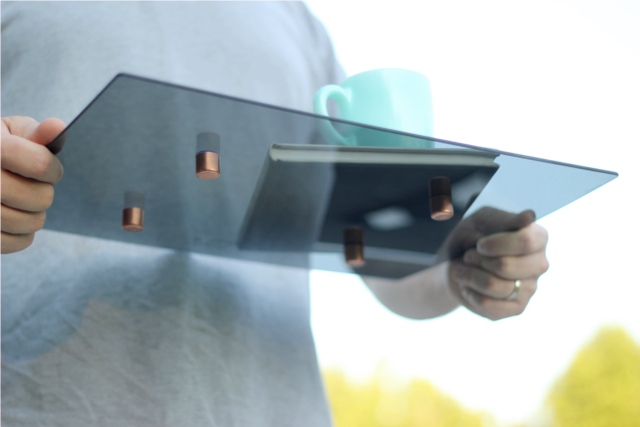
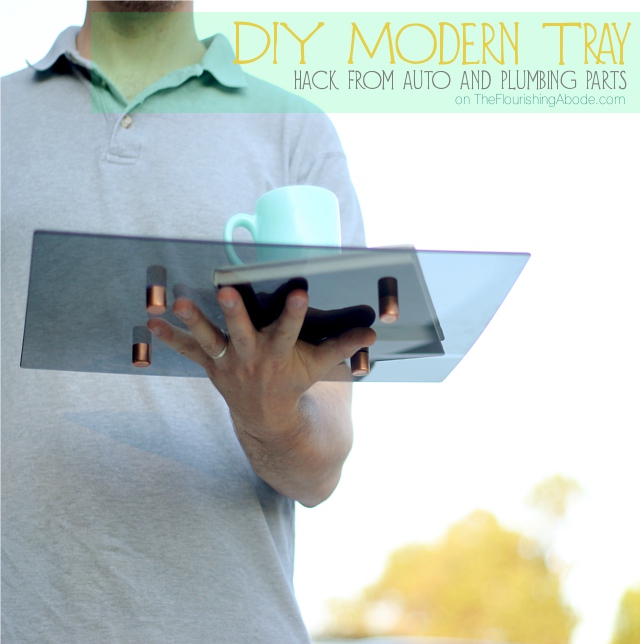
I never would have thought of today’s hack-a-week project without my husband, Tim. He currently works in the auto glass industry, and brought home this lovely piece of dark glass. It was his idea to turn it into a tray! Handles were posing somewhat of a problem, though, and so I suggested feet instead. And voilà, here is today’s project!

Now, you might be thinking, “Great, I don’t work at an auto glass place. How on earth am I supposed to get my hands on something like that?” Well, here’s the deal. Apparently on certain kinds of trucks with divided back glass, if they have to replace one of the pieces because it is damaged – they have to replace all the pieces of the back glass, regardless of whether the other ones are damaged. So from time to time, there is this extra piece of glass that they had to take out, and it’s just headed for the trash. Now, it’s going to be hit or miss because typically they’re only replacing broken glass, but if you call some auto glass places and ask about it, they just might have some you could use. Who knew, right?

And if they do, well, you know what you can make with it: a diy tray!

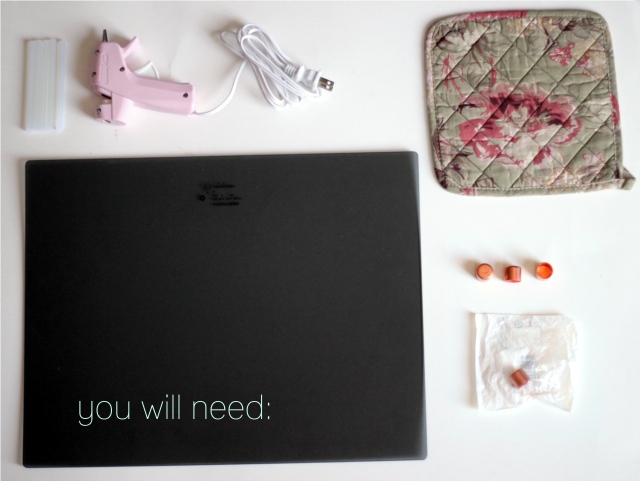
You will need…

– A piece of auto glass.

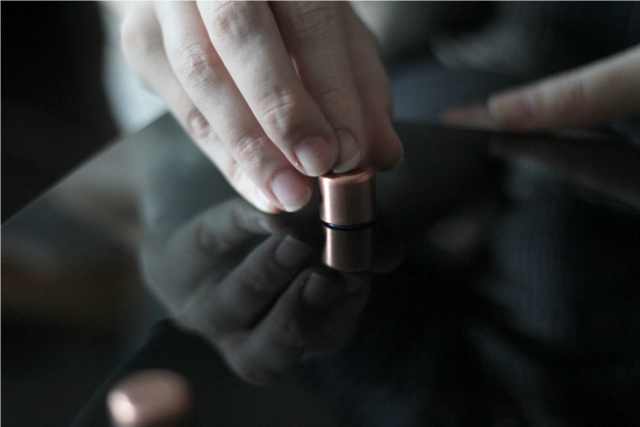
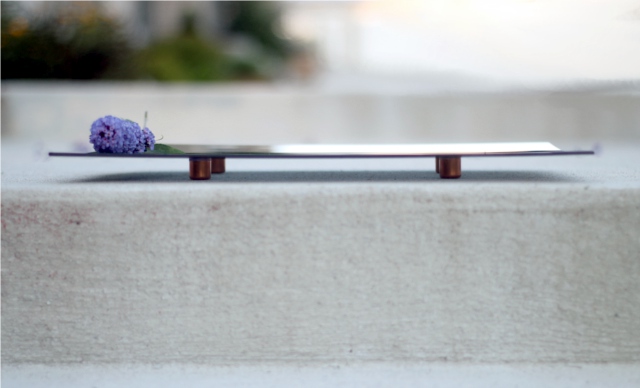
– 4 Copper “feet”. This is where the plumbing parts come in – if you go to your local hardware store and look in the plumbing pipes section, you can find copper pipe end caps. These cost me just 67 cents each! And I think the copper looks really sharp compared to the dark glass.

– A glue gun and glue.

– A hot pad.

Step 1: Clean the glass. There may still be some adhesive around the edge of the glass, from where it was held in place on the vehicle (which can be removed with a razor blade and/or some scrubbing) as well as fingerprints, smudges, etc. (which can be removed with glass cleaner).

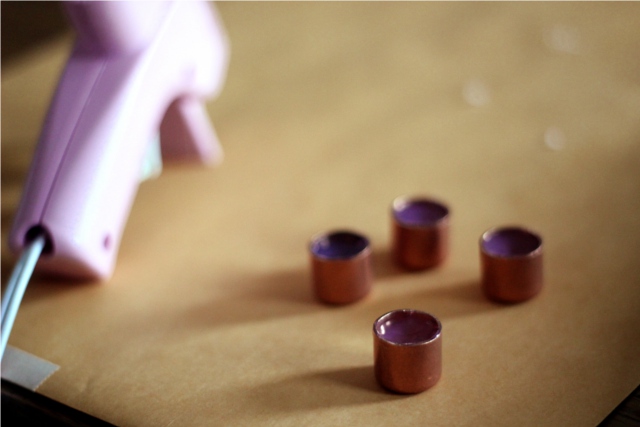
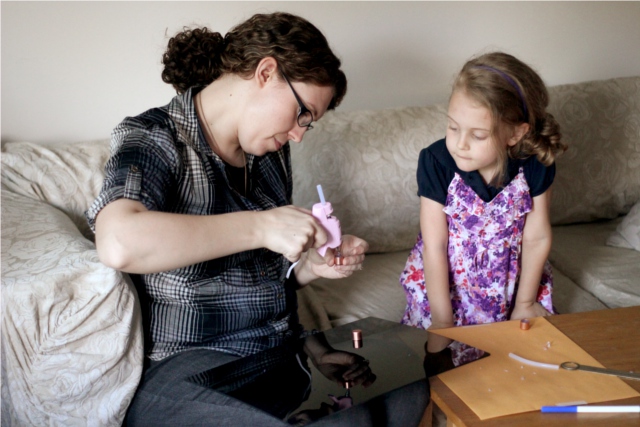
Step 2: Fill the copper feet mostly full with hot glue. Use the pot holder to hold a copper foot while you fill it – the copper will get VERY hot. Fill it almost to the top, but not quite. Repeat with all four copper caps, and then set aside to cool.

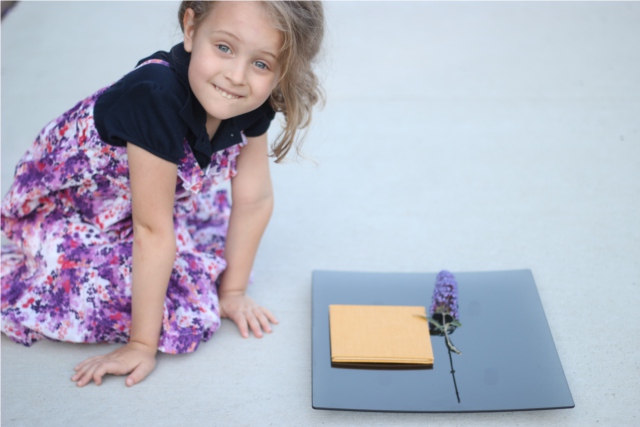
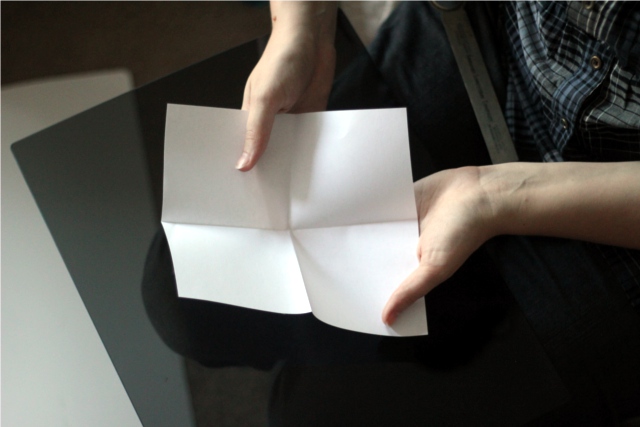
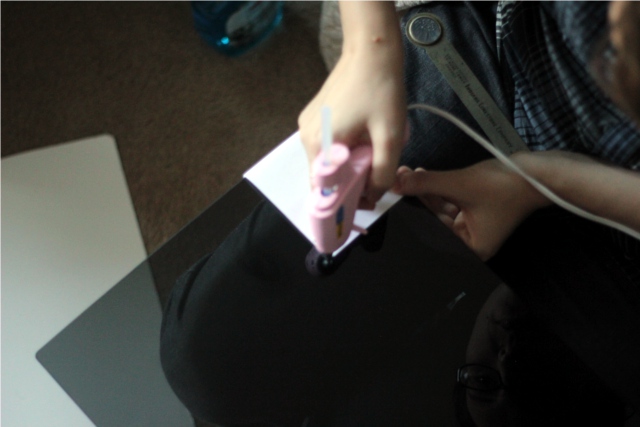
Step 3: Measure and mark where you want the feet to sit. The glass is slightly curved, so you probably don’t want the feet too close to the edge – and you also want to make sure you mark on the underside of the glass, so that the tray will be ever so slightly bowl shaped. Where ever you decide to place the feet, though, you want to make sure they’re equidistant on each side. Here is one easy way to do this, courtesy of Tim, and pictured below: take a square piece of paper, and fold it into quarters. Slide the corner of the glass into the folded paper so the the corner of the glass is snugly aligned in the folder corner of the paper. Use the glue gun to place a dot of glue where the edge corner of the paper reaches on the glass. Repeat on the other four corners – if your paper is a perfect square, it doesn’t matter what direction you slide the paper on the glass. If it is not a perfect square however, just flip the paper as you go to each corner so that each corner is properly mirrored.

Step 4: Top off the glue for the feet, and place on glass at the markers. Once the glue in the copper feet has set and the copper is cool enough to handle, take one of the feet and fill to the brim with glue, plus a *tiny* bit extra. You need to make sure the glue is high enough to encounter and hold to the glass – but you don’t want to fill it over the top too much, or it will be hard to get the exact same amount in each foot, and your tray will be wobbly because the feet will be different heights. Once you have glue ready in one of the feet, place it centered on top of the dot of glue you marked earlier. Repeat with the other three feet.

Step 5: You’re done! Just make sure the glue came in contact sufficiently with the glass, and that the glue has set (which happily happens oh-so quickly) – and your tray is ready to use! After handling it so much, you may want to give it a another swipe with glass cleaner. Then just find a place to display it!

I really like how it turned out – thanks for the idea, Tim! :)

I have a couple other tray ideas I may post in the future. Plus, I should share photos of the gorgeous handmade wooden tray the Tim designed and made as a gift for me. Yeah, I love trays. :)
What would you turn into a tray?
Leave your thoughts and comments below, I love to hear from you!

Hack Challenge: Week 4! No Assembly Required

I’m taking a little different approach with this week’s hack challenge … instead of one more-involved project, I wanted to give several different upcycling decor ideas that are so simple, there’s no assembly required!

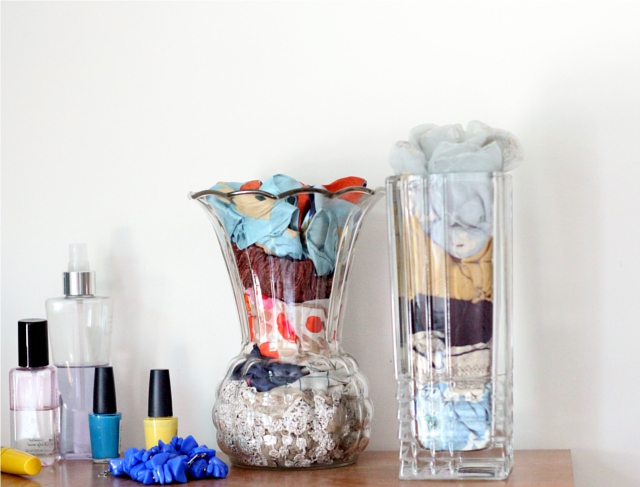
1 – Repurpose clear glass vases to store layers of colorful scarves:

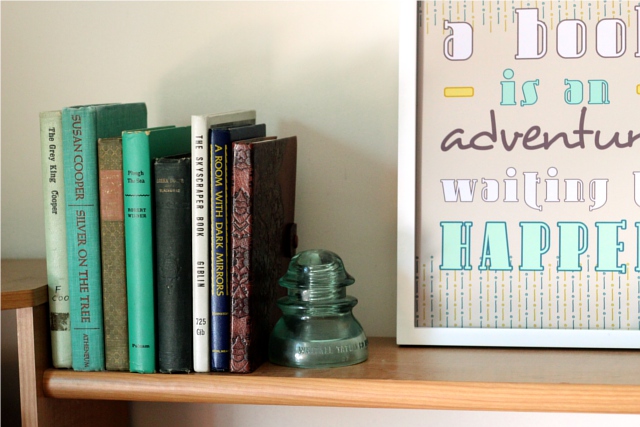
2 – Use vintage insulators as unique book ends:

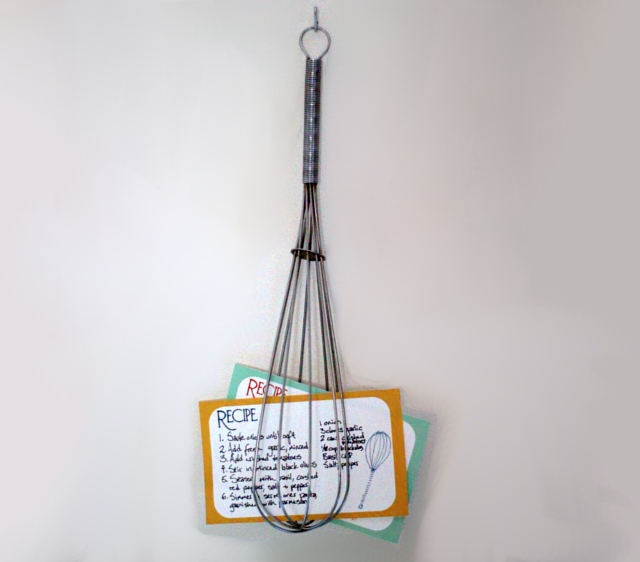
3 – Use a whisk to hold recipe cards:

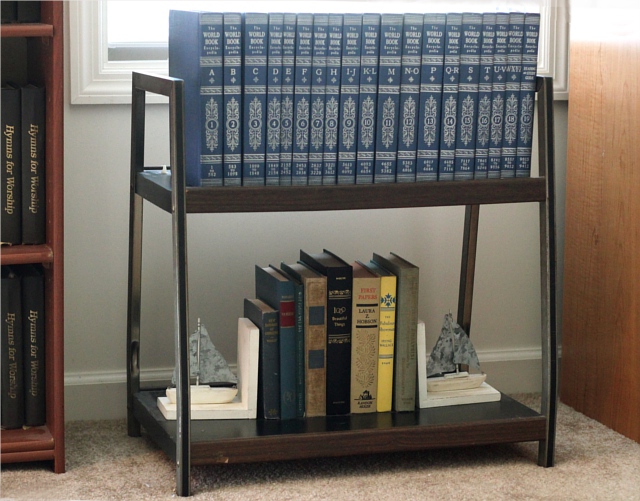
4 – Repurpose an old tv stand as a book shelf:

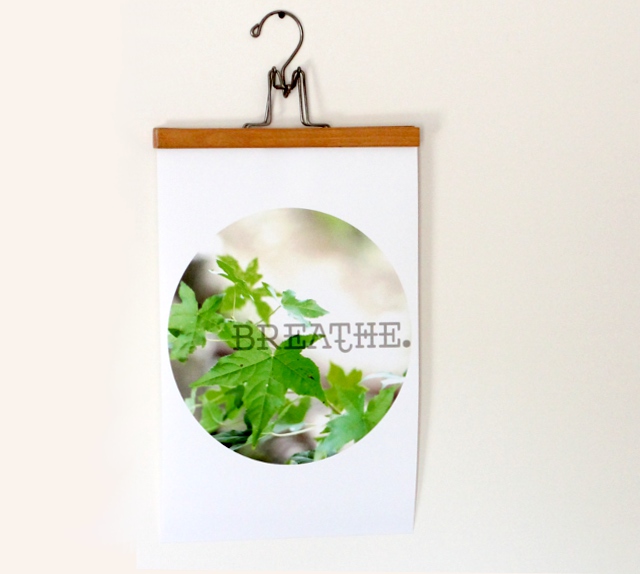
5 – Use a vintage skirt hanger as a unique method of “framing”:

Do you have any no-assembly-required upcycling ideas to share?
Post them in the comments below, I love to hear from you!

Hack Challenge: Week 3! DIY Hanging Planter

It’s week 3 of the hack challenge! And I must admit, it was a close call this week to get a project done.
But, ta da, here it is!

I wasn’t quite sure how I was going to get any project finished for this week’s post done while we are out of town … I had a back up plan in mind, but I’m glad I didn’t have to use it because I wasn’t terribly thrilled about. Fortunately, my sister in law up here in New England was having a craft night at her house this week, and I realized it would be the perfect opportunity to work on a hack challenge project! First, though, a trip to the local thrift store was in order. I’ve been asked how I come up with these project ideas – well, basically I go to a thrift store or hardware store or somewhere else that has interesting items I might be able to upcycle … and I hunt there until that “aha!” moment. This time, I was at the thrift store and spotted this:

A row full of old wooden wall mount candle holders. Tip: when in doubt, pick something up, turn it upside down and figure out what to do with it then. ;)

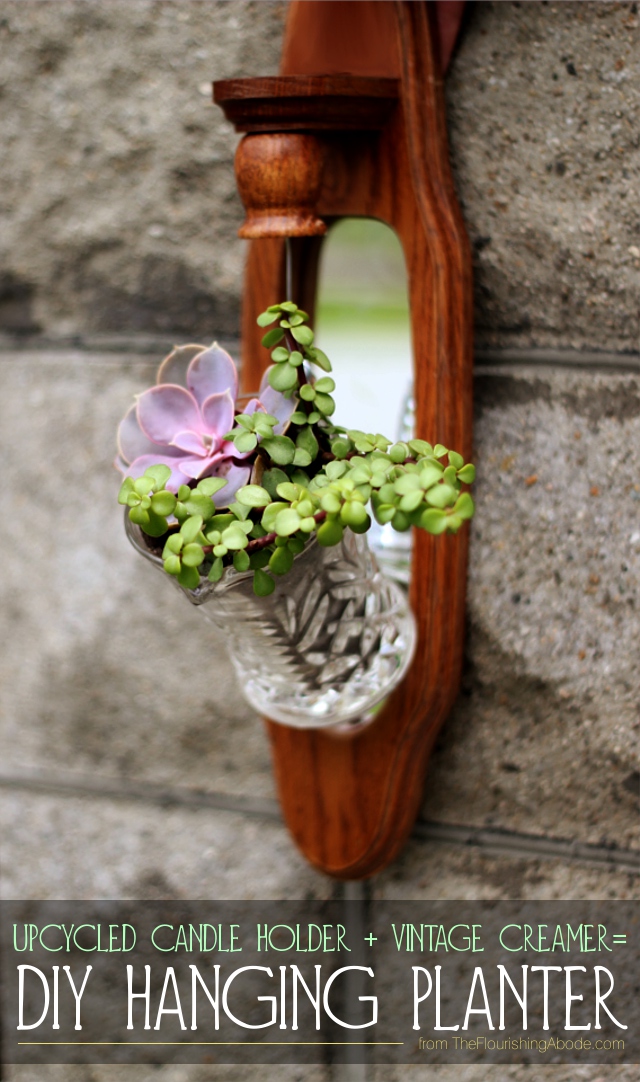
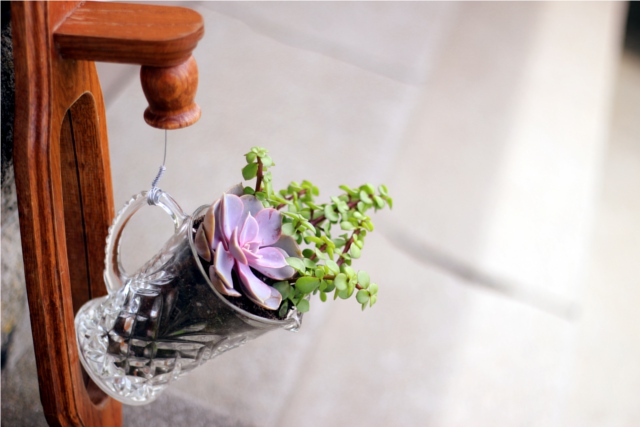
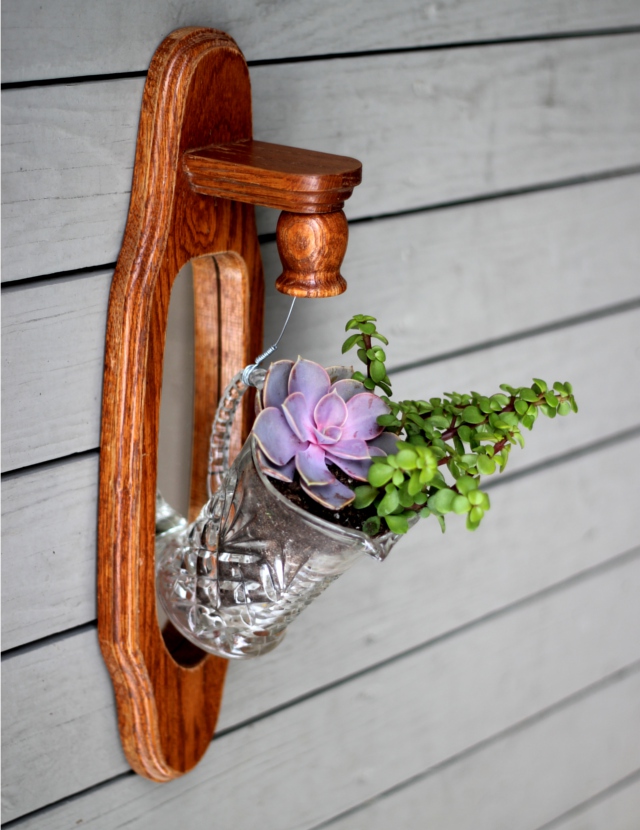
This week’s project turns one of these candle holders upside down and suspends a little creamer pitcher from it to create a unique small hanging planter. Aha! :)

For this project you will need:

Supplies:

– A wall mount candle holder. Make sure it is one that has the actual candle holder part secured on with a screw. (Most are like that, so it’s not hard to find.) I chose one with a mirror, but it certainly doesn’t have to have a mirror. Just pick one you like.

– A small creamer pitcher. Or small jar, etc., as long as it has a handle. Try to find one that has a handle which is weighted toward the top. In other words, if you just hang it on your finger by the handle, it should still be facing mostly upward, not completely sideways or upside down. If the handle is toward the bottom of the creamer, it will face downward, and would spill the contents if hanging. You want one with a handle toward the top so the contents will stay inside when it is hanging.

– Wire. I used about an 19 gauge wire. You definitely want it to be sturdy, because of the weight it will be supporting – but it also needs to be pliable for tight wrapping.

– Pebbles. This is for drainage in the bottom of your planter.

– Plants. Just whatever you like! I think something that trails some would be pretty due to the way the pitcher will look like it is almost pouring out the plant. Like ivy, or a trailing succulent, etc. Nothing large, this is a small planter.

– Soil. Whatever type of soil is appropriate for the plants you chose.

Tools you will need:

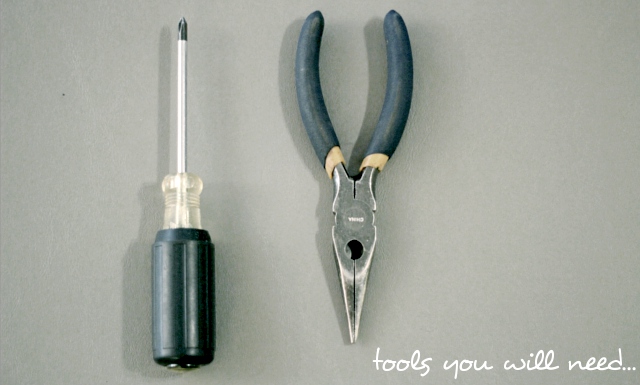
– A screwdriver. It will need to fit the screw that secures the candle holder.

– Wire pliers/wire cutter. For the wire. Um, yeah, pretty straightforward. :)

And now that you have everything you need, here’s how to make it!

UPCYCLED HANGING PLANTER TUTORIAL:

Step 1: In the bottom of the little cup that holds the candle, there should be a screw. Unscrew it completely.

Step 2: Since you will be hanging the entire finished project upside down from the original orientation of the candle holder, remove the hanging bracket on the back of the candle holder, and attach it to the other end, so it can hang the direction you want.

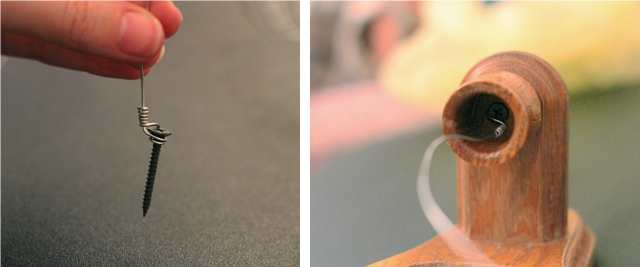
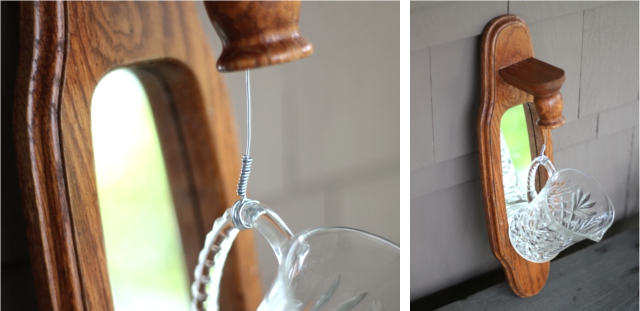
Step 2: (Photographed below) Using the wire pliers, tightly wrap around the screw (the one that had attached the candle holder) a couple times between the head of the screw and where the threading begins. The end of the wire should not be in these tight loops. There should be several inches of wire coming out from one end of the loops, and the rest of the wire should continue out from the loops. Bend both continuing segments upward so they go up over the head of the screw. Tightly spiral wrap the shorter end of the wire around the other wire. If after several tight wraps you still have too much wire, cut the extra length off of the SHORT wire. Reattach the candle holder, and securely screw back in the wire wrapped screw.

Step 3: (Photographed below) Loop the wire that now extends downward from the candle holder a few times tightly around the handle of the creamer. Then, in the same manner as on the screw, use the wire pliers just above the creamer’s handle to very tightly wrap the continuing wire back around the wire the hangs down from the candle holder. Don’t skimp on the number of loops, and don’t let them be loose. This is what is securing the wire from unraveling and dropping the creamer, so make sure your wire wrapping is nice and tight!

Step 4: Place a layer of small pebbles in the bottom of the creamer for water drainage. Add soil, make holes for your plant(s), loose the plant’s roots and place the plant in the planter. Place more soil on top of the roots, and gently water your plants according to their needs.

Step 5: Hang your new upcycled planter on the wall and enjoy!

A couple additional ideas that people who saw me working on this project mentioned:
– If you wanted, you could paint the wooden candle holder before attaching the creamer.
– To make it a little artsy, in addition to the structural wire wrapping, you could do some free form wire wrapping around the entire creamer.

I hope you enjoyed this week’s diy home decor project!
If you did, you might also be interested a previous planter project I made out of old light fixture globes, or in the other hack challenge posts.

I’m curious – if you were going to paint the candle holder, what color would you paint it? Leave a comment below, I love to hear from you!

Hack Challenge: Week 2! DIY Record Side Table

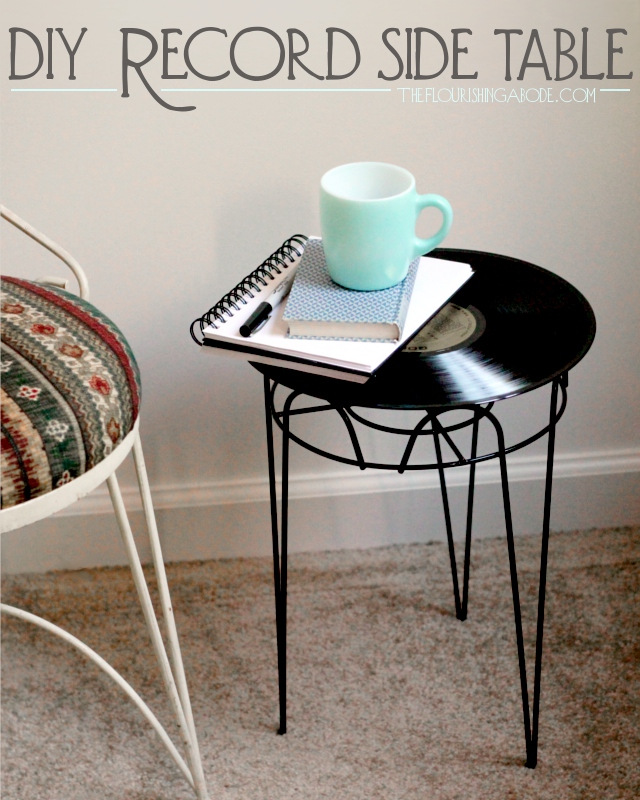
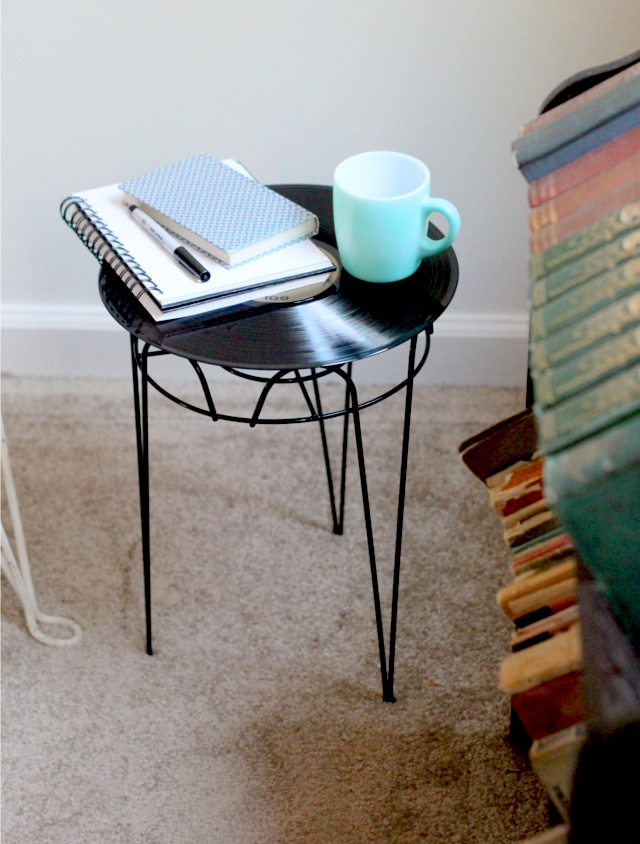
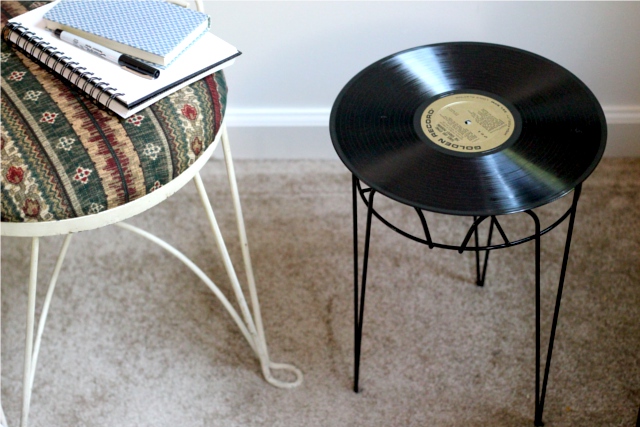
Onward with the weekly hack challenge – where each week I have to hack an item and upcycle it into something completely new, typically decor related. I’m so tickled with how last week’s project of the DIY solar paper lamps went, and I’m also excited about this week’s project: an upcycled DIY record side table!

I’ll be honest – I had a completely different idea for this week originally, but I was having trouble at the hardware store finding screws with the right threading, the right head and the right length that I needed for that other project .. I must admit, I never thought I’d have such specific requests out of a screw, but it was what I needed. The guy at the hardware store was baffled by my request. Soooo, long story short, I’ll need to take a different approach with that project, and I put it off for a different week. And instead I came up with and idea that is MUCH simpler … ridiculously easy, in fact. Which I’m guessing would be preferable to me sending you on a project that calls for you to baffle the hardware store with your request for a certain kind of screw! So here we go with the simple (but still kinda spiffy, in my opinion, anyway) project for this week…

For this project you will need:

‣ ‣ ‣ a vinyl lp record. Make sure it is one that you don’t mind “destroying”, for all listening purposes, anyway. You can often pick up some old records at thrift stores for about a dollar.

‣ ‣ ‣ a planter stand. Preferably in black, to match the record. Also, make sure it in not wider at the top than your record’s width. For instance, for a 12 inch record, I used a planter stand that was 10 inches wide at the top.

‣ ‣ ‣ a glue gun.

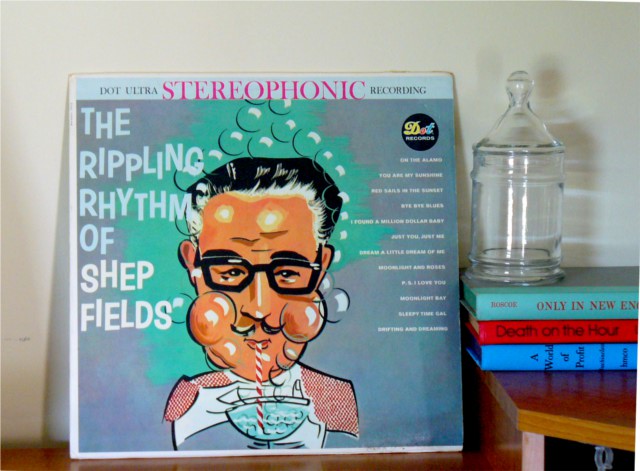
You’ll only need the record, not the cover. But if it has interesting cover art, you don’t have to toss it! I think vintage albums make an interesting decor feature! Like this:

But back to the table! Instructions:

1. Wipe down the record with a damp paper towel – chances are if it’s vintage, there may be a good bit of dust trapped in the grooves. Clean both sides, then wipe gently with a dry cloth. Make sure it’s dry before attaching to the table.

2. Heat up your hot glue gun.

3. Once the hot glue gun is ready to use, apply an even line of hot glue all along the entire top edge of the planter, where the record will sit.

4. Promptly place the record on top of the planter while the glue is still hot. Be careful to place it so that it is centered – you don’t want to scoot it around to get it in the right position after it has come in contact with the glue.

(I tend to eyeball things, but if you’re not comfortable with eyeballing it, before you heat up your glue gun, subtract the width of the top of planter from the width of the record, then divide that in half, and the result will be the amount of overhang the record should have. (ie, 12 inch record – 10 inch planter = 2 inches. Divided in half makes it 1 inch of overhang all around.) On the underside of the record, measure that far in from the edge in a couple of spots, and mark at that point. Then, when placing the record on the planter, watch from underneath as you place it, and line up your markings so they land directly on the glue, and your record will be centered.)

5. Let the glue cool and harden – and you are done! Super easy.

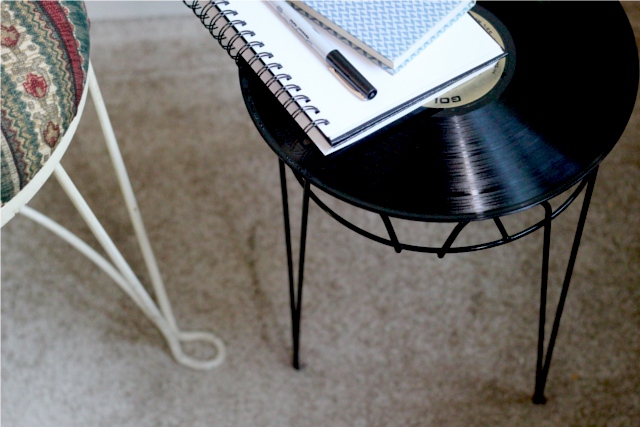
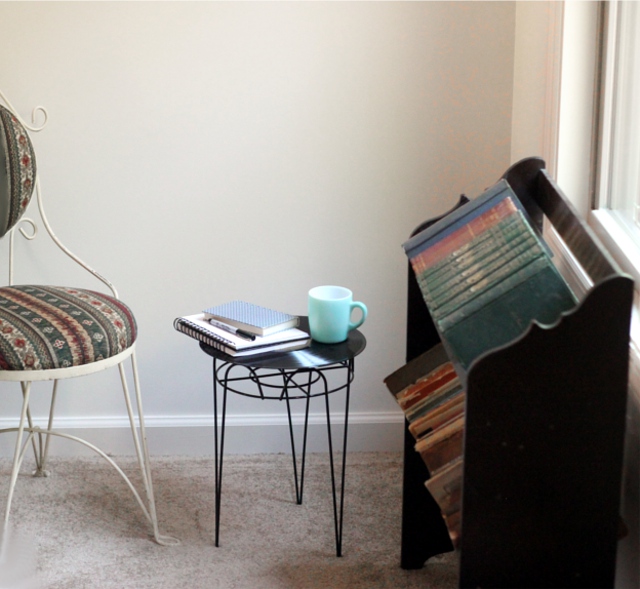
All that is left to be done is to find the perfect spot for your new little little piece of upcycled furniture to sit! :)

Hope you enjoyed this project idea! Records are great for projects, there are tons of things you can make with old records.
Have you ever upcycled a record?
And I’m curious – do you prefer easy projects like this, or more time intensive/elaborate projects that involve power tools like a miter saw, for example?
Leave your thoughts and comments below, I love to hear from you! :)
Hack Challenge: Week 1! DIY Solar Paper Lamps

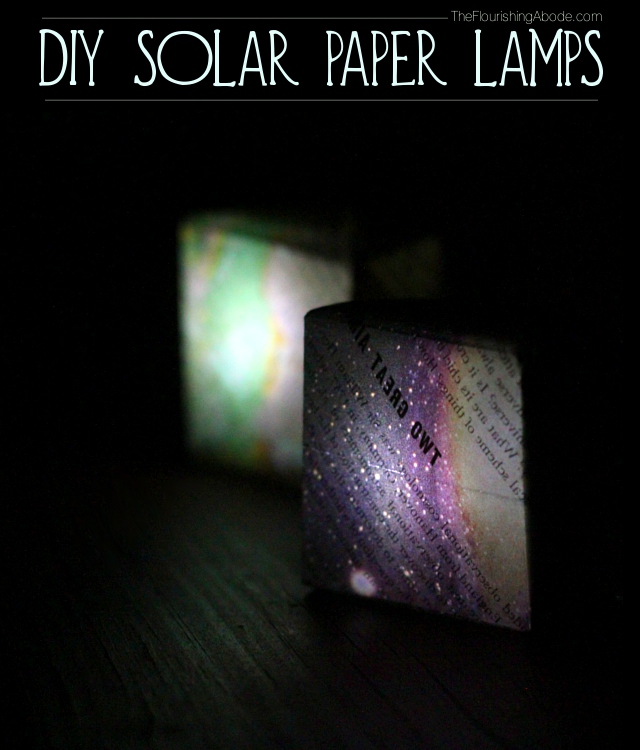
Here we go! Thanks to all of you who voted for what would be the next challenge – and this week it begins: The “Hack” Challenge, where each week we come up with a new DIY project, upcycling an item from it’s original purpose into something new, usually some kind of home decor or furniture type project. And so onto week 1… Solar Powered DIY Paper Lamps!

Generally when I come up with an idea for something I would like to turn into a lamp or use in lighting, I run into the same problem: it is not an object that would be safe to light with an interior candle, and it can not be easily wired. But for this week’s project, you don’t have to worry about either one. Since these are solar powered, they don’t need any wiring, and there is no flame to worry about. We’re “hacking” into yard solar lamps to create our own glowing paper lamps. I think these would be lovely in a collection as part of a centerpiece for a dinner table, or lining a deck railing for an evening gathering, or anywhere ambient lighting would be a nice touch!
All you need are…
– some solar powered lawn lights, one for each lamp. You can pick these up for just a couple dollars.
– an old illustrated book (encyclopedias are perfect because of the variety of types of images!)
– and a pair of scissors

Make sure you get the type of solar lawn light that has a square head, and then stand them outside in direct sunlight to get their charge.

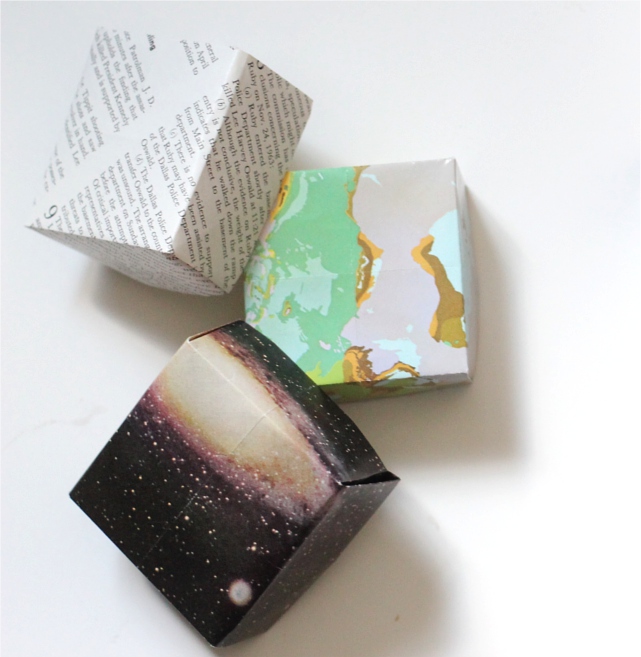
Choose an page from the encyclopedia, or whatever paper you choose to use, that has a design you want to be the “shade” of the lamp, bearing in mind that whatever is on the back of the page will also shine through. Cut a square out of that page. The size ratio that I used was this: for a 2.2 inch square solar lamp head, I used a 5.5 inch square paper. Here is how you turn that piece of paper into an origami box to use as the “shade” for your mini-lamp:

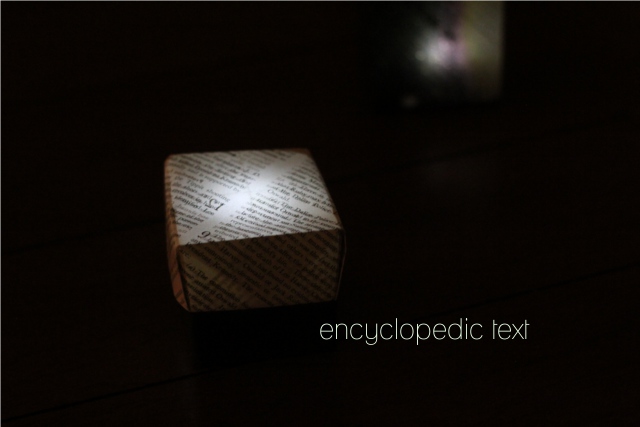
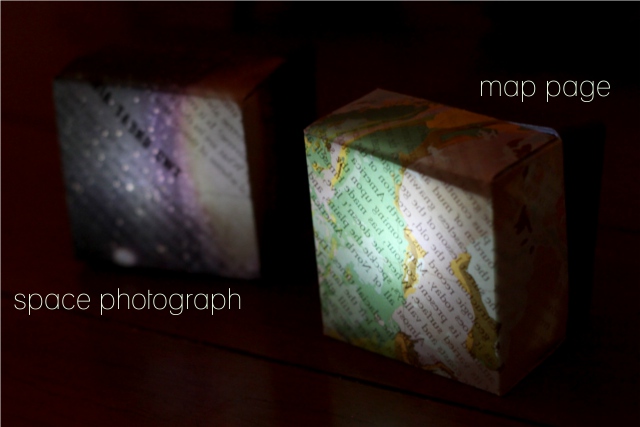
I made three separate paper “shades” for the lamps, all from the same encyclopedic volume from 1965: one was an outer space photograph, one was a map, and one was simply text.

Once the solar lights have charged, bring them inside, and disconnect the top, which contains the light bulb, from the rest of the body. You’ll probably be able to do this by simply partially twisting the top and then lifting.

Fit the paper box shade onto the solar light unit. If there is still a fair amount of light where you will be displaying these, you’ll probably need to sit them face up, so that the solar panel is downward, and not absorbing any light, so that the light will turn on, as shown in the first photo below. But if it will be dark, I think they also look very nice displayed on their side, as shown in the second photo below. Either way, you now have a unique piece of ambient lighting, which can be changed to a completely different design by simply making a new origami box to go on top!


Remember to recharge the lights before their next use – just remove and set aside the paper, and reattach the light to the top of the yard light, and put it back outside!

So, what do you think of week one of the hack challenge?
What type of paper would you use on top of your lamps?
Leave your thoughts and comments below, I love to hear from you! :)
Final Adventure Challenge! Stop Motion Festival

Well, it’s time for the final post of the Adventure-a-Week Challenge! It’s been such a fun project over the last several weeks. You can see a list of all the Adventure-a-Week posts here.
(If you’re reading this in an email or reader and can’t see the video above, just click here .. the video is where the substance of this week’s challenge is! Plus there’s some new stop motion video, as well as the announcement for what the next challenge will be, now that the adventure challenge is over!)

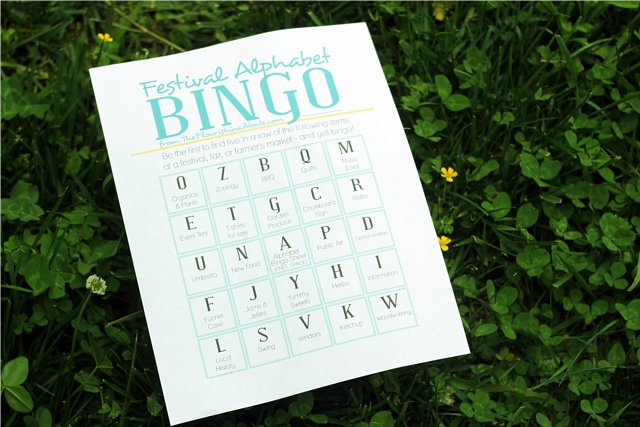
Below, is the set of Bingo printables – I’ve created 6 Bingo sheets, all from our same festival alphabet finds, but scrambled into a different order for each sheet. Hand one out to each family member and start looking for the finds! Just like any Bingo – who ever crosses off five in a row first, yells “Bingo!” and wins. :) All of the items just need to be spotted/found, not necessarily purchased. Most of the letters should be self-explanatory as shown in the video … but on “N”, new food just means anything you have never tried before. In my case, it was a deep fried Snickers. Om nom nom!
Just click the image below to access the free Festival Alphabet Bingo printables:

Thanks to Mike Mills (from the Knox Historical Museum who was giving free local history tours at the festival) and B Edward Pope (from bpopewoodturning who gave us lots of interesting information about his work) for both kindly letting me take your photos for our project! And thanks to Kevin MacLeod for the music.

Don’t forget about the upcoming new challenge as announced at the end of the video, and be sure to subscribe so you’ll be the first to know when the new challenge posts begin! :)
So what do you always look for at fairs and festivals?
Leave your thoughts and comments below, we love to hear from you!

Adventure Challenge: Week 8! Go Geocaching

Have you ever gone geocaching? It is the perfect activity for week 8 of our adventure-a-week challenge! Once you have a GPS, it is something you can do for free, and is a great way to explore a new area – or even to see a familiar area is a whole new light. As it is described on their website, Geocaching.com, it is a real-world outdoor treasure hunting game. Players try to locate hidden containers, called geocaches, using GPS-enabled devices and then share their experiences online.

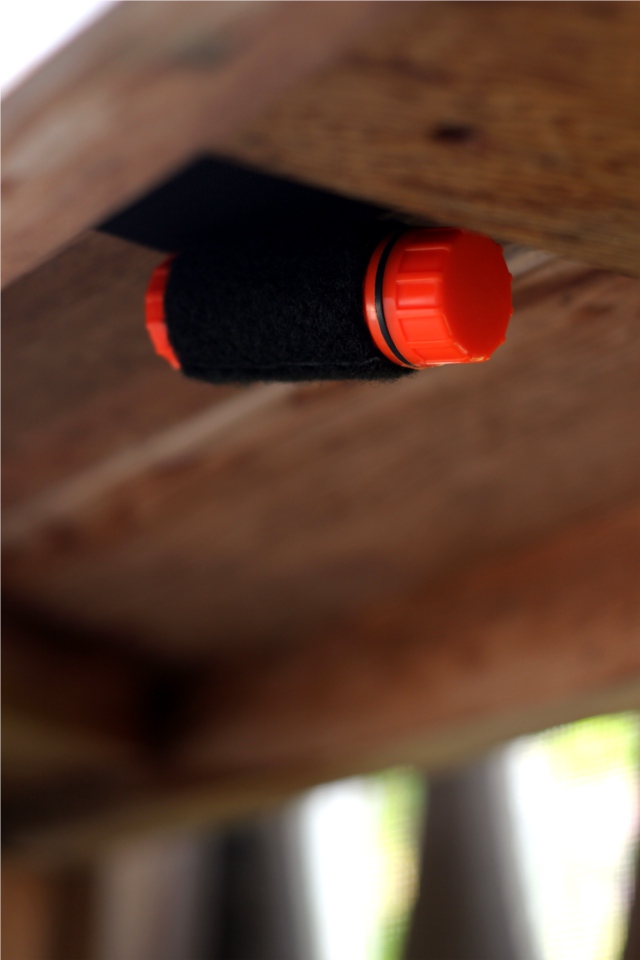
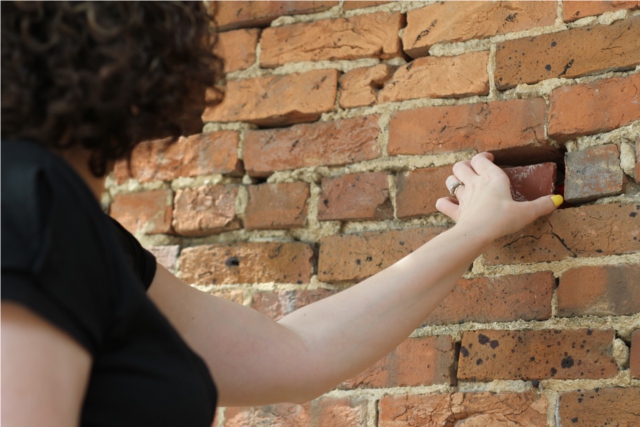
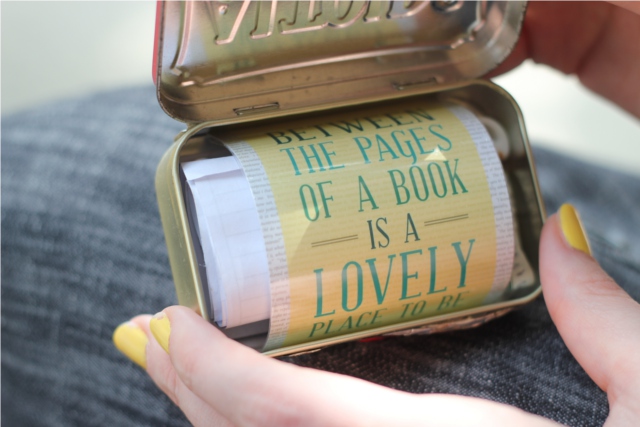
The fun is in the hunt – to find these hidden caches, more than what is inside them. They can range in size from micro caches in tiny capsules only a couple inches wide with barely enough room for just a sign-in sheet, to regular sized caches often in an ammo-box or other waterproof container which often have little trinkets of small value which you can trade out in addition to the sign-in sheet, to “virtual” caches which are not a typical cache with a log-in sheet, but just takes you to an area where there is an interesting sight to see and find. My personal favorite are micro caches- I think they are the most challenging to find! Often, in addition to the coordinates given for the GPS there are clever clues to help you narrow down your search to a more selected area.

To start, you sign up and download the waypoints from Geocaching.com, and input them into your GPS to get you to the area where the cache is hidden. Once there, you start hunting. But with a somewhat clandestine air- you have to be aware of “muggles”! The definition of muggles on the geocaching.com website makes me laugh: “Muggle: A non-geocacher. Based on “Muggle” from the Harry Potter series, which is a non-magical person. Usually this term is used after a non geocacher looks puzzled after befriending a geocacher searching for a cache, or when a non-geocacher accidentally finds a cache. Geomuggles are mostly harmless.” If you call too much attention to a cache, non-geocachers who saw you might move it or take it after you leave, not realizing what it is. So be sneaky! ;)

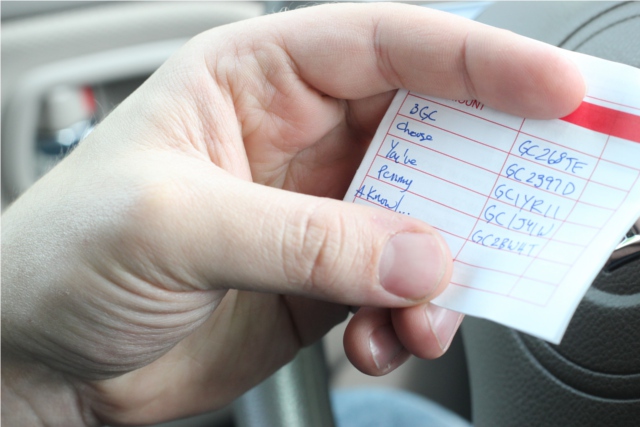
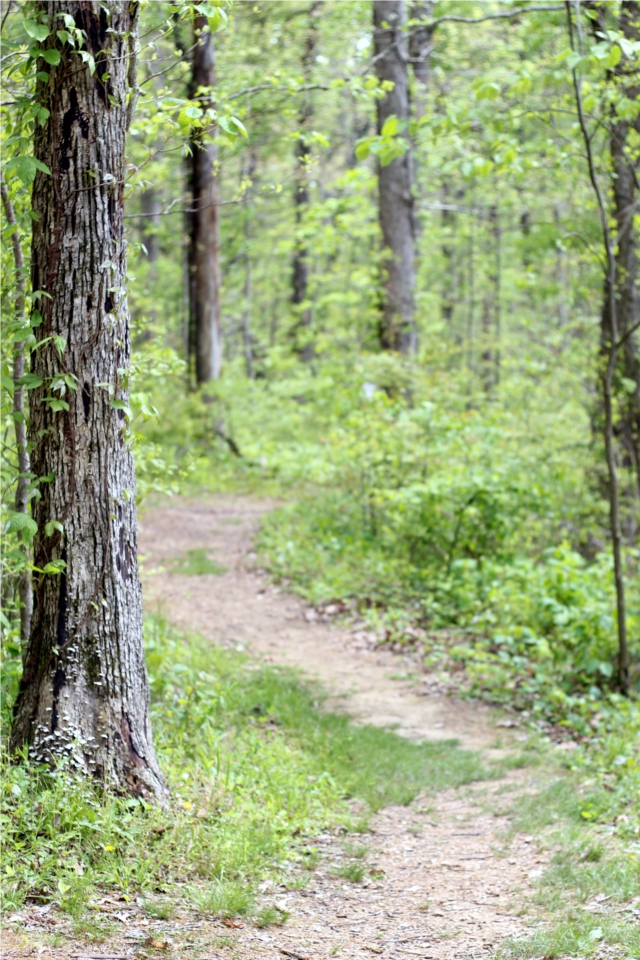
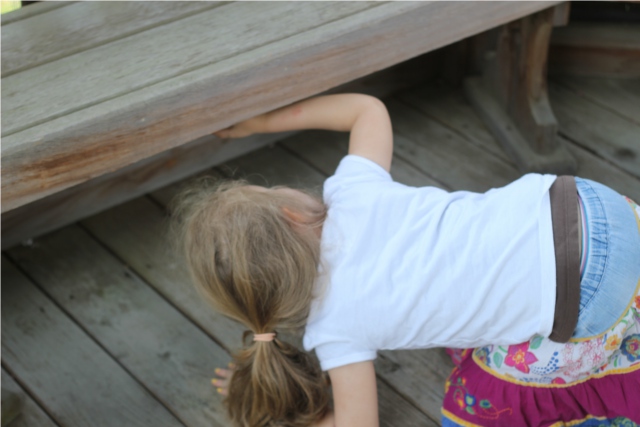
After you have found the caches and logged into the sheets and had your fun exploring, when you get back home you log your finds on the geocaching website. Geocaching is something we enjoy doing occasionaly – but it had been a pretty long time since we had gone geocaching, so this week it was fun to get out and try it again! Here was our adventure, there were very few “muggles” around where we were geocaching, so I was able to take pictures without too much trouble:

I don’t usually bother trading items in the larger caches – anytime I’ve seen someone give Geocaching a try thinking that the trading is the main thing, they’re usually disappointed …the fun is really in the finding! A lot of times the clues/names and such are very clever, too. But I did decide to leave one of my mini-art prints in one of the caches, as you see above. :) We had a great time, and one of the fun things about geocaching is it takes you to new places and helps you find interesting areas. We certainly made some new discoveries!

If you haven’t gone geocaching, you should give it a try! Here are a few more geocaching terms that might be helpful to know:

BYOP: Bring your own pen. This means the cache is too small to hold a pen along with the sign-in sheet, so you must bring your own to be able to log your visit.

Multi cache: This is where a single cache hunt is made up of a series of individual caches, in a series. It is usually on some theme, and you may need to find the caches in a certain order to get all the information needed to find the later caches.

Travel Bug: You might find a travel bug in a cache. This is a token of some sort with a tracking number, and hitchhikes from person to person and cache to cache, with its progress tracked online.

CITO/Cache in, trash out: This is a common practice that as you geocache and log into caches you find, that if you find litter in the area you are hunting, you take the time to collect it and throw it away. So do some good while you are out having fun!

Have you ever gone geocaching? Does it interest you?
Leave you thoughts and comments below!

Vote! YOU choose the next weekly challenge!

Thanks so much to everyone who submitted ideas last week for what should be the next weekly challenge here on my blog! Now that it’s narrowed down to the following options – it’s up to you to vote and decide which one will actually happen! All of these ideas were suggested by readers, and now voted for by readers. So – what’s it going to be?? You choose!

Which idea should be the NEXT WEEKLY CHALLENGE on my blog?
  
pollcode.com free polls 

Voting ends April 26th, and the winner will be announced April 27th. The new challenge will start at the first full week of May. Until then, I’m finishing up my current challenge: An Adventure-a-Week. And a special thank-you and congrats to Alessandra, Allie, Jai, Katrina, Fede, Church Mouse, Rob, Amanda, Jody, and Lori – your ideas are the ones in the poll!

So everyone vote for your favorite- and feel free to tell others which one you voted for and encourage them to come vote as well – the more people who vote for that idea, the more likely it will win! Plus, if you haven’t already, be sure to subscribe to my blog so that you won’t miss out on the upcoming challenge, as well as other posts!


Adventure Challenge: Week 7! DIY Art Rubbings

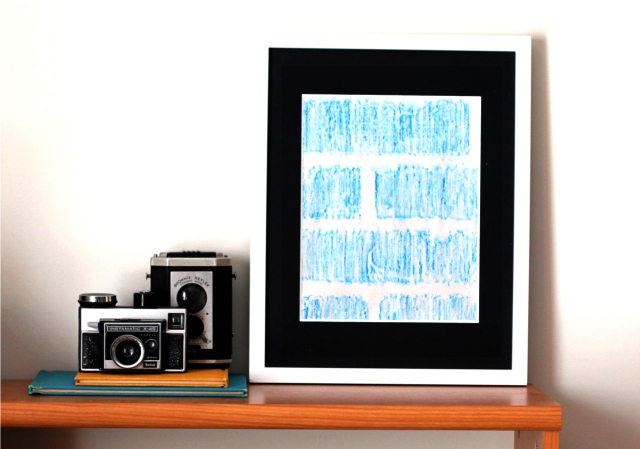
This week, for our Adventure-a-Week challenge, our adventure doubles as a craft project as well. I was in a used book store one time and saw a book on “rubbings” and it captured my attention, and we gave it a try for this week’s adventure. So grab your art supplies and head outside!

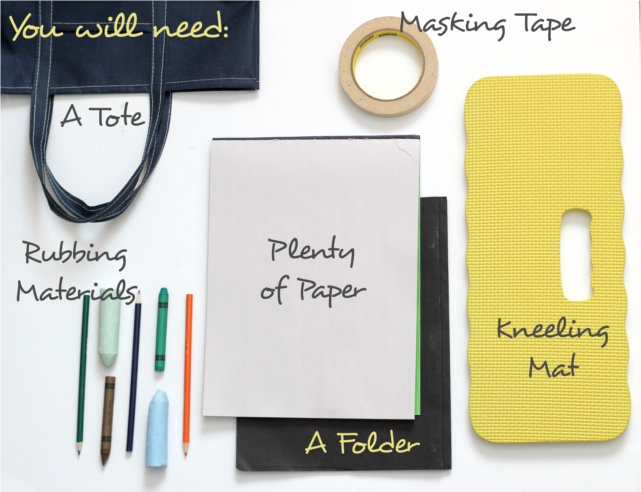
For this week’s activity you will need…

– Paper. And plenty of it. I found that I like using very thin paper, personally. I bought a cheap sketchpad and I really liked the texture and thinness of the paper for this project.

– Rubbing Materials. There are all sorts of rubbing materials you could use! Take a bunch with you and try them out to see what you prefer. Graphite, colored pencils, pastels, chalks, wax, you name it! Although I didn’t expect it, I ended up preferring crayons for larger pieces. Colored pencils were nice for more detailed/smaller items.

– A Kneeling Pad. If you’re going to be crouching on sidewalks and streets making your rubbings, it’s a little more comfortable if you have something under your knees.

– A Folder. Or something to put your finished rubbings in to prevent them from getting bent up and wrinkled.

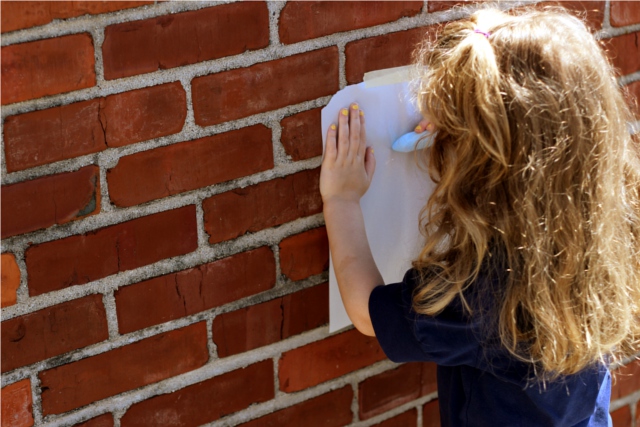
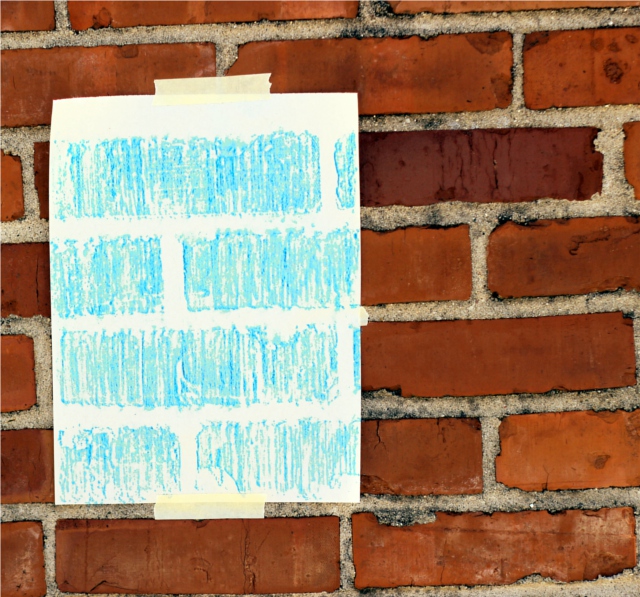
– Masking Tape. You need for your paper to lay very still while making a rubbing, and I found masking tape to work very well. It’s especially helpful for working on vertical surfaces, of course, but even on a flat horizontal surface, it is a good idea. Be aware, though, that depending on the kind of paper you are using, the area with the masking tape may need to be trimmed away. This is usually fine because of the nature of rubbings, often the edges are not the most attractive part, anyway, and can be cut away.

– A Tote. Or something similar to carry all these supplies!

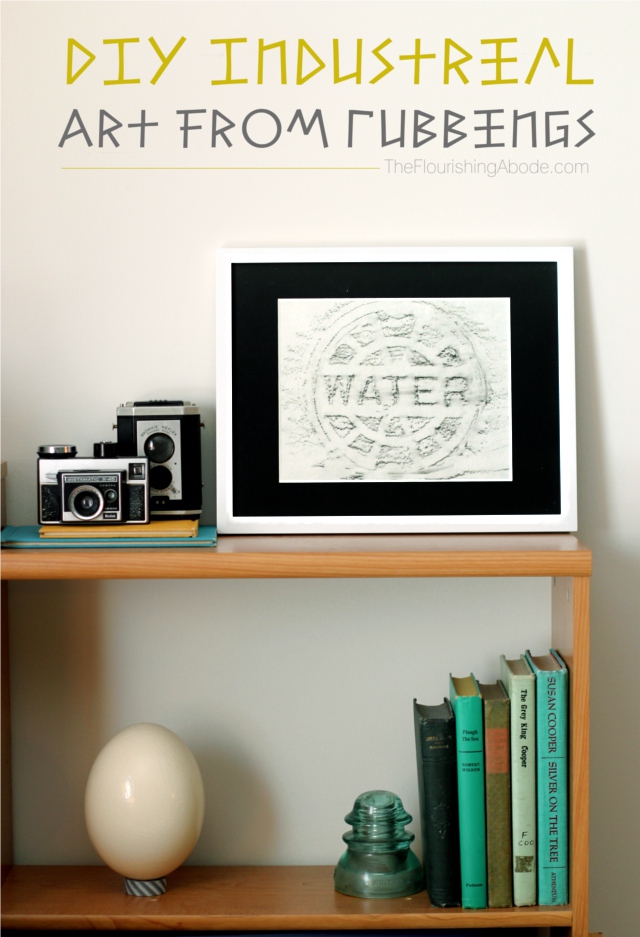
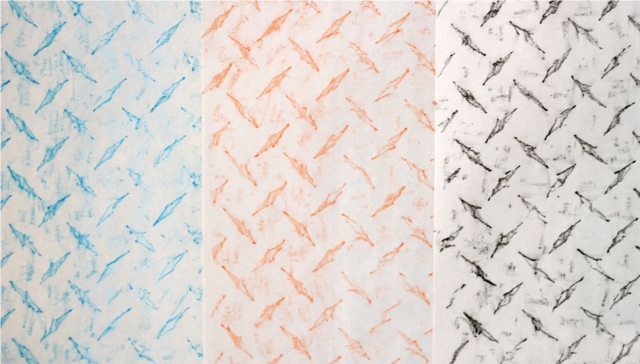
You could do a variety of themes out of rubbings – such as, a nature theme where you make rubbings of leaves and feathers and other natural objects. But I wanted to do a more urban/industrial theme. Of course, this works best if you live in a fairly urban area … which I do not. However, even so we were able to find some interesting subjects for rubbings. Try man hole covers, engraved signs, and plaques for more definite rubbings, or try brick walls, metal plates and concrete for more textural subjects. Be aware, though, that you need to know what you are allowed to make rubbings of – it is illegal some places to make rubbings of gravestones, and, of course, you shouldn’t wander onto private property to make rubbings. Still, it is an interesting way to wander around a town, looking for interesting spots to make into rubbings – you notice all sorts of things you wouldn’t have seen before.

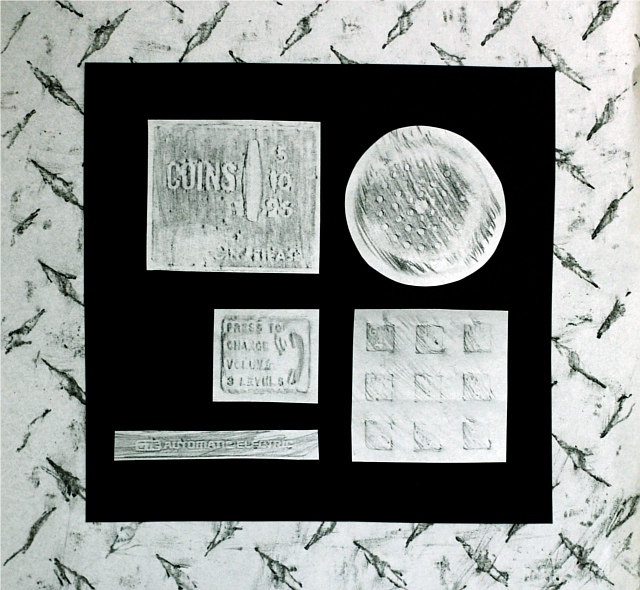
You can even make a collection of small rubbings all from different aspects of one particular subject. It might be fun to make rubbings this way, put them together and see how quickly people can figure out what it was. I’m sure you can easily tell what this was!

A few tips on making rubbings…

Don’t use a sharp point of whatever art medium you are using, but rather use a blunt point or use it on an extreme angle.

Start out marking lightly – if you press too hard, you’ll just be drawing on top of the surface, not really picking up the texture. But if you start lightly and gradually get to darker/harder strokes, you’ll get a better feel for what works well.

While making the rubbing, try to keep your hand moving in the same plane. In other words, if you’re rubbing right to left, don’t suddenly switch to up and down, or you’ll probably end up with some unattractive competing lines.

This is probably an activity better for adults or older children … small children can have fun just drawing on their pages, but probably will have trouble gently pulling the textures into relief on the page.

Go exploring and think outside the box on what you can make into rubbings!

I hope you enjoy it!
Have you ever made rubbings at home, for instance of pennies and household items?
What about heading out and about to look for more unusual items to turn into rubbings?
Leave your thoughts and comments below!