Skip to content

organization

Tips on blog pages: The must-haves & the panache

A few posts back I mentioned the importance of white space (especially in your background), but that if you are worried about it making your design too boring, do not fear! There are other ways to add panache to your site – ways that enhance rather than distract from your content. The banner and the sidebar we have already discussed – and today we’ll be talking about something that I consider to be often overlooked design-wise: your menu of stand-alone pages.

When I refer to “stand-alone” pages, I’m talking about pages you create that don’t shift down in order like regular blog posts – these are pages that stand on their own. For instance, the “About Me” page is a very common example of a stand-alone page. You can see my menu of stand alone pages right below my banner – each with my own pen and ink illustration. Personally, I think that menu is one of the main things that helps my blog design to be unique and branded. Plus, it helps with navigation, as several of those pages are designed to highlight particularly useful posts (like in the Tips & Tutorial gallery or on the Printables page).

In today’s post, I’m going to be sharing my thoughts with you on important and helpful ways to use pages, as well as tips ranging from practical to the more panache on how to set them up – and, as always, demonstrating on Lori’s new site for her blog, In My Kitchen, In My Life. And I’m reeeeeeeeeeeeeally excited about Lori’s new menu of buttons which I will be showing later in this post! The possibilities are fairly endless on how you might choose to use your pages. But here are my suggestions as a couple “must-haves” in your pages … as well as a list of ideas for “maybe-haves”, depending on what kind of blog you have.

An “about” page is HUGELY important for a blog. I’ve heard statistics that, in general, the “about me” page is one of the most highly visited pages on a site. Why? Because people want to know who you are and what the site is about! People like to talk and visit with someone they know. Use your “about” page to let people get to know you. Let’s say you run a weight-loss blog. Why do you? Is it because you have a touching story of how you lost a lot of weight yourself, and you want to help others? Or is it because you see the growing trend of overweight children in America and you want to help parents keep their kids healthy? People love to hear your story.

Here are a few fun ideas for ways you might approach your “about” page:

‣ ‣ ‣  Photographs and descriptions of you doing things pertaining to your blog subject
‣ ‣ ‣  A bullet list of interesting facts about you
‣ ‣ ‣  The story of how you got involved in whatever activity it is that you blog about
‣ ‣ ‣  A video for your about page
‣ ‣ ‣  Your own personal mission statement, and the things that matter most to you
‣ ‣ ‣  Humorous interview style
‣ ‣ ‣  Stories/pictures from your childhood that help define you
‣ ‣ ‣  Separate “about” pages for your blog itself, as well as each writer on your blog
‣ ‣ ‣  Etc! Have fun with it!

Some things to probably avoid on your “about” page…

‣ ‣ ‣  Writing in the third person. Unless you have highly unusual circumstances on your blog that make it extremely formal, write in the first person. We all know it’s you writing it. Imagine you are talking to your readers when you write it … and how odd it would sound to talk in the third person.
‣ ‣ ‣  Making it reeeeeeeeeeeeeeally long. It doesn’t have to be your WHOLE life story, just give people a glimpse into your life and a taste of your personality.
‣ ‣ ‣  Résumé style. People want to “meet” you on your about page … not feel like they’re being sold to or that you’re trying to prove something. Highlighting some accomplishments is fine, but try to keep it casual and personable. Awards/features/accomplishments can, in fact, have their own page, like a “Press” page.

But one way or another, have an “About” page on your blog! You visitors are looking for it.

Your contact information should be easy to find from any page a visitor may be viewing. A good way to do this is to have your contact page in your pages menu. There are any number of reasons a visitor to your site may want to get in touch with you – they may want to advertise on your site, they may be interested in guest posting, they may spot an embarrassing typo they want to alert you to, they may want to keep in touch with you on social media sites, they may just want to say hi! Have that contact info easy to find. How much contact info you share is completely up to you. I’ve seen people on large blogs even including their home address so people can send them gifts! Personally, an email address is the most personal info I put on my site … and even that is my “professional” email address, which gets screened through a couple filters before it gets forwarded to my personal email, to weed out the spammers. Also – helpful hint here if you’re concerned about bots scanning your site – you can always include your info in an image rather than in type. That way a real visitor will be able to see it, but it won’t get scanned the same way by bots and crawlers. Or you could always set up a “contact form” where people submit their questions/messages right on your site rather than providing contact info. But at the very least, it is a good place to share your links for how to contact you on other sites – for instance, your Twitter, your blog’s Facebook page, your Pinterest, etc.

Ok, so now you have an About page and a Contact page. What other pages might you want? Really, the possibilities are endless. Here is a list of ideas – and not all of these will be applicable to everyone and you wouldn’t want this many anyway – but hopefully this list of ideas will help get your mind rolling…

‣ ‣ ‣  Home/Blog Page (helpful, because a lot of people won’t be landing on your most recent post, if they’re coming from Pinterest or anywhere else that linked to a previous post)
‣ ‣ ‣  About Blog Page (in addition to an “about me” page)
‣ ‣ ‣  Welcome Page (where you can give first time visitors a tour)
‣ ‣ ‣  Shop Page (where you sell your wares)
‣ ‣ ‣  Press Page (where you highlight places you/your blog have been featured/awarded/etc.)
‣ ‣ ‣  Sponsor Page (info on advertising/sponsoring your blog)
‣ ‣ ‣  FAQ’s Page (your answers to frequently asked questions)
‣ ‣ ‣  Highlight Content Page (pages like my “printables” page or “tips and tutorials” page that highlight especially relevant content from your blog)
‣ ‣ ‣  Outside Pages (including a button in your menu that doesn’t lead to a stand-alone page, but rather links directly to a site outside of your website – for instance my “Cafe” button in my menu takes you to my Etsy shop, FlourishCafe – or another example would be a button that takes you to a subscription form)
‣ ‣ ‣  Links Page (a page that includes links to other pages, like if you want to recommend other blogs/books/resources/etc.)
‣ ‣ ‣  Map Page (a sitemap to help people get around your blog)
‣ ‣ ‣  Etc! The sky is the limit.

First, we’ll go over the basics – and next, how to get that extra panache with images and such. Since in this series we’re moving Lori’s blog from Blogger to WordPress, most of the tech stuff in this series is about how to do things on WordPress. However, in this instance, I actually wrote a blog post a while back when I was on Blogger myself about how to make stand-alone pages in Blogger. You can click here for that post … it’s like a glimpse into the past because it’s from my old blog. :)

Here are the instructions for WordPress. Sign into your WordPress dashboard. On the left-hand menu, you’ll see the option “Pages”. From there, you can select “add new”. This is what you’ll see (minus my notes, of course ;)
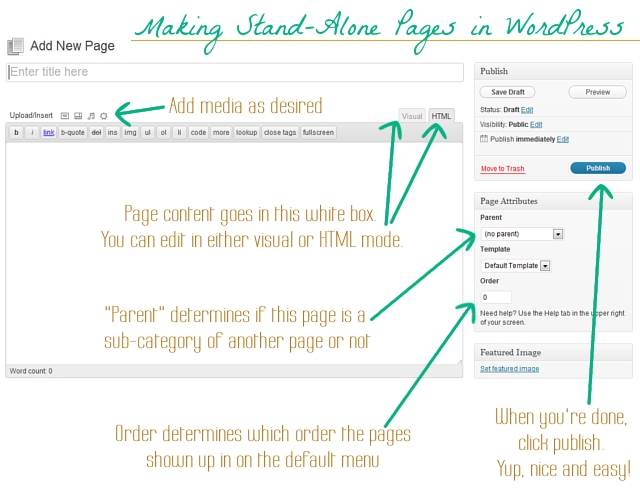
Super easy. Now let’s take it to the next level by creating a menu of buttons for our pages!

So, now you’ve made your pages. And we discussed in an earlier post how to make your own graphics that fit your branding and design choices, and these buttons are no different. If you want to make a button for each page in the menu (such as I have under my banner) make sure each image file is exactly the same size – or at the very least, all the same height. You want your menu to look uniform and even. Go to the “Media” section of your WordPress dashboard and upload all the buttons you have made for your menu.

Next, in your WordPress dashboard, go to Appearance -> Menus. Name your new menu (I called mine “top menu”), and save it. Next, look for the “custom links” box:

In the URL box, put the link you want it to go to. If it’s leading to one of your stand-alone pages, like your about page, put the URL for that page in this box. Or, if you’re wanting to link to an outside page, such as your Etsy shop or your subscription form, just put that link here – this is how you include a button to other sites!

Then, in the “Label” box, you will want to use the following code to make it display your button image:
 

<div style=”background-image: url(‘http://www.inmykitcheninmylife.com/wp-content/uploads/2012/08/about.jpg‘);background-repeat: no-repeat;padding: 116px 0 0 120px;”></div>

.. only you will want to edit this code. For one thing, you will need to change the address in green to the URL of the image file you uploaded. (to get the url of an image you uploaded: go to “Media”, hover over the image, click “edit”, then scroll down to “file URL” and copy it.) Also, the numbers after “padding” will need to be adjusted to fit the size of the image you uploaded. For instance, Lori’s buttons were 120×116, your’s will be a different size, most likely. Once you’ve adjusted the code as needed, and have put it in the “Label” box, click “add to menu”. (As I’ve explained before, I’m no coding wizard … I just tweak. For a more full explanation on this particular bit of code, you can check out this blog post where I found it.)

Repeat with each button you want to make! Rearrange order by dragging and dropping. Click “save menu”. Make sure that in the box at the top of the page that your new menu is selected to make it active:

(Or, alternately, if you don’t want to use it as the main menu at the top of the page, and you want to use it else where, you can add it as a widget on your widgets page.)

Let’s say, though, that on one of the buttons, you don’t want the button itself to link to anywhere, but instead you want a drop-down menu of options to come available. Here is how you would do that…

Make the button the same way, only leave the area for a URL blank. But input the image code the same way. Add to menu. So the button is ready, and doesn’t lead anywhere. Now to make the drop down menu, look for this box on the left hand side:
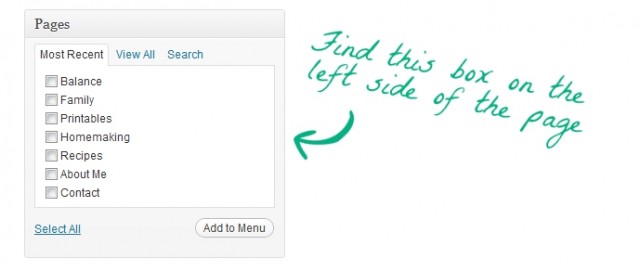
This is a list of all the pages you have made. Find the pages that you want to show up in the drop-down menu, select them, and click “Add to menu”. Then drag and drop those newly added pages under the button you want to be at the top – make sure you drop them so they are indented:
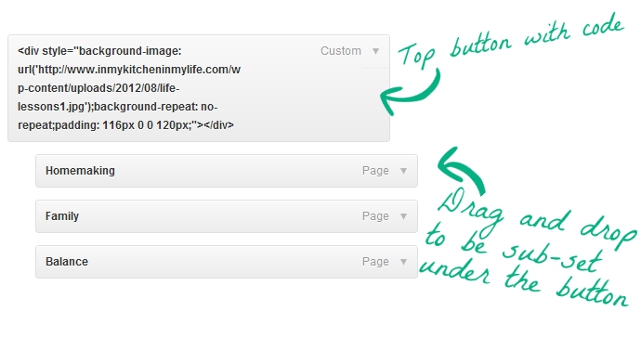
And now a menu will pop up with those options when someone hovers over the top button! Nifty, eh?

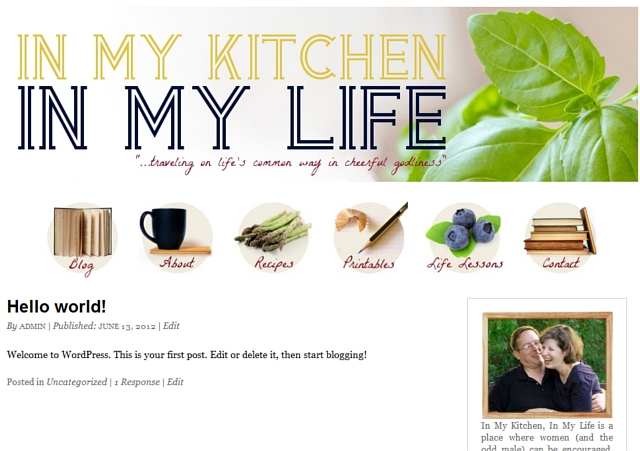
So *drum roll* … here is Lori’s site, now with menu buttons! She can always change them around to her own needs and desires, but for starters, here is how I’ve set it up:

She mentioned some types of pages she wanted, so she now has the following buttons:
– Blog
– About
– Recipes
– Printables
– Life Lessons (which goes into a drop down menu where she can feature any special series she chooses)
– Contact

… and, as we’ve discussed over and over again, any graphics you design for your site, like these buttons, should fit with your branding statement and design choices (style, medium, colors, etc.)

So what do you think about how things are coming along? Do you use your menu of pages as a design element? Also, I’d love to hear what pages you have set up on your own site, it would be interesting to see the variety of types of pages different bloggers have! Leave your thoughts and comments below, I love to hear from you!

If you’ve missed the other posts in this series on DIY blog redesign, here they are:
Part 1: Discover your branding with “The Drawing Board” Printable
Part 2: WordPress vs. Blogger
Part 3: Design Tips + Design Worksheet
Part 4: Themes, Coding and Stylesheets
Part 5: Making your own graphics
Part 6: 7 Blog Layout Tips to Engage your Reader
Part 7: Blog Page: The Must-haves and the Panache (This is this one!)
Part 8: 25 Tips for using WordPress
Part 9: The Big Reveal
Part 10: 7 Ways to Promote and Market Your Blog
10 things you shouldn’t miss

‣ ‣ ‣  1. Several of you commented on Friday’s post asking “how are you still blogging while moving?” I can’t claim I’m keeping up with everything perfectly – but RememberTheMilk.com has been hugely helpful. I can plug in tasks I need to complete for moving, tasks I have to complete for my shop, and anything else – and it sends me handy email reminders so I don’t forget anything! Super helpful.

‣ ‣ ‣  2. I absolutely love rainy days. The sound of the rain against the windows is just so soothing and lovely. I think Tim is the one who showed me RainyMood.com … it’s an on demand rainy day whenever you want it!

‣ ‣ ‣ 3. Fellow readers: do you ever feel like you’re not sure what you should read next? Well, the aptly named WhatShouldIReadNext.com should prove helpful. You input books that you enjoy, and it recommends books that others who enjoy your books also enjoyed. Simple but pretty brilliant! Not all the answers are perfect, of course, but it’s a fun place to start.

‣ ‣ ‣  4 & 5. Fellow writers: if you’re not familiar with NaNoWriMo.org … you’re missing out! It’s for November which is NAtional NOvel WRIting MOnth, and the basic premise is that you write a 50,000 word book IN A MONTH. It is crazy, insane, and a ton of fun. And whether you do NaNoWriMo or not, if you ever have trouble getting motivated to work on your writing, I highly recommend WriteOrDie.com. Let’s just say that it finds ingenious ways to punish you if you stop writing, and it’s great to crank out a high number of words in a short time – you can always go back and edit later. ;)

‣ ‣ ‣  6. Fellow wives: (and especially those who like me who struggle with housecleaning) should check out Lori’s series on Cerebral Homemaking. It’s really helping me completely rethink how I approach homemaking! Although, being in the middle of a move … perhaps not the easiest time to implement! Still, once we’re in our new place, I can’t wait to really start putting more of it into practice. ;)

‣ ‣ ‣  7. I know there are a lot of charities out there, but one you should definitely check out is Heifer.org. You’ve heard the saying “if you give a man a fish, you feed him for a day; if you teach a man to fish, you feed him for his life”. This site lets you contribute to third world families in a way that’s even better than just sending money – you can send a goat, a cow, a flock of geese … something that will continue to help them provide for their family over a longer time period! Check it out, and you could help a family provide for itself in a meaningful way.

‣ ‣ ‣ 8. If you like to make to-do lists (and in particular bucket lists), you might enjoy 43things.com … it’s a fun way to keep track of goals and aims. Checking off the goal “lose 20 pounds” or “move to Boston” or whatever goals you have from your list does feel good!

‣ ‣ ‣ 9. If you’re looking for a laugh on Twitter, you should follow Honest Toddler. Basically you’re following a fictional 3 or 4 year old with complete ability to talk/write/share his thoughts and feeling. He has status updates like, “Daddy’s home!!! Mommy’s telling him all the feelings she’d had since morning.” or “Learning about colors. When am I ever going to use this.” Makes me laugh. :)

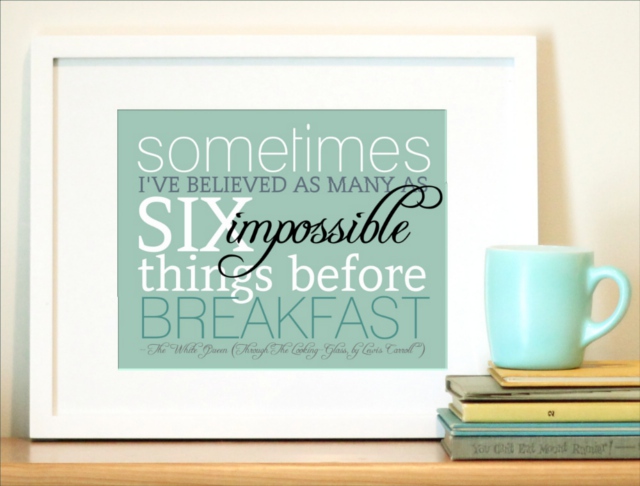
‣ ‣ ‣ 10. And of course, a little shameless plug here, there are only a few days left to get August’s print of the month (shown below) for half off from my shop, FlourishCafe. Details are here. :)

What sites and finds have your found online? Share them below! I love to hear from you. :)

Well, since I’m bad at clues- here’s the answer!

So, last week I tried to post some clues to see if anyone could guess what the next weekly challenge would be … buuuuut apparently I’m pretty bad at clues, haha! But the hack-challenge ends this week and next week is the start of the new challenge … so instead we’ll just skip to the announcement. :) It’s one that was suggested by one of you when I asked for challenge ideas a while back – and I’m very excited about it!


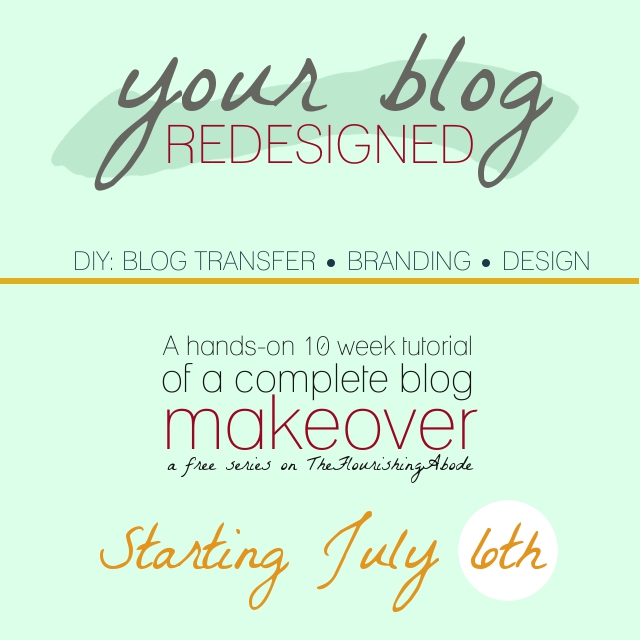
It’s a DIY blog redesign series! Basically, as a graphic designer I will be demonstrating how to do a complete blog makeove by taking a reader’s blog, overhauling it, and each week showing tips, how-to’s and instructions to also be able to conduct your own blog redesign. We’ll start from scratch on how to establish the look and branding you want to go for on your blog, and work all the way through to setting up or transferring a blog to WordPress, designing your blog to highlight rather than distract from your content, create a layout to encourage reader interaction, tools that can help boost your blog, and more. I’ll be posting each Friday for the 10 part series, Lord willing – it starts July 6th, and I’m so excited! If you’re a blogger, be sure to subscribe so that you won’t miss out on all the blog design tips.

UPDATE: Here are the posts in the series…
Part 1: Discover your branding with “The Drawing Board” Printable
Part 2: WordPress vs. Blogger
Part 3: Design Tips + Design Worksheet
Part 4: Themes, Coding and Stylesheets
Part 5: Making your own graphics
Part 6: 7 Blog Layout Tips to Engage your Reader
Part 7: Blog Page: The Must-haves and the Panache
Part 8: 25 WordPress Tips
Part 9: The Big Reveal
Part 10: 7 Ways to Promote and Market Your Blog

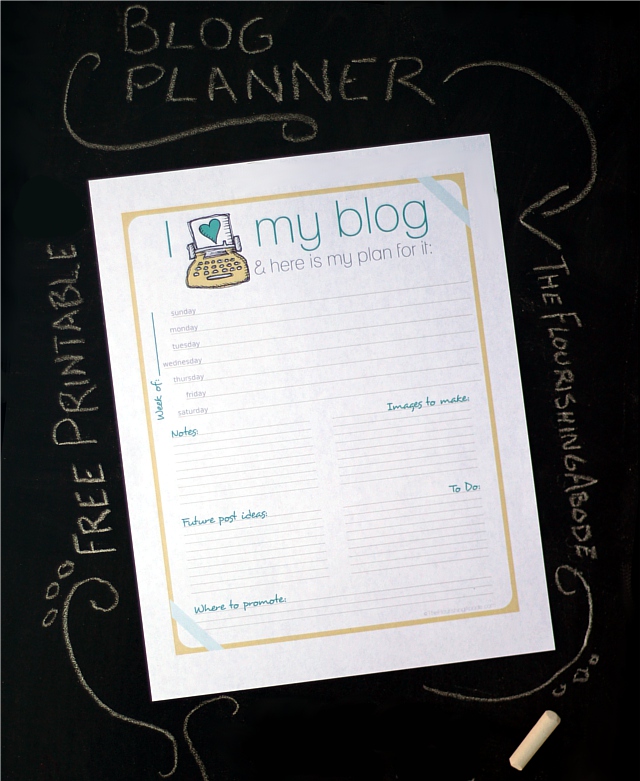
Until then, though, if you haven’t already gotten it, here is my free blog planner printable. I hope you’ll find it useful in organizing your blog posts! Just click the image below to open the PDF file.

Do you have a blog? Tell me a little about your blog in the comments below, and if you have any particular design questions you would like to see covered in the series, I’d love to hear them!

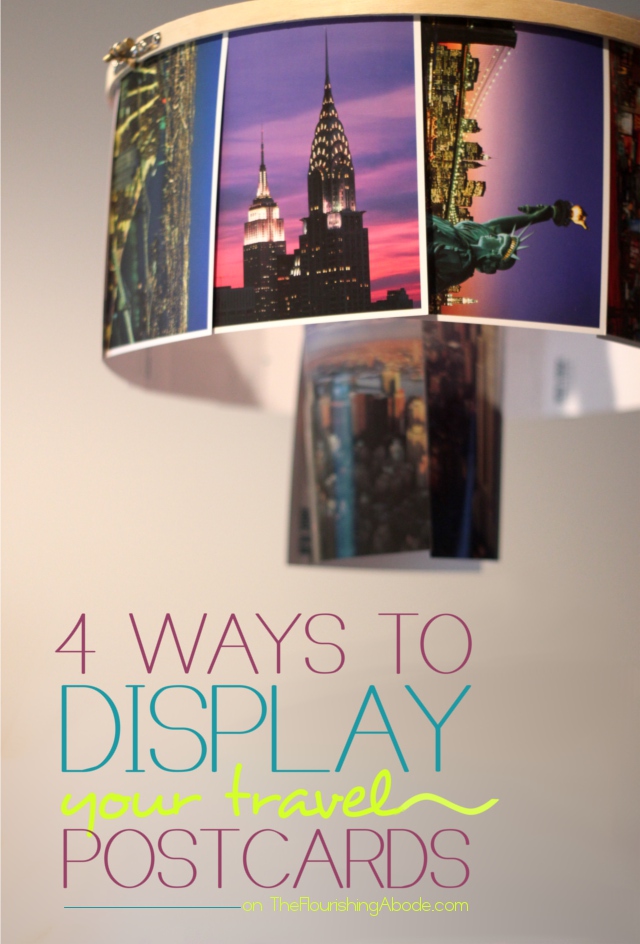
4 Ways to Upcycle and Display Postcards: Hack 7!


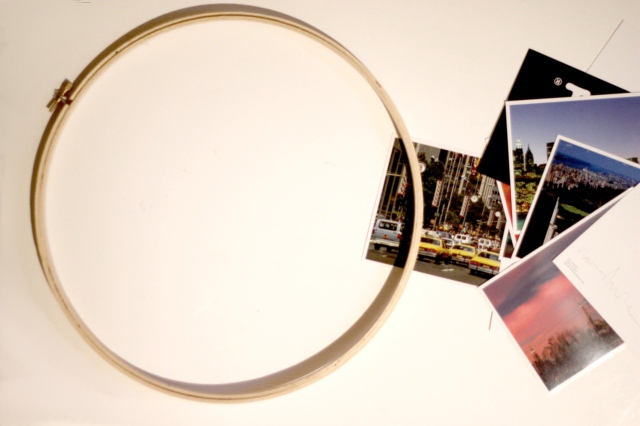
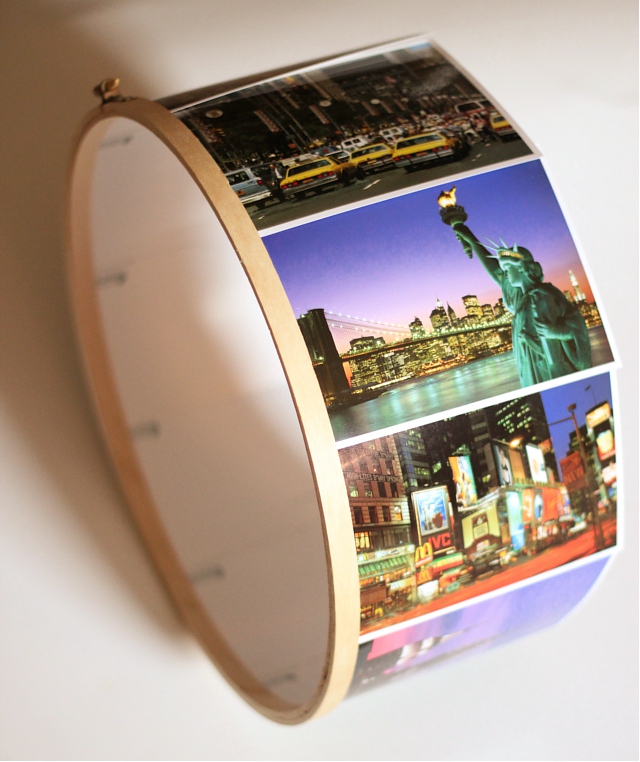
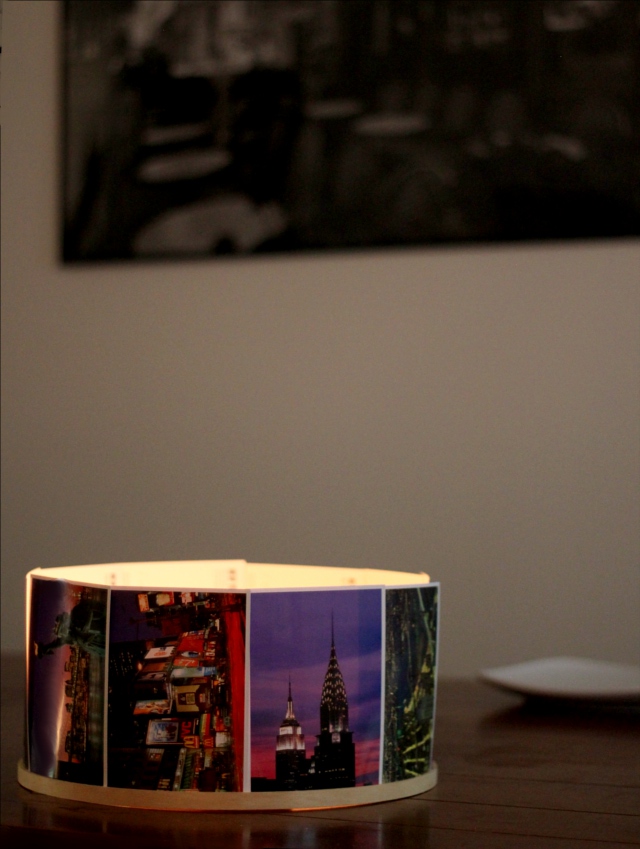
I love to travel – and I love to collect postcards from the places I go. They’re small, low-cost and lovely .. perfect to be able to collect some from each destination. However, most of my postcards live in a photo album and for this week’s upcycling hack challenge, I thought it would be fun to come up with some interesting and unique ways to upcycle and display postcards. And you only need one item for all of them: an embroidery hoop! Well … and your postcards, too, of course.

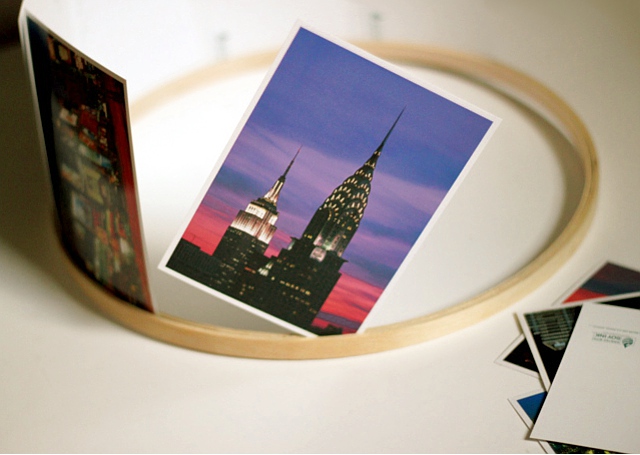
Use the screw to loosen the outer band of a 12 inch wide embroidery hoop, and stand your postcards in the space between the bands. Once you have your postcards lined up in a pleasing way, tighten the outer screw to hold the postcards in place.

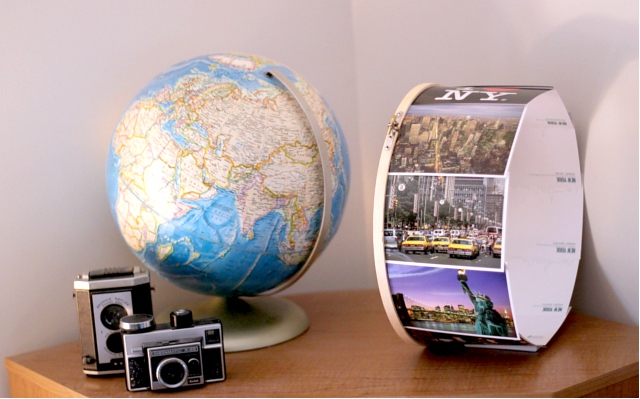
Pretty spiffy looking, eh? The first idea to display the postcards is just this easy, with the hoop standing on it’s side:

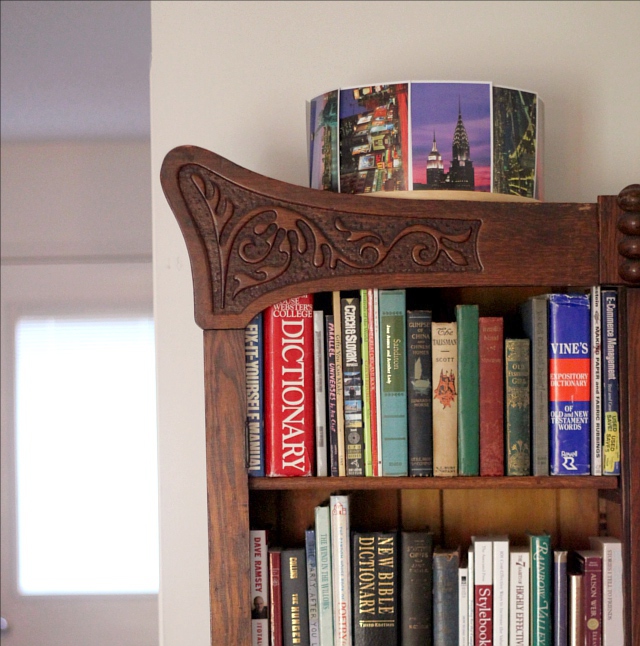
But another idea is to lay it on its base and to let it double as place is disguise storage. Sometimes there are items, like a modem or router, that you need to have out but you don’t really want to have visible. Set the postcard hoop on a shelf, on top of the fridge, etc. and just place whatever items you want to keep out of sight inside the hoop!

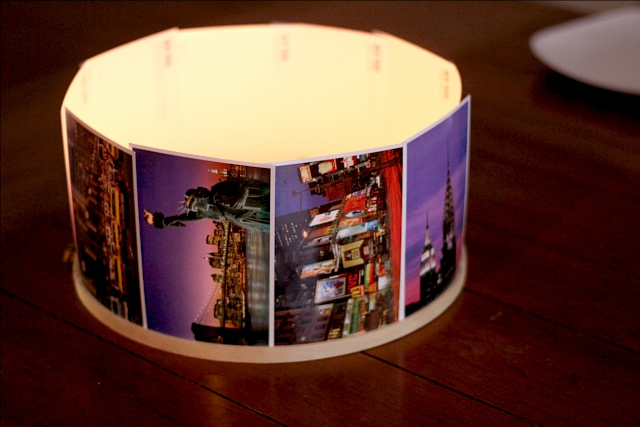
The third idea is to make a centerpiece out of your postcards! Put candles in the middle (just not too close to the paper postcards) and enjoy the glow of the places you’ve visited.

It might be neat to use for wedding table centerpieces, and have postcards from places that are special to the couple. You could even have guests each take a postcard and write a bit of marriage advice on it, and then put it back in the centerpiece. If you’re worried about the flame, one reader suggested battery operated tea lights – great idea!

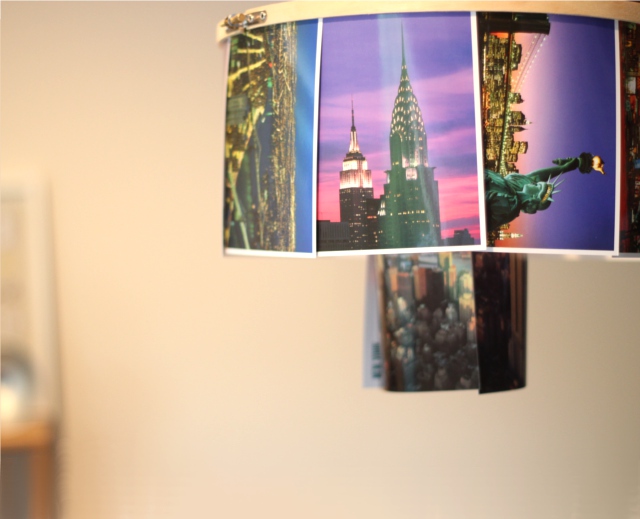
Or, for the last idea, if you’re feeling more ambitious, line multiple embroidery hoops of different sizes with postcards, and hang them at staggered heights to create a chandelier effect.

I hope you liked these simple ideas on how to upcycle an embroidery hoop and display your postcards.
And I’d love to hear – how do you display your postcards? Or do you collect something else from your travels?
Leave your thoughts and comments below, I love to hear from you!

10 Ideas for Crafty Organization

I wish I was a naturally organized person. The whole “a place for everything and everything in its place” idea is wonderful – but the first problem for me is finding a place for everything!

Back before the holidays, orders started flooding in for my art and I felt like all I was doing was packaging and shipping orders – and the packaging was taking f-o-r-e-v-e-r. For one thing, I didn’t have a good inventory storage system. Also, every time I needed to package something, I had to go gather all my supplies together. I don’t have a separate studio, so shop supplies had to put away to have livable space.

It just wasn’t working.

And then I bought two vintage items which drastically changed my art shipping process. They are pictured above: a vintage LP record holder on the left, and a vintage silverware caddy on the right. With the record holder, I was able to store my backed-and-sleeved art prints in a space-efficient way, where I could easily glance through and find what I needed. With my silverware caddy, I was able to store my regularly needed shipping supplies (washi tape, notecards, address labels, etc.) in one portable unit (love the handle on top!) so I could bring it out and put it away as needed. Packaging started going SO much faster.

Plus, its just fun to have nifty organizational stuff! And vintage items are generally nice and sturdy and will last well. So I thought it would be fun to gather a collection of vintage items from Etsy that can be repurposed in fun organizational ways, and help you find “a place for everything”. (A few of these are from my own shop, but most are from other sellers on Etsy.)

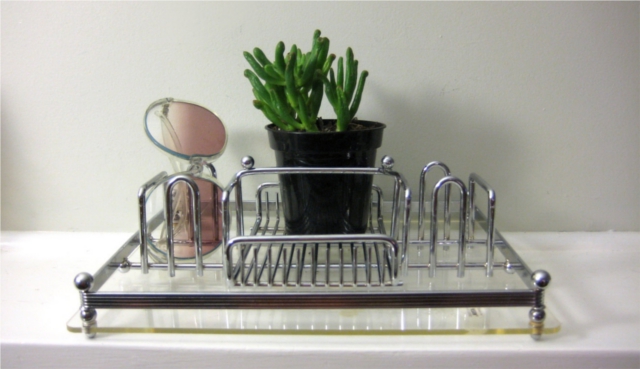
This vintage silverware caddy from SaltandGinger is almost exactly like the one I have! I highly recommend it for storing various small items – the little dividers, the “basket” and the handle make it just perfect for keeping small things organized and portable. You could use it for sewing supplies, or makeup and hair care items, or as a desk caddy – all sorts of uses!

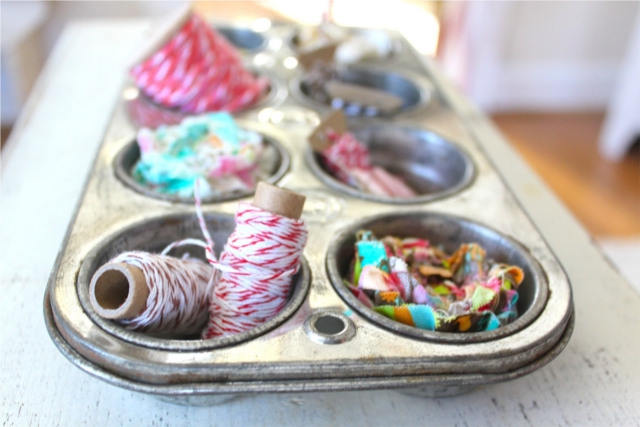
I think this is so clever – and pretty! This vintage muffin tin from NavarreCharm is such a charming idea for storing all those little-bitty items that tend to get jumbled together. Keep it on your desk to sort beads, or put it in a drawer and keep your safety pins and other such items from getting all mixed up.

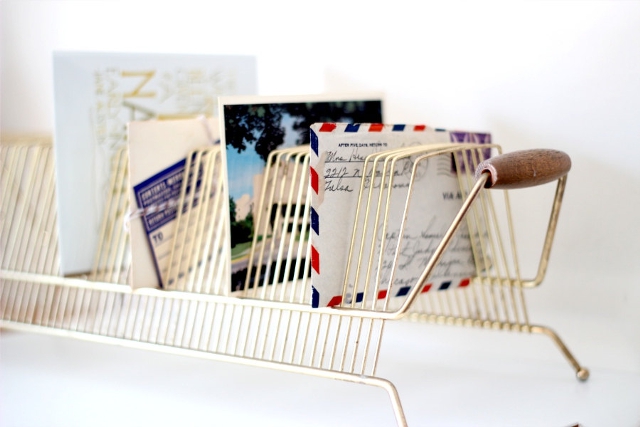
I’ve got a soft spot for old record holders. Few people need something to store their vinyl anymore, but we all have mail, printouts and other such items to sort. This one is nice and long and you could easily add dividers to keep track of various papers.

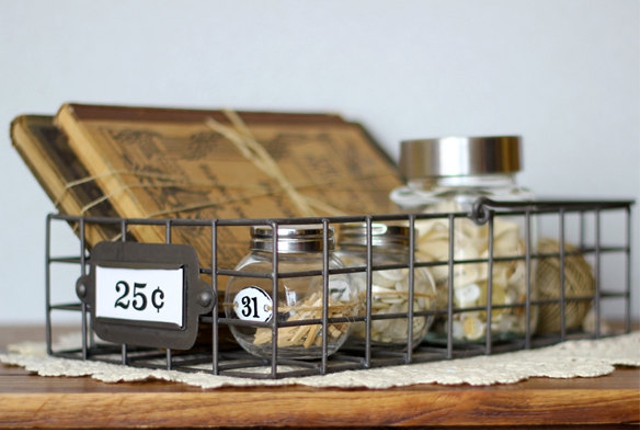
How charming is this vintage metal basket from TimelessFindsVintage? One great thing about a vintage storage item like this one – it doubles as decor! Especially nice if you have limited closet and hide-away places … keep crafty items out in the open in this cute basket. Bonus: it has a handle.

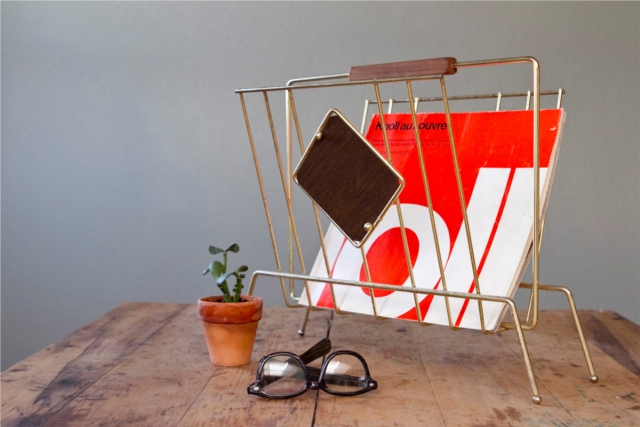
This mid century modern magazine rack from CastandCrew is so sleek! It would add a snazzy retro feel to a room AND give handy storage space. Use it to stylishly store magazines, craft books, mailers, skeins of yarn – you name it!

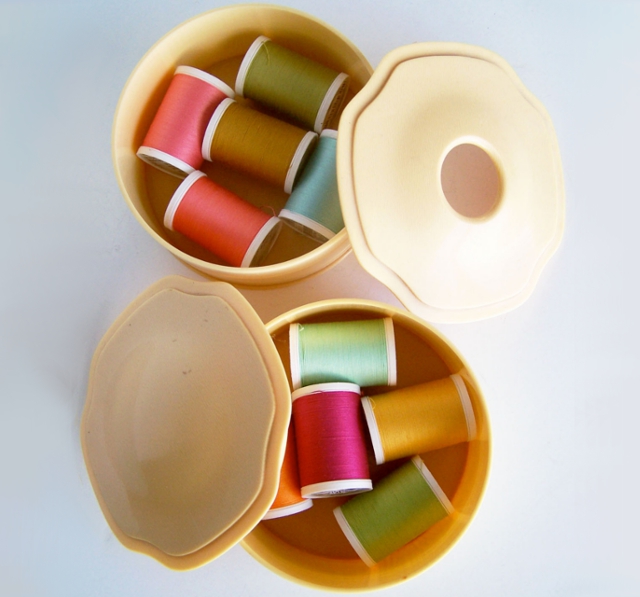
Another fun repurposing idea you might not have thought of before – a vintage vanity set from BusyBreeVintage could be used to house any number of small crafty items! The especially nice thing about these is that they have lids, to hide away contents and neaten your work space.

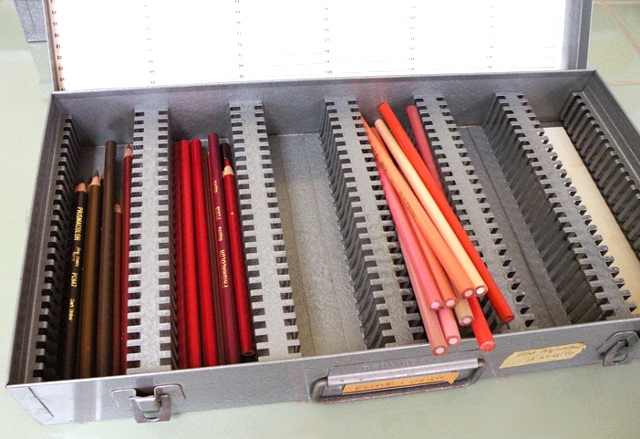
Now this is a vintage item which you probably wouldn’t have much use for its original purpose – but could be extremely handy to get things organized! This vintage photo slide box from heartkeyologie could house colored pencils, or other art supplies … or insert some slides (or little pieces of cardboard) in the slots to create compartments suited to what you’re storing. Make compartments for beads, seam rippers, thimbles, whatever you need!

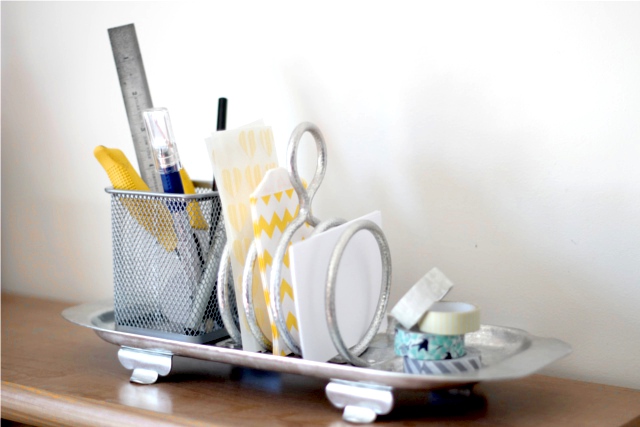
I don’t know about you, but I don’t really need something to hold my toast (except my belly.) I listed this vintage toast holder in my shop, though, because I think it would make a great little caddy for storing crafty items. There are two blank spaces on either side (probably for butter/jam pots) where you could put pencil holders, and the spiral in the middle is handy for small paper items like stickers. And a handle. I’m fond of handles, in case you haven’t noticed. I like portable.

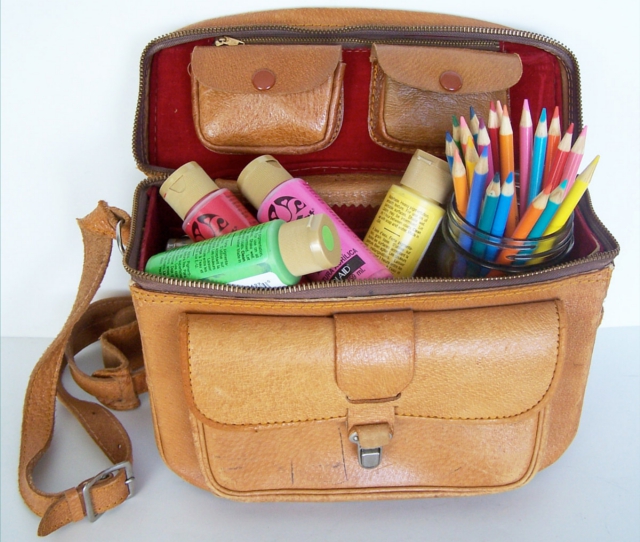
If you want something *truly* portable, though, check out this gorgeous vintage leather camera bag from BusyBreeVintage. Use it to carry your camera – or, as is pictured, to store and carry your art supplies! This would be especially nice if you like to paint outdoors – have you supplies together and ready to go! And, even when you’re not going anywhere, it still looks spiffy with all those art supplies.

We have tape dispensers – why not dispensers for more items? This is a vintage brass postage stamp dispenser from my shop, but it wouldn’t have to be limited to stamps. Fill it with ribbon, or tickets, or trim, and snip off as needed!

I hope you’ve found these vintage items inspiring for organization!
Do you have other vintage repurposing ideas to help you get organized?
Are you naturally organized, or just trying to learn, like me?
Leave your thoughts and ideas below, I’m always tickled to get comments! :)

Pin It

Behind the scenes – take a tour of my space!

Me, in my creative space. Although most of the time, I’m not holding a frame.

(Just a quick note: It’s taking longer than I anticipated for Blogger to replace all the comments. They say they are working on it … *sigh* Hopefully I can announce the giveaway winner soon – I will as soon as all the entries are back! Now back to your regularly scheduled program!)

I think its so interesting to see how different artists use their space and where they work. Sooo, I thought I’d take you on a tour of my space, too! And throw in a few storage and organizational ideas along the way. So if you will, step right this way…

And, ahem, pardon my narrow shots – I don’t have a wide angle lens, so some of the pictures have overlap to get the full picture :)

I’m a big fan of these stacking wire storage units. You can build them to whatever shape and size you like! And then fill all the shelves with your boxes/tubs/containers. Oh, and you see that rockin awesome camera bag over there on the right? It’s from Porteen Gear, and my husband got it for me for Valentine’s Day. I highly recommend her shop for any photographer to get some gear!

See that photo on the wall? It’s one I took! And yes, it includes that same frame I’m holding my my photo. :)

 So, I forgot to take a picture of this, but under that curtain on the front of my table is a seriously awesome organization idea my aunt gave to me! She took a drawer from an old unwanted dresser, painted it white and stenciled on the front to make it pretty, and put rollers on the bottom.  Voila! A large, easy to roll out storage compartment, perfect to go under a bed or table. Love it!! :D

You know how in my shop I’m always talking about decorating with record albums? See, I do it too! I love this album cover from the Ink Spots. And in front is a goooorgeous print from Tahlia Day. Her artwork is absolutely stunning! Oh, and that is an ostrich egg on the left.

Keeping all your most essential go-to tools in one place makes life SO much easier as you don’t have to spend time hunting down what you need each time you get a chance to work on a project.  This lovely basket (in my yellow no less!) was a gift from my husband’s grandmother. I love it so much! It’s quite spacious in the middle of the basket, and has all sorts of pockets on the outside, too!

An easy way to store my handmade jewelry!

Recognize that picture frame? Yeah, I pretty much love it.

 My vintage sewing machine (still works, and is what I sew with!) and a cute hoop from Danielle over at the Merriweather Council, and a little bunting from Palimpsestic — both fabulous shops. (You may remember seeing those from an earlier post!)

This is one of the places my little girl likes to be creative! I snagged this vintage school desk recently, and she keeps some of her art supplies inside it. :)

A couple ideas from this shot – if, like me, you’re in an apartment where you can’t paint, you can still get some color on your walls but putting up a colorblock of fabric! Also? Pages from vintage atlases look fabulous framed.

Can you tell I love books? I stacked books alternating horizontal and vertical for added interest on this DVD rack.

This concludes our tour. Thank you for visiting .. my home!
Do you have any organizing or decorating tips to share?
Do you have any pictures of your space? Do share in the comments below!